
If you have spent any significant amount of time driving or maintaining vehicles, you are likely intimately familiar with the frustrating phenomenon of cloudy, yellowed, and oxidized car headlights. Exhaust fumes, relentless ultraviolet (UV) rays from the sun, harsh chemical pollutants, acid rain, road salt, and abrasive dirt can cause your car’s pristine headlight lenses to degrade and fade drastically over time. In the world of modern automotive manufacturing, this is a highly common occurrence and, due to the materials used in contemporary car construction, is almost entirely inevitable. However, the good news for vehicle owners is that you absolutely do not need to visit a high-priced mechanic’s workshop or a professional auto detailing studio to completely restore your headlights to their showroom-quality brilliance.
Today’s automotive aftermarket is flooded with incredibly affordable, highly effective, and exceedingly easy-to-use car headlight restoration kits. These comprehensive DIY systems are scientifically engineered to help you completely eliminate that stubborn, opaque yellowish layer of oxidized plastic, thereby restoring the optimal brightness, light output, and structural clarity of your headlights. In this exhaustively detailed expert guide, we will deeply explore the absolute best headlight restoration kits designed specifically for car DIY enthusiasts. By utilizing these meticulously curated kits, you can save massive amounts of time and hundreds of dollars, empowering yourself to flawlessly restore your vehicle’s headlights in the comfort of your own garage in just one hour or less.
Before we dive into the specific product reviews, it is absolutely vital to understand the underlying science of why your headlights degrade in the first place, the severe safety implications of ignoring oxidized lenses, and the specific mechanical and chemical processes required to fix them properly. Armed with this expert knowledge, you will be uniquely positioned to choose the exact right kit for your vehicle’s specific needs.
The Science of Polycarbonate Degradation: Why Do Headlights Turn Yellow?
To truly master the art of headlight restoration, one must first understand the materials at play. Decades ago, automotive headlights were manufactured using thick, heavy, and highly durable glass. While glass is incredibly resistant to UV degradation and chemical oxidation, it posed significant risks. Glass is heavy, it limits the aerodynamic design of the vehicle’s front fascia, and most importantly, it poses a severe safety hazard to pedestrians in the event of a collision because it shatters into dangerous shards.
To solve these issues, the automotive industry shifted entirely to impact-resistant plastics, specifically a highly durable material known as polycarbonate. Polycarbonate is an engineering marvel: it is exceptionally lightweight, can be molded into the sleek, aggressive aerodynamic shapes seen on modern sports cars and sedans, and is virtually shatterproof, making it infinitely safer for pedestrians. However, polycarbonate has one massive, unavoidable weakness: it is highly susceptible to environmental degradation, specifically from Ultraviolet (UV) radiation.
When a vehicle rolls off the factory assembly line, its polycarbonate headlight lenses are coated with a specialized, microscopic layer of UV-resistant clear coat. This factory hard-coat acts as a protective sunscreen for the plastic. Unfortunately, this coating is not invincible. Over the years, the constant bombardment of UV rays from the sun begins to break down the chemical bonds of this protective layer. This process is drastically accelerated by the immense heat generated from the halogen or HID bulbs inside the headlight housing itself.
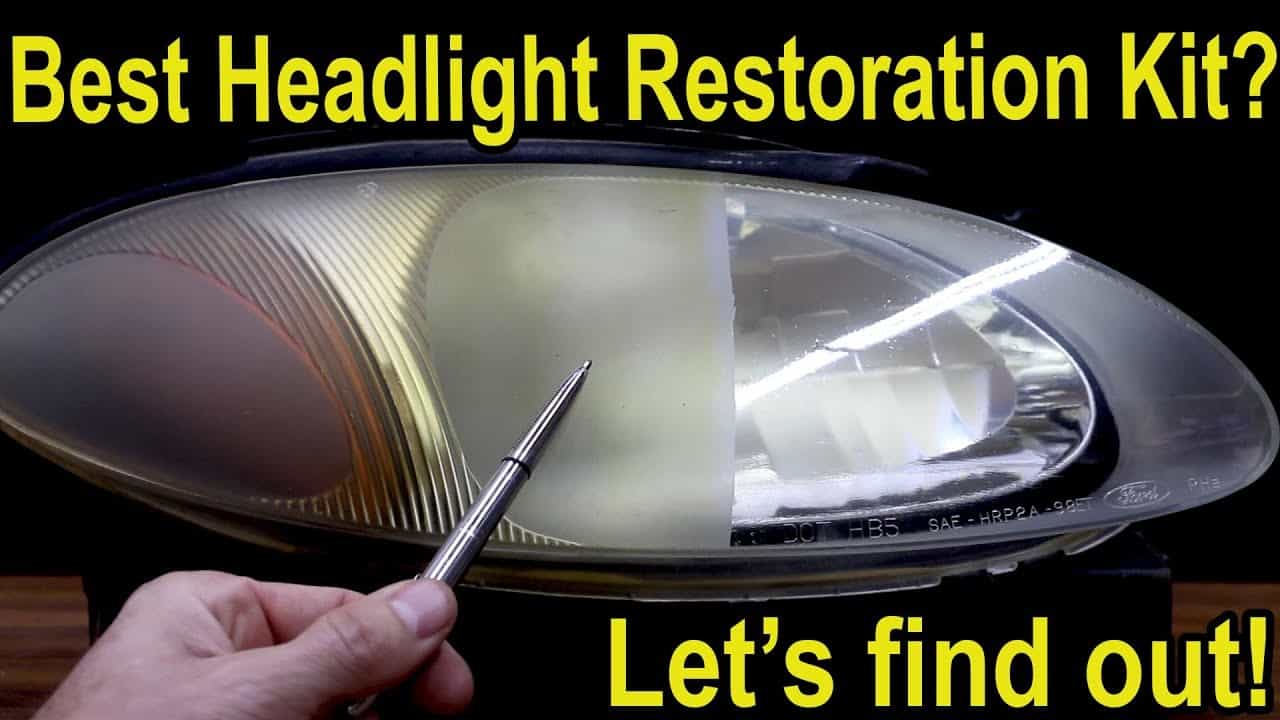
As you drive at highway speeds, your headlights are also subjected to a relentless barrage of micro-abrasives. Sand, dirt, pebbles, road salt, and debris act like microscopic sandpaper, slowly chipping away at the factory UV clear coat. Once this protective barrier is finally breached, the raw, unprotected polycarbonate plastic is exposed directly to the elements. The UV rays then begin to literally bake the plastic, altering its chemical structure and causing microscopic cracks known as “crazing.” The plastic naturally oxidizes, absorbing dirt, exhaust fumes, and chemical fallout from the road. The result is that familiar, unsightly, opaque yellow crust that completely ruins the aesthetic appeal of your vehicle.
The Severe Safety Implications of Ignoring Foggy Headlights
While most car owners view cloudy headlights as a purely cosmetic issue that makes their vehicle look aged and neglected, automotive safety experts and highway patrol agencies view it as a critical, life-threatening safety hazard. The primary function of your headlights is not just to help you see the road ahead, but to help other drivers and pedestrians see you.
When your headlight lenses become heavily oxidized and yellowed, they fundamentally alter the optical physics of the light beam. Instead of passing through a crystal-clear lens in a highly focused, concentrated beam pattern designed to illuminate the road hundreds of feet ahead, the light hits the cloudy, porous layer of degraded plastic. This causes severe light scattering. The light bounces randomly inside the housing and scatters in all directions upon exiting the lens.
This light scattering phenomenon results in several highly dangerous driving conditions:
1. Drastically Reduced Visibility: Studies conducted by automotive safety organizations have conclusively proven that severely oxidized headlights can reduce your nighttime visibility by up to 80%. This means that if a pristine headlight allows you to see a deer, a pedestrian, or a stopped vehicle 200 feet away, a heavily oxidized headlight might only allow you to see them 40 feet away. At highway speeds, this massive reduction in reaction time can easily be the difference between a safe stop and a fatal collision.
2. Blinding Glare for Oncoming Drivers: Because the yellowed, pitted plastic scatters the light rather than focusing it, much of the light output is directed upward and outward into the eyes of oncoming traffic. This scattered glare can temporarily blind other drivers, increasing the likelihood of head-on collisions, especially on poorly lit, two-lane rural roads.
3. Failed Vehicle Safety Inspections: In many jurisdictions and states, annual or biennial vehicle safety inspections (such as the MOT in the UK or state inspections in the US) strictly monitor headlight performance. If an inspector determines that your light output is insufficient due to severe lens oxidation, your vehicle will instantly fail the inspection, rendering it illegal to drive until the issue is rectified.
Given these massive safety implications, restoring your headlights is not a luxury; it is an absolute necessity for responsible vehicle ownership.
Why DIY Headlight Restoration Beats the Dealership
When faced with foggy headlights, many vehicle owners assume their only options are to either take the car to a professional dealership for an expensive restoration service or completely replace the entire headlight assembly. Both of these professional routes are fraught with significant downsides, primarily revolving around exorbitant costs.
Replacing an entire headlight assembly on a modern vehicle is astoundingly expensive. Today’s headlights are not simple glass bulbs; they are complex, computerized units featuring integrated LED daytime running lights, adaptive cornering motors, and high-intensity discharge ballasts. A single replacement OEM (Original Equipment Manufacturer) headlight assembly can easily cost anywhere from $500 to $2,500 depending on the make and model of the vehicle. Replacing both sides can quickly amount to a massive financial burden.
Alternatively, professional detailing shops and dealerships offer headlight restoration services. While effective, these services typically range from $100 to $250. The secret that these professional shops don’t want you to know is that they are utilizing the exact same mechanical and chemical principles found in the high-quality DIY restoration kits we are about to review.
By opting for a premium DIY headlight restoration kit, you are heavily leveraging your own manual labor to save hundreds of dollars. The vast majority of these kits cost between $15 and $40, representing an incredible return on investment. Furthermore, the satisfaction, empowerment, and mechanical confidence gained from successfully restoring your own vehicle’s vital safety components are truly immeasurable.
The Core Mechanics of DIY Restoration: Sand, Polish, and Protect
Before selecting a kit, it is crucial to understand exactly how the restoration process works. The most effective, professional-grade kits rely on a highly systematic three-step process: Mechanical Sanding, Chemical Compounding/Polishing, and UV Protection Sealing.
Step 1: Mechanical Sanding (Leveling the Surface): The yellow, oxidized layer of plastic cannot simply be washed away with soap; it must be physically removed. This is achieved through a process called wet sanding. Using progressively finer grits of abrasive sandpaper (typically starting around 400 or 800 grit and moving up to 3000 grit), you systematically shave off the dead, degraded polycarbonate. The lower grits remove the heavy yellow oxidation and the remnants of the failing factory clear coat, while the higher grits refine the deep scratches left by the previous steps, smoothing the plastic surface to a uniform, frosted haze.
Step 2: Compounding and Polishing (Restoring Optical Clarity): Once the dead plastic has been completely sanded away, the lens will feel smooth but look entirely opaque and frosted. To restore the optical clarity and make the plastic transparent again, a polishing compound is introduced. These chemical compounds contain microscopic diminishing abrasives. When applied with a polishing pad (either by hand or via a drill attachment), these micro-abrasives smooth out the microscopic 3000-grit sanding marks until the plastic surface is optically flat, allowing light to pass through flawlessly.
Step 3: UV Protection Sealing (Future-Proofing): This is arguably the most critical, yet frequently overlooked, step in the entire process. Once you have sanded and polished the headlight, you have exposed raw, unprotected polycarbonate. If you leave it in this state, the sun’s UV rays will aggressively attack the raw plastic, and the headlight will turn cloudy and yellow again in a matter of weeks. To prevent this, the final step involves applying a high-quality, synthetic UV-blocking clear coat or ceramic sealant. This chemical layer bonds to the plastic, replacing the factory hard-coat and providing months or even years of durable protection against future oxidation.
With this expert foundation laid, let us thoroughly examine the absolute best DIY headlight restoration kits currently available on the market. We have carefully ranked and rearranged this list based on overall effectiveness, inclusion of heavy-duty mechanical sanding tools, the quality of the polishing compounds, and the long-term durability of the final UV protective sealants.
MUST READ: The 7 Best Repair Kits for Small Dents in a Car’s Body (2026)
1. 3M 39195 Ultra Headlight Restoration Kit
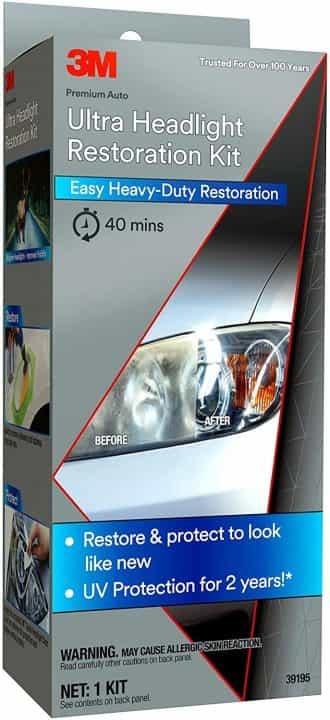
Taking the highly coveted number one spot on our expert list is the phenomenal 3M 39195 Ultra Headlight Restoration Kit. When it comes to automotive abrasives and professional-grade detailing technology, the 3M corporation is the undisputed global heavyweight champion. This incredibly comprehensive, heavy-duty DIY kit is purposefully engineered to tackle the most severe, deeply oxidized plastic lenses on the market, including neglected headlights, heavily faded fog lights, and sun-damaged taillights. The true power of this system lies in its mechanical integration: it is designed to be applied using a standard household drill, which provides thousands of times more cutting power and consistent rotational velocity than manual hand-sanding could ever achieve.
The kit utilizes 3M’s proprietary, industry-leading abrasive technology. It includes a highly specific progression of sanding discs, starting with an aggressive 500-grit gold abrasive to rip through the toughest, thickest layers of yellowed plastic and failing factory clear coats. It then transitions seamlessly to an 800-grit white disc to refine the scratches. The true magic happens in the third stage, which introduces 3M’s legendary 3000-grit Trizact foam-backed abrasive disc. This advanced, microscopic pyramid-structured abrasive operates wet, meticulously refining the surface to an incredibly smooth, frosted finish without aggressively gouging the delicate lens surface. Finally, the kit includes 3M’s premium synthetic rubbing compound and a compounding pad to polish the plastic back to a mirror-like, crystal-clear finish.
What firmly elevates the 3M Ultra kit above the competition is the inclusion of their Quick Headlight Clear Coat wipes. After the mechanical restoration is flawlessly complete, these highly specialized, chemical-resistant wipes deposit a thick, durable layer of advanced UV-blocking polymer sealant over the raw plastic. This ensures that your intense labor is protected, guaranteeing that your newly restored headlights will remain brilliantly clear, safe, and free from future yellowing for a significantly longer period than most competing products. For heavily oxidized lights, this drill-powered mechanical system is absolutely unmatched in the DIY space.
2. SYLVANIA Headlight Restoration Kit
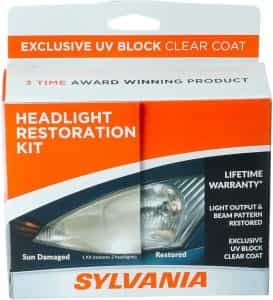
Securing the runner-up position is the legendary SYLVANIA Headlight Restoration Kit. Sylvania is a globally renowned titan in the automotive lighting and car care industry, manufacturing millions of OEM and aftermarket bulbs every year. They understand the critical importance of optical clarity better than almost anyone, and their deep expertise is perfectly showcased in this meticulously formulated restoration system. Unlike drill-based kits, the Sylvania system relies heavily on a brilliant combination of manual wet sanding and highly advanced, proprietary chemical polymers to achieve astonishing, professional-level results.
The kit initiates the restoration process with a unique, chemically aggressive Surface Activator liquid. When generously sprayed onto the cloudy lens, this activator chemically reacts with the stubborn, degraded polycarbonate, softening the heavy yellow oxidation and making the subsequent manual sanding process significantly easier and vastly more effective. The kit provides a comprehensive selection of premium wet-sanding sheets in various grits, allowing you to methodically work through the damaged layers, successfully removing deep-seated haze, stubborn micro-corrosion, and pitting.
Following the thorough sanding and the application of a high-quality clarifying polish, the absolute crown jewel of the Sylvania kit comes into play: their exclusive UV Block Clear Coat applicator. This final chemical step deposits an incredibly tough, highly cross-linked polymer coating that chemically bonds to the freshly exposed plastic. This proprietary coating is so phenomenally effective at rejecting future UV damage, environmental fallout, and acid rain that Sylvania confidently backs this specific product with an unprecedented Lifetime Warranty. For DIY enthusiasts who may not own a power drill but still demand long-lasting, immaculate, and guaranteed optical clarity, the Sylvania kit is an undisputed top-tier choice.
3. MEGUIAR’S Headlight Restore 2step
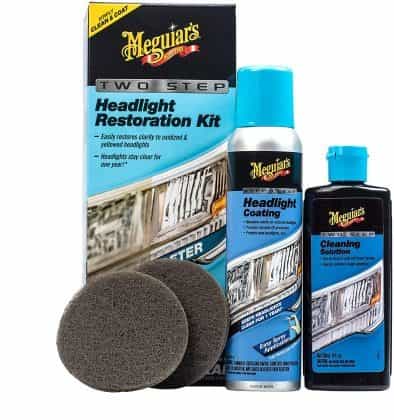
For those who value incredible speed, supreme convenience, and the backing of a legendary car care brand without sacrificing visible results, the MEGUIAR’S Two-Step Headlight Restoration Kit earns a highly respected third place. Meguiar’s has been a staple in the high-end automotive detailing community for over a century, and they have successfully distilled their vast compounding expertise into an incredibly user-friendly, fast-acting, two-stage system that eliminates the intimidating complexity of multi-grit sanding progressions.
This ingenious kit simplifies the entire intimidating restoration process into two highly manageable steps. First, you apply a small, concentrated amount of Meguiar’s advanced, proprietary cleaning solution to the included abrasive cleaning pad. With firm, consistent manual pressure, you rub this abrasive cleaner directly into the oxidized headlight lens. The combination of the specialized pad and the chemical compound works synergistically to rapidly strip away the unsightly yellow oxidation, light scratches, and surface cloudiness. After vigorously working the product, you simply wipe off the excess residue with a clean microfiber towel to reveal a massively improved, highly clarified appearance.
The second, and final, step involves the application of Meguiar’s highly praised aerosol Spray Lens Coating. Once the lens is clean and dry, you mist this advanced aerosol coating evenly over the surface. The spray instantly levels out, filling in any remaining microscopic imperfections, and chemically cures to form a tough, durable, brilliant clear shield. This specialized coating not only drastically brightens the visual appearance of the headlights but also provides robust, scientifically formulated protection against relentless UV oxidation for up to a full 12 months. It is the absolute perfect kit for weekend warriors seeking maximum visual improvement with minimal manual labor.
4. 3M 39008 Headlight Lens Restoration System
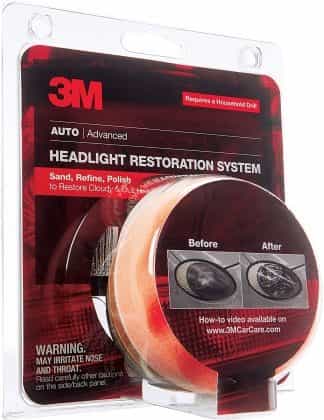
Making a second, highly deserved appearance on our expert list is 3M with their widely celebrated 39008 Headlight Lens Restoration System. While similar in mechanical concept to the heavy-duty Ultra kit occupying our number one spot, this specific kit is uniquely tailored as a highly compact, incredibly comprehensive, all-in-one solution that provides absolutely all the necessary fundamental tools for a flawless, professional-grade DIY restoration directly out of the box.
This meticulously organized kit shines due to its completeness. Recognizing that preparation is the secret to perfect detailing, 3M includes a roll of high-quality automotive masking tape, allowing you to carefully protect the delicate paint and trim surrounding your headlights before the aggressive sanding begins. The system is designed around a drill-attachment backing plate and includes a generous supply of 3M’s premium, light-sanding abrasive discs (500 and 800 grit), allowing you to effectively power through even the most stubborn, deeply ingrained yellowish layers of baked-on oxidation.
Following the heavy mechanical compounding steps, the kit provides their signature 3000-grit Trizact refining disc and a high-quality rubbing compound to polish the severely scuffed plastic back to a state of flawless, glass-like transparency. Finally, it includes premium synthetic wax protectants to seal the freshly exposed lens. Highly versatile and uncompromisingly effective, this kit is perfectly suited for tackling severe oxidation on all types of automotive lighting, including heavily degraded plastic headlight lenses, faded taillights, and severely pitted lower fog lights.
5. Mothers 07251 NuLens Headlight Renewal Kit
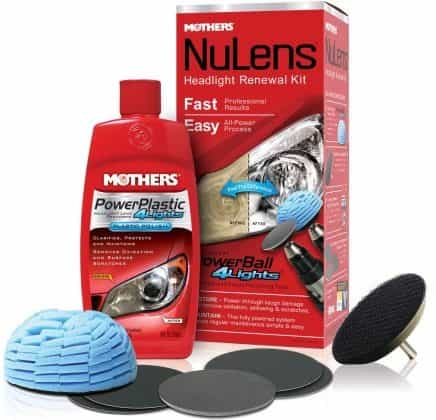
Mothers is a brand name that resonates deeply with passionate auto enthusiasts and professional detailers alike, known specifically for their exceptional polishes and metal care products. The Mothers 07251 NuLens Headlight Renewal Kit perfectly encapsulates their dedication to high-performance surface care. This highly reliable, professional-leaning auto DIY kit is specifically designed to safely tackle oxidation on all types of modern cars and complex plastic headlight geometries.
The standout feature of this system is its integration with your standard cordless drill via an included backing plate and a highly engineered, spherical polishing tool (similar to their famous PowerBall technology). The kit includes a series of high-quality restoration sanding discs to effectively strip away the dead, yellowed plastic layer. Where the Mothers kit truly excels, however, is in the compounding phase. It utilizes Mothers’ legendary PowerPlastic 4Lights polish—a highly advanced, specifically formulated chemical compound that utilizes diminishing abrasive technology to aggressively cut through the remaining sanding haze, quickly breaking down into a fine polish to deliver an unmatched, optically perfect finish.
The Mothers 07251 system does not merely focus on the immediate visual restoration; it is highly focused on long-term maintenance. The PowerPlastic 4Lights compound leaves behind a tough, synthetic protective polymer layer designed to actively repel environmental oxidation, seal the microscopic pores of the plastic, and ensure long-lasting crystal clarity. This kit is an exceptional choice for those who demand a high-gloss, show-car finish on their restored lenses.
6. Turtle Wax T-240KT Headlight Lens Restorer
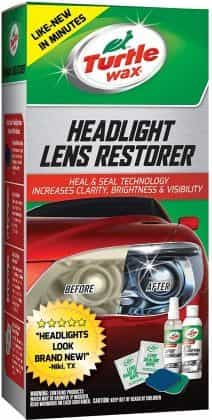
Turtle Wax is undeniably one of the most recognizable and trusted household names in the global car care industry, and their T-240KT Headlight Lens Restorer kit provides an incredibly cost-effective, straightforward, and highly accessible solution for budget-conscious consumers dealing with moderate headlight fading. This kit relies entirely on manual application, making it the perfect choice for users who may be intimidated by the aggressive cutting power of drill-mounted sanding systems.
Despite its highly affordable price point, this kit is remarkably comprehensive. It includes three distinct restoration pads featuring various abrasive grits, meticulously designed to be used by hand to carefully level the oxidized surface. To ensure the sanding process is safe and scratch-free, Turtle Wax thoughtfully includes a specialized spray lubricant, which keeps the abrasive pads gliding smoothly over the plastic while actively flushing away the shaved, dead plastic residue. Once the mechanical leveling is complete, the kit utilizes a high-quality Lens Clarifying Compound to polish the haze away, restoring the transparent nature of the lens.
This kit is highly effective on both traditional plexiglass and modern polycarbonate plastic headlights, successfully cleaning deep surface discoloration. To conclude the process, the kit includes specialized, chemically treated lens sealing wipes. These final wipes deposit a protective, UV-resistant layer over the freshly polished plastic, designed to significantly prevent future environmental discoloration and keep your headlights looking pristine for months to come.
HOT READ: The Best Hands-Free Car Kits of 2026: Best Bluetooth Hands-Free Car Kits
7. Rust-Oleum 327489 Wipe New Heavy Duty Headlight Restore
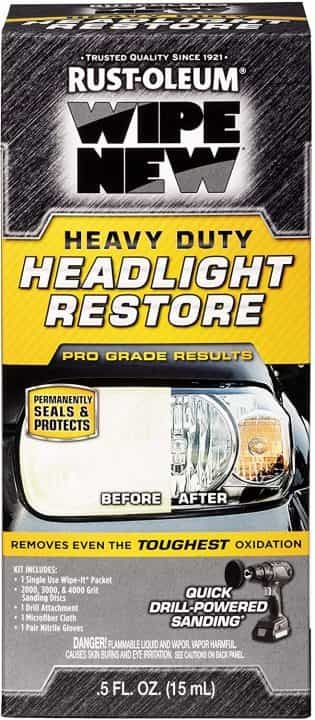
When you hear the name Rust-Oleum, you immediately think of heavy-duty, industrial-grade protective coatings, and their 327489 Wipe New Heavy Duty Headlight Restore kit brings that exact hardcore philosophy to automotive detailing. This heavy-duty kit is uncompromisingly designed to work on all types of modern vehicle headlights and is specifically formulated to aggressively clean, strip, and restore lenses suffering from the absolute heaviest, most severe, and deeply baked-on oxidation imaginable.
Recognizing that severe oxidation requires serious mechanical force, this kit generously includes drill-powered sanding discs. By harnessing the torque of a power drill, you can rapidly and efficiently grind through incredibly tough, thick, and crusty layers of UV damage that manual hand-sanding would struggle to penetrate. After the intense mechanical preparation, you utilize their polishing pad to refine the plastic surface, preparing it for the final, critical step.
The true standout component of this system is the inclusion of the famous Wipe New technology. The kit features pre-saturated, chemical-laden wipes that contain a highly advanced, pro-grade proprietary formula. When wiped across the sanded lens, this formula instantly levels, cures, and bonds to the plastic, filling in microscopic imperfections and acting as an incredibly durable, long-lasting clear coat. This chemical shield is renowned in the industry for offering exceptional, long-lasting protection against future oxidation, making it a stellar choice for neglected vehicles.
8. Rain-X 800001809 Headlight Restoration Kit
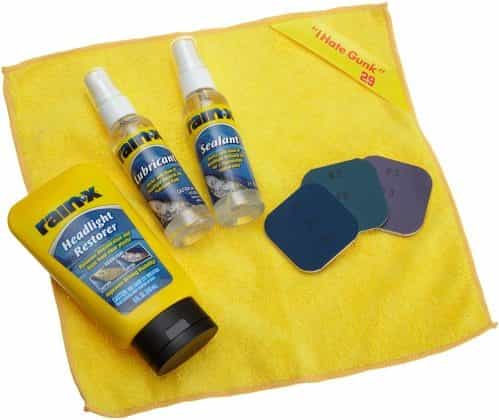
Rain-X is a globally recognized brand famous for their revolutionary water-repelling glass treatments, and their expertise in optical clarity transitions beautifully into the realm of polycarbonate plastics with the Rain-X 800001809 Headlight Restoration Kit. This kit is highly regarded for its straightforward, no-nonsense approach to removing severe haze, deep discoloration, and yellowing, effectively restoring heavily weathered clear plastics back to their original, safe operating condition.
The Rain-X system is designed for manual application, making it incredibly accessible for beginners. The kit includes a series of specialized, water-resistant sandpapers designed to be used in a wet-sanding progression. This mechanical step smoothly shaves away the oxidized surface layer. Following the sanding phase, you apply the included Rain-X polish cream. This highly effective chemical compound utilizes ultra-fine abrasives to buff out the sanding scratches, polishing the plastic until it achieves a brilliant, transparent shine, fundamentally improving your light output and maximizing your crucial visibility while driving at night.
To seal the deal and protect your hard work, the kit includes specially formulated sealant towelettes for finishing. These towelettes apply a durable layer of UV protection and, true to the Rain-X heritage, leave behind a slick, hydrophobic surface that actively repels water, dirt, and road grime, helping to keep the headlights cleaner for significantly longer.
9. Wipe New HDL6PCMTRRT Headlight Restore
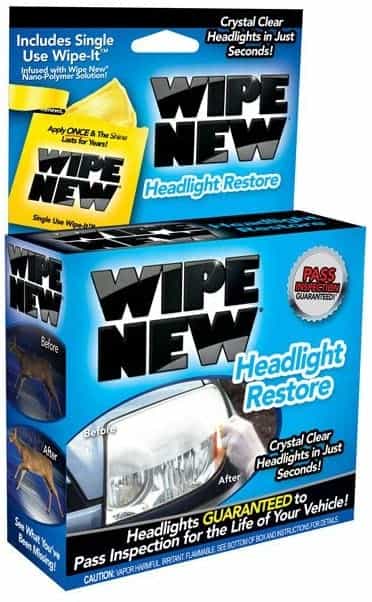
If you are looking for a standalone solution that focuses intensely on chemical restoration and unparalleled long-term protection, the Wipe New HDL6PCMTRRT kit is an absolutely fascinating product. While many kits focus heavily on the mechanical sanding aspect, Wipe New made its name through highly advanced, proprietary nano-polymer chemical technology designed to bond instantly to degraded plastics, filling in micro-abrasions and restoring a flawless, factory-like shine with minimal effort.
This streamlined kit is incredibly easy to apply using the specialized, chemically infused applicator pad included in the box. After performing a basic preparation to ensure the lens is entirely free of surface dirt and grease, you simply wipe the nano-polymer solution across the hazy headlight. The chemical reacts instantly, melting away light surface oxidation and depositing an incredibly thick, resilient layer of crystal-clear protection. The entire process is stunningly fast, typically taking around 30 minutes to completely clean and coat both of your vehicle’s headlights.
The true selling point of the Wipe New system is its legendary durability. The resulting chemical bond adds a hardcore protection layer that is scientifically formulated to prevent future UV headlight degradation. The manufacturer boasts that this formidable coating is strong enough to easily last through hundreds of harsh, high-pressure car washes without peeling, flaking, or degrading, offering exceptional peace of mind for the daily driver.
10. Visbella Professional Headlight Restoration Kit
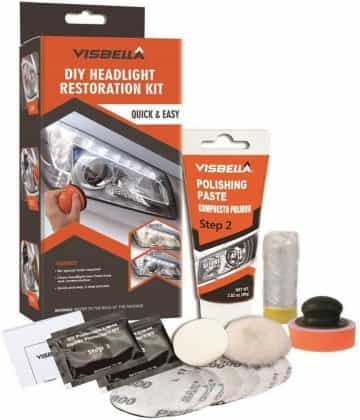
Rounding out our top 10 expert list is the highly comprehensive Visbella Professional Headlight Restoration Kit. Highly suitable for all makes and models of cars, motorcycles, and even marine watercraft, this extensive kit provides a wide array of physical tools specifically curated to aggressively remove extreme clogginess, deep-seated pitting, and thick, crusty yellowish layers from heavily degraded polycarbonate headlights.
This kit is incredibly generous in its inclusions. Inside the box, you will find a backing pad, multiple grades of abrasive sanding discs, masking tape, a specialized sponge polisher, highly effective polishing paste, and an advanced UV protection liquid compound. The provided step-by-step instructions guide you through a logical progression: taping off the paint, wet-sanding the damaged plastic away, compounding the scratches to a smooth haze, and finally, sealing the lens.
It is important to note a crucial caveat regarding the Visbella kit: while it includes the necessary backing pad designed for machine use, a domestic polishing machine or power drill is not included in the package and must be purchased or sourced separately. However, if you already own a household drill, this kit provides a tremendous amount of high-quality restoration materials for a very reasonable price point, making it a superb value for ambitious DIY detailers.
The Ultimate Expert Buying Guide: How to Choose the Perfect Kit
With so many fantastic options available on the market, selecting the exact right kit for your vehicle can feel slightly overwhelming. However, by assessing the specific condition of your headlights and your comfort level with DIY tools, you can easily narrow down the choices. Here are the critical factors an automotive expert considers when evaluating headlight restoration kits:
1. Assess the Severity of Oxidation (Drill vs. Hand Sanding): The very first step is to honestly evaluate how badly your headlights are damaged. If they are just beginning to look slightly hazy or mildly yellow at the very top edges, a simple manual hand-sanding kit (like the Turtle Wax or Rain-X options) or a chemical wipe system (like Meguiar’s Two-Step or Wipe New) will be more than sufficient. However, if your headlights are completely opaque, deeply yellow, crusty to the touch, or severely pitted from years of neglect, you absolutely must invest in a heavy-duty drill-attachment kit (like the 3M Ultra or Rust-Oleum Heavy Duty). The mechanical torque provided by a power drill is essential for efficiently grinding through thick, stubborn layers of baked-on UV damage.
2. Evaluate the Included Abrasives (Grit Progression): A high-quality kit will always include a logical progression of sandpaper grits. Look for kits that offer at least two, preferably three, different levels of abrasion. You need a lower grit (around 500-800) for aggressive material removal, a medium grit (1000-1500) for scratch refinement, and an ultra-fine grit (2000-3000) for the final smoothing phase. Attempting to restore a headlight with only one grade of sandpaper will result in deep, visible scratches that the polishing compound cannot remove.
3. The Importance of the UV Clear Coat Sealant: Never, under any circumstances, purchase a restoration kit that does not include a final UV protective sealant, clear coat wipe, or ceramic spray. Sanding and compounding strip away whatever microscopic protection was left on the plastic. If you leave the polycarbonate bare, it will rapidly re-oxidize, often looking worse than before within a mere matter of weeks. The best kits (like Sylvania and 3M) feature highly engineered, chemical-resistant polymer coatings that chemically bond to the plastic, ensuring your hard work is protected from the sun for a year or more.
Masterclass: An Expert’s Step-by-Step Guide to Perfect Headlight Restoration
Buying the right kit is only half the battle; proper execution is where amateur results are separated from professional, flawless clarity. Follow these expert detailing steps to guarantee an absolutely perfect, mirror-like finish when using your chosen DIY kit.
Step 1: Thorough Preparation and Decontamination: Do not start sanding immediately. First, thoroughly wash the headlights and the surrounding bumper area with high-quality automotive car soap and water. Remove all surface dirt, squashed bugs, and road tar. Follow this up with a wipe-down using Isopropyl Alcohol (IPA) to strip away any residual waxes, greases, or silicones that could gum up your sandpaper.
Step 2: Meticulous Masking (Protecting Your Paint): This is arguably the most crucial step for avoiding costly collateral damage. Using high-quality automotive painter’s tape (do not use generic beige masking tape or duct tape, as they leave highly stubborn adhesive residue), carefully and meticulously tape off the painted bumper panels, chrome trim, and rubber gaskets completely surrounding the headlight. Apply two overlapping layers of tape. A spinning drill pad or an aggressive piece of sandpaper can instantly burn right through a car’s clear coat in a fraction of a second, causing hundreds of dollars in paint damage.
Step 3: The Wet Sanding Process (Patience is Key): Fill a spray bottle with clean water and a single drop of car soap (this creates a vital slick lubricant). Keep the headlight lens and your sandpaper constantly saturated with this soapy water. Begin with your lowest, most aggressive grit. Sand using deliberate, overlapping, horizontal horizontal strokes (avoid wild circles). Keep sanding until you see an even, uniform, milky white slurry forming—this is the dead, yellow plastic being successfully shaved away. Wipe the lens completely clean. Next, move to your medium grit paper, sanding in overlapping vertical strokes. This cross-hatching technique ensures you are removing the deep scratches left by the previous grit. Finish with your ultra-fine (3000 grit) wet sanding stage until the lens looks like incredibly smooth, uniformly frosted glass.
Step 4: Compounding to Clarity: Attach the polishing pad to your drill (or use the hand applicator). Apply a few pea-sized drops of the provided polishing compound. Before turning the drill on, dab the pad against the frosted lens to spread the compound and prevent high-speed slinging. Turn the drill on to a medium speed, applying firm, even pressure. Work the compound slowly across the entire surface. As the abrasives break down, you will literally watch the frosted haze melt away, revealing breathtaking optical clarity.
Step 5: Final IPA Wipe and UV Coating Application: After compounding, wipe the headlight completely clean with a microfiber towel. Crucially, do a final wipe-down with Isopropyl Alcohol. This strips away the oily, greasy residue left by the polishing compound, leaving perfectly bare, chemically clean plastic. Finally, working in a shaded, dust-free environment, carefully apply the provided UV sealant or clear coat wipes according to the manufacturer’s exact instructions. Allow the coating to cure completely (often requiring 1-2 hours of dry time) before exposing the vehicle to rain or moisture.
Post-Restoration Maintenance: How to Keep Your Headlights Crystal Clear for Years
Congratulations, you have successfully restored your headlights! However, proactive maintenance is required to ensure they stay that way. The aftermarket UV sealants applied in these kits, while highly durable, are not entirely permanent. To extend the lifespan of your crystal-clear lenses for years, adopt these simple maintenance habits:
First, get into the habit of applying a high-quality synthetic car wax or, even better, a modern SiO2 ceramic spray sealant to your headlights every time you wash your car. These products add an additional, sacrificial layer of UV protection over the plastic, absorbing the brunt of the sun’s rays so the plastic doesn’t have to. Second, whenever possible, park your vehicle in a garage, under a carport, or strategically in the shade facing away from the direct path of the sun. Reducing the total hours of direct, intense UV exposure is the absolute most effective way to drastically prolong the life of your freshly restored polycarbonate lenses.
Frequently Asked Questions (FAQ) About DIY Headlight Restoration
Can I use household toothpaste or baking soda to clear my headlights instead of buying a kit?
While toothpaste and baking soda do contain mild abrasives that can temporarily scrub away superficial surface grime and a tiny amount of oxidation, this is an incredibly flawed and strictly temporary “hack.” Toothpaste completely lacks the heavy cutting power necessary to remove deeply baked-on yellow plastic. More importantly, toothpaste does absolutely nothing to seal or protect the raw plastic. If you use toothpaste, your headlights will inevitably turn completely yellow again within a few short weeks, often looking significantly worse than before.
Do I need special automotive skills to use a drill-attachment kit?
Not at all. While power tools do command a healthy level of respect and caution, using a drill-based headlight kit is a highly accessible task for any DIYer. The most critical skill is simply controlling the speed of the drill (keeping it at a medium, steady pace) and ensuring you keep the pad moving constantly. If you hold a spinning abrasive pad in one single spot for too long, the friction can generate excessive heat and literally melt or burn the plastic lens. Keep it moving, keep it well-lubricated with water, and let the abrasives do the hard work.
How long does a typical DIY headlight restoration actually last?
The longevity of your restoration depends almost entirely on the quality of the UV clear coat sealant provided in the kit and the environmental conditions your car faces. Cheaper kits with inferior sealants might only last 4 to 6 months before haze returns. However, high-quality, premium kits utilizing advanced chemical polymers (like Sylvania, 3M, and Wipe New) can easily keep your headlights brilliantly clear for 1 to 3 years, especially if you proactively maintain them with regular applications of synthetic spray wax or ceramic sealants.
My headlight has condensation and water trapped inside the lens. Will a restoration kit fix this?
No. Headlight restoration kits are exclusively designed to repair exterior surface damage, specifically UV oxidation, yellowing, and minor scratches on the outside of the polycarbonate lens. If you have liquid water droplets, persistent fog, or heavy condensation physically trapped inside the headlight housing, you have a failed rubber weather gasket, a cracked housing, or a compromised ventilation seal. In those specific cases, the headlight assembly must be completely removed, dried out, and resealed with silicone, or entirely replaced.
Final Expert Conclusion
In summary, enduring the severe safety hazards and unsightly appearance of cloudy, yellowed headlights is completely unnecessary. The modern headlight restoration kits detailed in this comprehensive guide are highly affordable, incredibly easy to use, and readily available in various auto care stores and online retailers. They represent one of the most satisfying, visually transformative, and cost-effective DIY maintenance tasks any vehicle owner can undertake.
These expertly engineered systems do not merely superficially clean your headlights; they systematically strip away the molecular decay and lay down highly advanced chemical polymers, providing robust, long-lasting protection against future UV oxidation. By investing a mere fraction of the cost of a professional service or a full assembly replacement, and dedicating just one hour of your weekend, you can utilize these exceptional DIY kits to dramatically boost your vehicle’s aesthetic appeal, significantly increase your nighttime driving visibility, and ensure the absolute safety of yourself and others on the road—all from the ultimate comfort of your own driveway.