
The backup camera on your Hyundai is one of those features you barely notice when it works perfectly. Then one day you shift into reverse, glance at the screen, and see a blurry mess, a completely blank display, or nothing at all. Suddenly, backing out of a parking space feels a lot more stressful.
Backup camera problems are among the more common complaints Hyundai owners report, and the frustrating part is that the same symptom can come from several different causes. A black screen might mean a blown fuse, a bad connection, or a failed camera. A blurry picture might just need a quick lens wipe. Knowing how to tell the difference saves time and money.
Table of Contents
The good news is that most of these issues are fixable, and many of them do not require a trip to the dealer. Some solutions take five minutes. Others require a little more effort. Either way, working through the problem systematically is the only way to solve it without replacing parts you did not need to touch.
This guide covers the most common Hyundai backup camera problems, what they usually mean, and how to address each one properly whether you are handling it yourself or preparing to explain it to a technician.
The Most Common Hyundai Backup Camera Problems and What They Actually Mean
Not every backup camera problem looks the same. A blurry image is a completely different problem from a black screen, and diagnosing one the same way as the other wastes time. Before you start checking wires or pulling fuses, it helps to know what symptom you are dealing with and what systems are likely behind it.
Blurry or Unclear Image: Usually Simpler Than It Looks
A blurry image is one of the more common Hyundai backup camera complaints, and in many cases, the fix is genuinely easy. Dirt, grime, water droplets, or even road film on the camera lens can scatter light enough to make the image look unclear or washed out.
Before assuming anything is broken, clean the lens first. Use a soft microfiber cloth and a gentle cleaning solution. Do not use abrasive materials on the lens surface because small scratches can permanently affect image quality.
If the image is still blurry after cleaning, check whether the camera housing is sitting correctly in its mount. A camera that has shifted from its position due to a minor impact, a car wash pressure jet, or simply a loose fastener may no longer be aimed properly. That can cause the image to look off-center, blurred along one edge, or tilted in a way that makes it hard to use.
If neither cleaning nor repositioning solves it, the lens itself may be scratched or the camera unit may be aging. Some cameras develop an internal fogging issue, particularly after years of temperature changes. That kind of fogging is inside the sealed camera housing and cannot be cleaned away. Replacement becomes the only real fix at that point.
No Signal: What That Message Usually Points To
A “no signal” message on the backup camera screen means the display is powered and working, but it is not receiving a video feed from the camera. That narrows things down quickly because it tells you the infotainment system itself is functioning. The problem is somewhere in the signal path between the camera and the screen.
Common causes of a no-signal condition include:
- A blown fuse in the camera circuit
- A broken, frayed, or disconnected video cable
- A loose connection at the camera itself or at the display
- Corrosion on a connector that is preventing clean signal transmission
Start with the fuse. It is the fastest and cheapest item to check. Find the fuse that corresponds to the backup camera in your vehicle’s fuse diagram and pull it out to inspect it. If it is blown, replace it with a fuse of the exact same amperage rating. Do not go higher.
If the fuse is fine, move to the wiring. Trace the video cable from the back of the vehicle to the display and look for obvious damage. Pay particular attention to areas where wiring passes through the body, around the tailgate hinge on SUVs and hatchbacks, or through any rubber grommets that could be rubbing over time.
Blank Screen: The Difference Between a Blank Screen and a Black Screen Matters
A blank screen and a black screen are different symptoms, even though they can look similar at first glance.
A blank screen usually means the display itself is not activating at all when you shift into reverse. The infotainment system may not be detecting the reverse signal, or there could be a software or system-level issue preventing the camera mode from launching.
Try rebooting the infotainment system first. On most Hyundai models, you can do this by pressing and holding the power or home button for several seconds, depending on the head unit. If that does not work, a battery disconnect for five to ten minutes can sometimes clear a software hang that is preventing the camera screen from activating properly.
If the display stays blank only when in reverse and works fine otherwise, the issue may be that the reverse signal wire is not delivering the trigger to the head unit. That wire tells the display to switch to camera mode. If it has a poor connection or is not reaching the correct input on the head unit, the display will not switch over even if the camera itself is working fine.
Black Screen: No Power or No Signal at All
A black screen, where the display appears to be on but shows nothing at all, points toward either a power issue at the camera or a complete signal failure.
Unlike a blank screen where the system simply is not switching to camera mode, a black screen during camera mode suggests the camera is being called upon but is not delivering any image. That usually means the camera is not receiving power, has a failed output, or the video signal is being lost somewhere in the wiring path.
Testing the camera’s power supply directly with a multimeter is one of the most useful steps here. With the vehicle shifted into reverse, you should see voltage at the camera’s power wire. If there is no voltage, the camera is not getting power, and the problem is in the supply circuit, not the camera itself.
If power is present but the screen is still black, the camera may have failed internally. At that point, replacement is typically the most efficient solution.
Distorted, Flickering, or Frozen Display
A display that shows a distorted image, flickers, or freezes occasionally can be one of the harder symptoms to pin down. It can come from software glitches, a loose video connection, or hardware problems with either the camera or the display unit itself.
Start with the software side. Rebooting the infotainment system is always worth trying first because it costs nothing and sometimes resolves display behavior that looks like a hardware fault but is actually a software freeze.
If the display flickers specifically when driving over bumps or when the vehicle vibrates more than usual, that points toward a loose connection somewhere in the system. The vibration is momentarily breaking contact at a connector, which causes the signal to drop and the display to flicker or freeze.
Persistent distortion that is present every time you use the camera and does not respond to software fixes is more likely to be a hardware issue. That may mean a failing camera, a damaged video cable, or in some cases a display that is beginning to fail.
| Symptom | Most Likely Cause | First Step to Try |
|---|---|---|
| Blurry image | Dirty lens, misaligned camera, aging lens | Clean the lens with a soft cloth |
| No signal message | Blown fuse, damaged video cable, loose connection | Check and replace the relevant fuse |
| Blank screen | Infotainment software issue, reverse trigger wire fault | Reboot the infotainment system |
| Black screen | No power to camera, failed camera unit | Test camera power with a multimeter |
| Flickering or frozen display | Software glitch, loose connection, hardware fault | Reboot the system, then check connections |
How to Fix Hyundai Backup Camera Problems Step by Step
Once you understand what symptom you are dealing with, a systematic repair approach gets you to the solution faster. Jumping straight to replacing the camera before checking cheaper and simpler items first is how people end up spending money they did not need to spend.
Work through these steps in order. Most backup camera problems on Hyundai vehicles are resolved somewhere in the first few steps.
Step 1: Check the Wiring and All Connections
The backup camera system depends on several wires working together: a power wire, a ground wire, a video signal wire, and a reverse trigger wire. A fault in any one of them can create very different symptoms.
Start by visually tracing the wiring from the camera at the rear of the vehicle toward the cabin. On most Hyundai models, the camera wiring runs through the trunk area, along the interior panels, and connects to the head unit behind the dashboard.
Pay special attention to these areas:
- The trunk or tailgate panel area where the camera wiring exits the vehicle body
- Any rubber grommets where wires pass through sheet metal, as these can wear over time and allow chafing
- The tailgate hinge area on SUVs and hatchbacks, where wiring flexes every time the gate opens or closes
- The connector behind the head unit and any inline connectors in the video or power circuit
Look for frayed insulation, wires that have been pinched, loose connectors, or any sign of corrosion at the connector pins. A connector can appear plugged in and still have poor contact if the pins inside are corroded or spread apart.
If you find a frayed or broken wire, repair it properly with the correct gauge wire and sealed connectors. Do not use quick tape fixes in areas exposed to heat or moisture. A proper repair lasts. A shortcut creates the same problem again in six months.
Ground connections deserve particular attention. A bad ground can cause all kinds of strange camera behavior, including flickering, color distortion, and intermittent signal loss. The camera needs a solid ground connection, and if that ground point has corroded or the fastener has loosened, the camera may behave erratically even when everything else is fine.
Step 2: Inspect the Fuse Panel
A blown fuse is one of the fastest things to check and one of the most commonly overlooked. The backup camera circuit typically shares a fuse with a related system, and the exact fuse location varies by Hyundai model and year.
Check your owner’s manual for the fuse diagram and find the fuse most likely to correspond to the camera or rear view monitor circuit. Pull it out and look at it directly. A blown fuse usually has a visible break in the metal element inside the clear plastic housing.
Replace any blown fuse with the exact same amperage rating. The number is printed on the side of the fuse and usually also listed in the fuse diagram. Using a higher-rated fuse may seem like a quick fix, but it removes the protection the fuse is designed to provide and can lead to wiring damage if there is a short in the circuit.
Here is something worth knowing. If a fuse blows again shortly after replacement, that is an important signal. A fuse that keeps blowing means there is a short circuit somewhere in that circuit. In that case, replacing the fuse is not enough. You need to find the short before anything else.
Step 3: Diagnose the Display
If the wiring and fuses are fine, the next step is to evaluate the display itself. Shift the vehicle into reverse and observe what the screen shows. Take note of whether:
- The display switches to camera mode at all
- It shows a black screen, a blank screen, or a no-signal message
- The display works fine in all other modes but fails only in reverse
- The image appears and then freezes or flickers during use
If the display switches to camera mode but shows no image or a poor image, the problem is most likely in the camera or the signal path between the camera and the display. If the display does not switch to camera mode at all, the reverse trigger signal may not be reaching the head unit.
Resetting the infotainment system is worth doing at this stage if you have not already. On most Hyundai models, this involves holding the power button or home button for several seconds. On some models, a full system reset is accessible through the settings menu. This step clears any software hang that might be preventing normal camera mode operation.
If the reset does not help and the display behavior points toward a hardware issue with the head unit itself, that is a conversation for a professional technician. Head unit diagnosis requires proper tools and often involves ruling out all other components first.
Step 4: Assess the Camera Lens and Camera Unit
Even if the display looks fine and the wiring checks out, the camera itself may be the problem. Physical inspection of the camera unit should include:
- Checking the lens surface for dirt, film, or scratches
- Looking for signs of impact damage on the camera housing
- Checking whether the camera is sitting correctly in its mount
- Inspecting the connector at the back of the camera for corrosion or looseness
- Looking for water intrusion, particularly around the camera seal
A dirty lens is cleaned gently with a soft cloth. A scratched lens may cause permanent image degradation that cleaning will not fix. Internal fogging inside the sealed housing means the camera seal has failed, and the camera unit needs to be replaced.
If the camera is loose in its mount, the image may appear shaky during use or may be aimed incorrectly. Most backup cameras are secured with small fasteners or clips. Reseating the camera and tightening its mounting hardware can fix alignment issues that affect image usability.
If physical inspection and cleaning do not solve the problem and wiring is confirmed good, the camera unit itself is the next logical replacement. Original equipment or quality replacement cameras from a reputable supplier are worth the investment over bargain-bin alternatives that may not maintain image quality or last as long.
Step 5: Reset the System
A full system reset can resolve minor software-related camera faults that do not have a hardware cause. The most thorough way to do this on a Hyundai is to disconnect the battery.
Turn the vehicle off, disconnect the negative battery terminal, and leave it disconnected for five to ten minutes. Then reconnect it and start the vehicle.
This forces the entire electrical system to reinitialize, including the infotainment unit and the camera control circuitry. It is a clean reset that goes further than just rebooting through the system’s software menu.
Some Hyundai owners find that this resolves intermittent camera issues that appeared without any obvious cause. That is because modern vehicles run on complex software, and occasional glitches can affect camera behavior the same way a frozen app on a phone can affect touchscreen response.
If the problem returns after the battery reset, it is not software. Persistent problems after a full reset need to be traced to a hardware or wiring fault rather than cleared away with another reset.
Step 6: Replace Damaged Components When Needed
Once inspection and testing identify a failed component, replacement is the appropriate next step. The most commonly replaced components in Hyundai backup camera systems are:
- The camera unit itself
- The video cable
- The reverse trigger wire
- A blown fuse
- A corroded or damaged connector
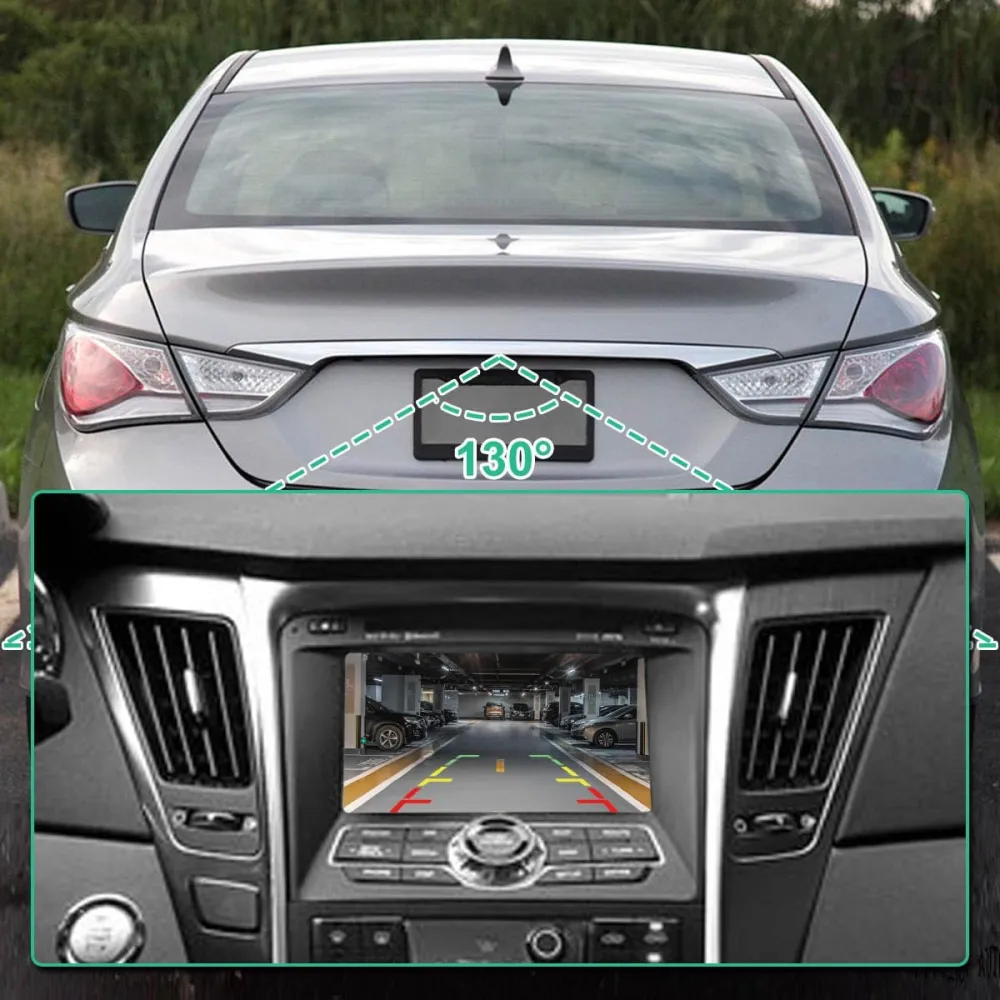
For camera replacement specifically, the process varies by Hyundai model. On many sedans, the camera sits in or near the trunk lid trim or the license plate area. On SUVs, it may be integrated into the tailgate handle or mounted above the rear hatch. Knowing where your specific camera is located before starting saves time.
If you are not confident with electrical diagnosis or interior panel removal, a professional repair shop or Hyundai dealer can handle the replacement. Bring your diagnostic notes with you. A technician who knows which symptoms you observed, what you already checked, and what you found can work much more efficiently than one starting from scratch.
For Hyundai Elantra owners specifically, the camera system on that model has some known wiring path concerns, particularly around the trunk hinge area. If you own an Elantra and the camera has been intermittent, that hinge area is worth inspecting carefully for wire wear before replacing the camera unit.
Step 7: Check for Available Software Updates
In some cases, backup camera issues on Hyundai vehicles are tied to software bugs in the head unit rather than hardware failures. Hyundai periodically releases software updates that address known issues, including camera-related behavior.
To find out whether an update is available for your vehicle, check with your local Hyundai dealer or visit the Hyundai website and enter your vehicle information. If a relevant update exists, a dealer can install it during a service visit. Some updates can also be downloaded to a USB drive and installed through the vehicle’s system menu, depending on the head unit model.
This step is often skipped by owners who assume their system is current. Updates do not install automatically in most cases, and a vehicle that left the factory in 2020 may never have received updates that were released in 2021 or later. If you have not had the software checked since you bought the car, it is worth confirming it is running the latest version.
A software update will not fix a broken wire or a failed camera lens. But if the camera hardware is fine and the behavior is inconsistent or strange in a way that does not match a clear wiring fault, an outdated software version is a reasonable thing to check before spending money on replacement parts.
A Practical Diagnostic Flow Chart for Hyundai Backup Camera Problems
Not sure where to start? Use this logical flow to work through the problem efficiently.
| What You See | Check This First | If That Does Not Help | Next Step |
|---|---|---|---|
| Blurry image | Clean the camera lens | Lens is clean but still blurry | Check camera mounting and consider replacement if lens is internally fogged |
| No signal message | Check and replace the backup camera fuse | Fuse is fine | Trace video cable and inspect all connections |
| Blank screen in reverse | Reboot the infotainment system | Still blank after reboot | Check reverse trigger wire signal at the head unit |
| Black screen in camera mode | Test camera power supply with a multimeter | Power is present but screen stays black | Replace the camera unit |
| Flickering or frozen display | Reboot the infotainment system | Still flickering after reboot | Check all connections, particularly in high-vibration or flex areas |
| Intermittent camera that works sometimes | Disconnect battery for 10 minutes and reconnect | Still intermittent after reset | Inspect wiring at tailgate or trunk hinge and check for loose connectors |
When to Call a Professional Instead of Continuing DIY
Most backup camera repairs are accessible for anyone comfortable with basic tools and methodical problem-solving. Some situations genuinely benefit from professional hands, though.
Consider bringing the vehicle to a qualified technician when:
- The fuse keeps blowing, which signals a short circuit that needs to be traced properly
- The wiring appears undamaged but the camera still does not work after all accessible checks
- The head unit may be the source of the fault and a proper diagnosis requires more than a visual inspection
- The problem appeared right after another shop did work on the vehicle, particularly any electrical work near the rear of the car
- Your vehicle is still under warranty and you want the repair documented and covered correctly
If the vehicle is within the Hyundai factory warranty or an extended warranty period, also check whether the backup camera issue qualifies for coverage before paying for repairs out of pocket. Camera system problems that result from a manufacturing defect or a software issue may be covered, and a dealer visit for diagnosis can establish whether that applies to your situation.
Simple Habits That Help Keep Your Backup Camera Working Properly
Backup cameras are not high-maintenance components, but a few habits go a long way toward keeping them working reliably over time.
- Keep the lens clean regularly. Road grime, car wash residue, and mud can accumulate on the lens without you noticing until the image is already compromised. A quick wipe with a soft cloth during routine washing keeps the lens clear.
- Avoid high-pressure water directly at the camera. Automatic car wash equipment and pressure washers can force water into small gaps around the camera housing and damage the seal over time.
- Be careful during hitch or trailer installation. Work around the rear of the vehicle can disturb camera wiring or physically damage the camera. Make sure anyone doing that work knows the camera is there and handles the surrounding area with care.
- Check for software updates periodically. If your Hyundai has had dealer service visits, ask whether the infotainment software is current. Dealers do not always apply available updates unless specifically requested.
- Pay attention to early warning signs. Intermittent flickers, occasional no-signal messages, or brief freezes are early warnings. Addressing them when they first appear is easier than diagnosing a complete failure later.