
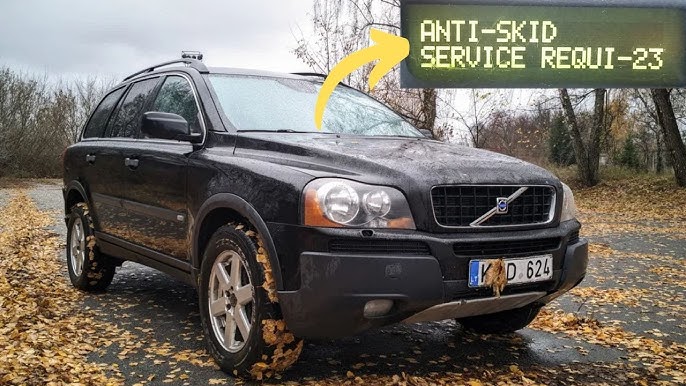
You’re driving your Volvo on a rainy morning, and a message pops up on the dash: “Anti-Skid Service Required.” No warning beforehand. No obvious problem with the brakes. The car still drives, but now you’ve got a safety system telling you it’s not working, and that’s not something you want to ignore.
This warning is tied to one of the most important safety features in your Volvo. The anti-skid system is what keeps your car from sliding out of control on wet pavement, icy roads, or during hard braking. When it stops working, you lose a critical layer of protection, and the car wants you to know about it immediately.
Let’s go through what this system actually does, what triggers the warning, and how to fix it without throwing parts at the problem blindly.
What Does Volvo’s Anti-Skid System Actually Do?
Volvo’s anti-skid system is essentially an advanced stability control setup that works hand-in-hand with the ABS (Anti-lock Braking System). Its job is simple but vital: keep you from losing control of the car.
When you’re driving on a slippery surface and the car starts to slide, the system kicks in automatically. It uses a network of sensors to figure out what the car is doing versus what you’re asking it to do. If there’s a mismatch, like the rear end swinging out when you’re trying to go straight, the system intervenes. It applies brakes to individual wheels and reduces throttle input to bring the car back in line.
The key sensors that make this work include:
- Wheel speed sensors on all four corners, tracking how fast each wheel is spinning
- Yaw rate sensor, which measures the car’s rotational movement around its vertical axis (basically, whether the car is spinning)
- Steering angle sensor, which tells the system where you’re pointing the wheels
All of this data flows to the ABS control module, which processes everything in real time and decides when and how to intervene. It’s a sophisticated system, and it works remarkably well. But when any piece of that sensor chain breaks down or sends bad data, the whole system shuts off and throws the “Anti-Skid Service Required” warning.
That warning isn’t telling you the car is about to lose control right now. It’s telling you that the safety net you normally rely on is no longer active. You can still drive, but you’re driving without stability control, which is a very different experience on a wet or icy road.
6 Common Reasons This Warning Shows Up
The “Anti-Skid Service Required” message can be triggered by several different issues. Some are cheap and easy to fix. Others are more involved. Here’s what to look for, starting with the most common culprits.
1. A Bad Wheel Speed Sensor
This is the number one cause, and it makes sense when you think about what the system relies on. Each wheel has its own speed sensor mounted on the steering knuckle. These sensors track rotational speed and send that data to the ABS module. If the module sees that one wheel is spinning significantly faster or slower than the others, it knows something is wrong and can respond accordingly.
But here’s the thing. These sensors live in one of the harshest environments on the car. They’re right next to the brakes, exposed to road grime, salt, water, and debris every time you drive. Over time, they corrode, crack, or get coated in brake dust to the point where they can’t read properly.
When a wheel speed sensor fails or sends erratic data, the ABS module can’t do its job. It doesn’t know what the wheels are doing, so it disables the anti-skid system entirely and triggers the warning. It’s a protective move. Better to shut the system off than to have it activate based on garbage data.
2. A Failed Yaw Rate Sensor
The yaw rate sensor is a gyroscopic device that measures how quickly the car is rotating around its vertical axis. In plain language, it detects whether the car is spinning or fishtailing. This is one of the most important inputs for the stability control system because it tells the module whether the car is actually going where the driver intends.
When this sensor fails, the system loses its ability to detect a skid in progress. Without that information, the anti-skid function can’t activate, and the warning pops up.
The yaw sensor is typically mounted under the driver’s or passenger’s seat, bolted to the floorboard near the vehicle’s center of gravity. It’s not as exposed to the elements as the wheel speed sensors, but it can still fail due to age, vibration damage, or electrical issues.
3. A Malfunctioning ECM
The Engine Control Module (ECM) oversees a huge portion of your Volvo’s systems, including the anti-skid function. If the ECM develops a software glitch or suffers hardware damage, it can trigger the anti-skid warning even when there’s nothing wrong with the ABS or stability control hardware itself.
This is one of the trickier causes because it can mimic other problems. You might replace a perfectly good wheel speed sensor because the code points that direction, only to find the warning comes right back. If the ECM is misinterpreting data or failing to communicate with the ABS module properly, the real problem is upstream of where you’re looking.
ECM issues aren’t super common, but they happen, especially on older Volvos with higher mileage.
4. A Damaged ABS Module
The ABS module is the brain of the entire anti-skid system. It collects data from all the sensors, runs calculations, and decides when to apply brakes or reduce throttle. When the module itself goes bad, the whole system goes down.
Module failures can be caused by internal software corruption, moisture intrusion, or simple age-related wear. On some Volvo models, the ABS module is known to develop internal solder joint cracks over time, which cause intermittent failures. The warning might come and go at first before eventually staying on permanently.
Replacing an ABS module isn’t cheap, but in some cases, specialty shops can repair and reprogram existing modules for significantly less than the cost of a new unit.
5. Worn Brake Pads or Rotors
This one catches people off guard. The anti-skid system relies on the brakes to do its job. When the system detects a skid, it applies braking force to specific wheels to correct the slide. If the brake pads are worn down to nothing or the rotors are warped, the system can’t apply consistent, controlled braking force.
In some cases, severely worn brakes can directly trigger the anti-skid warning because the system recognizes that even if it tried to intervene, the brakes aren’t in good enough shape to do what’s needed. You’ll usually see other brake-related warnings alongside the anti-skid message in this scenario.
6. Wiring Problems
Every sensor in the anti-skid system is connected to the ABS module through wiring harnesses. If any of those wires get damaged, corroded, or disconnected, the data flow breaks down and the warning light comes on.
Wiring issues are particularly common in areas where road salt is heavy. The salt accelerates corrosion on exposed connectors and wire terminals. Rodents are another frequent culprit. Mice and rats love to chew through automotive wiring, and they don’t care that the wire they’re eating happens to be your ABS sensor cable.
Wiring problems can be tedious to track down because there are dozens of wires running to various sensors around the car. But when you find one that’s corroded through or chewed in half, the fix is usually straightforward: repair or replace the damaged section and clean up the connectors.
How to Diagnose and Fix the Anti-Skid Warning
The first step with any of these warnings is to scan the car with an OBD-II tool. A basic code reader will pull ABS fault codes that point you toward the specific component causing the problem. Without scanning first, you’re just guessing, and guessing gets expensive.
Once you know what the codes are pointing at, here’s how to address each issue.
Replacing a Wheel Speed Sensor
Wheel speed sensors are located on the knuckle arm at each wheel. They’re bolted in and connected by a wiring harness that runs up into the wheel well. Replacement sensors typically come with their own cables, which is a good thing because the cables are often corroded alongside the sensor itself.
The job takes about 30 to 45 minutes per sensor if the bolt isn’t seized. On older cars with heavy rust, getting the mounting bolt out can be the hardest part. A little penetrating oil and patience usually does the trick.
If the yaw rate sensor is the problem instead, you’ll find it under the driver’s or passenger’s seat, mounted to the floorboard. It’s a straightforward swap once you slide the seat forward and remove the mounting hardware.
Reprogramming or Replacing the ECM
ECM problems come in two flavors: software and hardware. A software issue can sometimes be resolved by reprogramming or reflashing the module with updated firmware. This requires professional-grade diagnostic equipment, so it’s typically a dealership or specialist job.
If the ECM has a hardware failure, like a fried circuit board or damaged internal components, reprogramming won’t help. At that point, the module needs to be replaced and coded to your specific vehicle. This isn’t a cheap repair, but it’s also not something that happens frequently. When it does, though, getting it done promptly matters because a failing ECM can cascade into problems across multiple vehicle systems.
Replacing Brake Pads and Rotors
If worn brakes are contributing to the warning, the fix is standard brake service. Here’s the quick version:
- Lift the car and remove the wheel
- Remove the caliper slider bolt and pivot the caliper up and out of the way
- Slide out the old brake pads
- If the rotors are worn below minimum thickness or visibly warped, replace them at the same time
- Install new retaining clips and slide the new pads into place
- Compress the caliper piston, reposition the caliper, and reinstall the bolts
- Put the wheel back on and repeat on the other side
This is a job most DIYers can handle with basic tools. Just make sure you pump the brake pedal several times before driving to seat the new pads against the rotor. Rolling out of your driveway with no pedal pressure is an experience you only want to have once.
Tracking Down Wiring Issues
Wiring problems are the most tedious to diagnose but often the cheapest to fix. Start with your vehicle’s wiring diagram (available in the service manual or online) and trace the circuits related to the ABS and anti-skid system.
Look for obvious signs of damage: corroded connectors, cracked insulation, exposed copper, or sections that look like they’ve been chewed. Pay extra attention to areas where wiring passes through the wheel wells or under the car, since these are the most exposed to road debris and moisture.
A multimeter can help you check for continuity through suspect wires. If you find a break or high-resistance connection, repair the damaged section, clean the connectors, and apply dielectric grease to keep moisture out going forward.
The Quick Fix That Works More Often Than You’d Expect
Before you start pulling sensors and chasing wires, try the simplest approach first. Plug in an OBD-II scanner that can access ABS codes (not all basic scanners can, so make sure yours supports ABS), read the stored codes, and then clear them. Sometimes the anti-skid warning is triggered by a momentary glitch, like a brief sensor dropout caused by hitting a big pothole or driving through standing water.
After clearing the codes, drive the car for 10 to 15 minutes under normal conditions. If the warning doesn’t come back, the issue was likely a one-time event. If it returns, you know the problem is persistent and it’s time to dig into the specific code that keeps setting.
This simple reset resolves the issue more often than most people expect, especially on Volvos where a sensor connector got briefly disrupted and the system flagged it as a fault. It takes two minutes and costs nothing, so it’s always worth trying before spending money on parts.