You put your car in reverse, glance at the screen, and the backup camera image is completely flipped. Everything that should be at the top is at the bottom, and what should be on the left appears on the right. It is disorienting, it makes reversing genuinely difficult, and if your rear window has tint, it gets even harder to rely on your mirrors as a backup.
The good news is that a backup camera displaying an upside-down image is one of the more straightforward camera problems to diagnose. There are only a handful of real causes, and most of them have simple fixes that do not require a trip to a dealership or a big repair bill. This guide walks through all of them.
Table of Contents
What a Backup Camera Is Supposed to Do
Before getting into what goes wrong, it is worth understanding what the backup camera is actually designed to do, especially if this is a feature you have only recently started paying attention to.
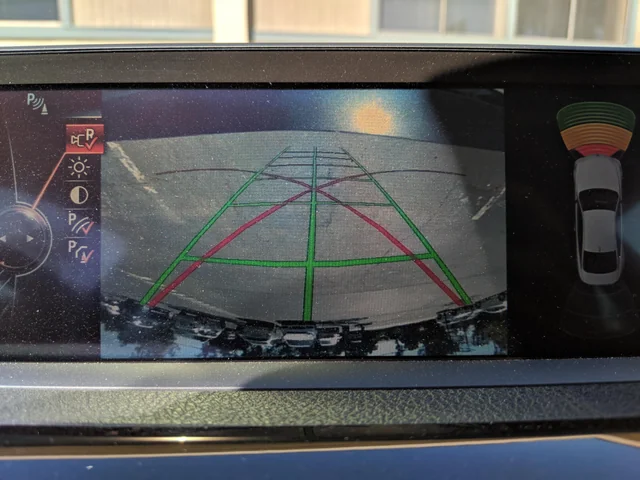
The backup camera, sometimes called a reversing camera or rear-view camera, is mounted at the back of the vehicle. When you shift into reverse, it automatically activates and sends a live video feed to your dashboard screen or infotainment display. The image shows you what is directly behind the car, including obstacles, pedestrians, and curbs that would otherwise fall into your blind spot.
Most modern backup cameras also include colored guide lines overlaid on the image. These lines shift as you turn the steering wheel to help you judge where the vehicle is going relative to the space behind it. Some systems add audible proximity alerts when you get close to an object.
The system works well when everything is set up correctly. But when the image appears upside down, the guide lines are wrong, your spatial reference is reversed, and the whole thing becomes more confusing than helpful. In some cases, it is actually worse than having no camera at all because it gives you false information about where objects are positioned.
Why Is Your Backup Camera Showing an Upside Down Image?
There are five main reasons this happens. They range from a simple settings toggle that takes thirty seconds to fix, all the way to a physical camera problem that requires a replacement. Understanding which one applies to your situation determines how quickly and cheaply you can resolve it.
1. The Camera Was Installed Upside Down
This is the most common cause when the problem appears right after a camera replacement or a new aftermarket installation. The camera was simply mounted in the wrong orientation. It sounds like an obvious mistake, but it happens more often than you might think, particularly with aftermarket cameras that do not come with model-specific mounting hardware.
Backup cameras are designed with a specific top and bottom. When the lens is pointing in the right direction but the housing is rotated 180 degrees, everything the camera captures appears flipped on the display. The camera itself is not defective. It is just oriented incorrectly.
If you recently had a camera installed and immediately noticed the upside-down image, incorrect installation is almost certainly the cause. The fix is simply removing the camera and reinstalling it in the correct position.
2. A Loose or Damaged Mounting Bracket
Here is a scenario that confuses a lot of owners: the camera was installed correctly, worked fine for weeks or months, and then the image suddenly flipped. No settings were changed. Nothing was touched. But now the image is upside down.
When this happens, the mounting bracket is often the culprit. The bracket is the hardware that holds the camera firmly in its position at the back of the vehicle. It keeps the camera from moving around when the car goes over bumps, potholes, or rough roads.
When the bracket loosens, cracks, or breaks, the camera loses its fixed position. Over time, or after a particularly rough stretch of road, the camera physically rotates within its mount. Even a partial rotation of the camera body can flip the image. The camera did not break. It just moved.
Check the camera housing at the back of the vehicle. Try gently pushing on it with your hand. If it moves, wobbles, or rotates, the mounting bracket is the issue.
3. A Camera Settings Change
Many modern vehicles include a camera image flip or rotation option in the infotainment system settings. This feature exists for good reason. Some aftermarket camera setups or specific installation positions require the image to be flipped digitally to appear correctly on screen. Manufacturers build in this option to accommodate different configurations.
But if this setting gets accidentally toggled, it will flip an image that was previously displaying correctly. Someone adjusting infotainment settings while exploring menus, a software update that reset camera settings to a default, or even a passenger accidentally tapping through menus can cause this.
This is the easiest fix of all of them. You just need to get back into the camera settings and toggle the flip option off.
4. A System Malfunction
Sometimes the problem is not the camera and not the settings, but a glitch in the infotainment or camera control system itself. Software-based systems in modern vehicles can develop faults just like any other computer. When the system malfunctions, it may fail to retain settings correctly, apply the wrong configuration to the camera feed, or display the image incorrectly even when all the physical components are working fine.
A system malfunction can also cause a situation where you correct the settings, the image rights itself, and then the next time you start the car it is upside down again. That cycle of fixing and re-breaking is a strong indicator that the system itself is not holding the correct configuration.
This type of issue typically responds to a system reset, though in some cases a software update or reprogramming is needed.
5. A Defective or Low-Quality Camera
This is the least common cause but the most frustrating one to deal with. Some backup cameras, particularly cheap aftermarket units, have internal lens or sensor issues that cause the image to be displayed incorrectly regardless of how the camera is mounted or what settings are applied. No amount of repositioning or settings adjustments will produce a correct image because the fault is inside the camera itself.
Low-quality cameras are also more prone to other image problems, including poor clarity, washed-out colors, significant distortion at the edges, and inconsistent performance in different lighting conditions. If your camera has multiple image quality issues alongside the upside-down display, a defective unit is likely the cause.
How to Fix a Backup Camera That Is Displaying Upside Down
Work through these fixes in order, starting with the simplest ones. There is no point in pulling the camera apart before you have checked the settings.
Fix 1: Check and Adjust the Camera Settings
Start here. It costs nothing, takes less than a minute, and resolves the problem in a surprising number of cases.
The exact steps vary by vehicle make, model, and infotainment system, but here is the general navigation path on most modern vehicles:
- Start the vehicle and navigate to Settings on your infotainment screen
- Look for a Camera, Reverse Camera, or Rear Camera option within the settings menu
- Inside those settings, look for an option labeled Image Flip, Mirror Image, Rotate Camera, or something similar depending on your system
- Toggle that option to the opposite setting from where it currently is
- Shift into reverse and check whether the image is now displaying correctly
If you cannot find the camera settings, consult your owner’s manual. Search for “backup camera settings” in the index. The manual will show you the exact menu path for your specific vehicle.
On some aftermarket head units or camera systems, the flip setting is controlled through a physical switch or a wire connection on the camera itself rather than through the screen. Check the camera’s installation manual if your system works this way.
Fix 2: Reinstall the Camera in the Correct Orientation
If the settings are correct but the image is still upside down, or if you recently had a new camera installed, physically removing and reinstalling the camera in the correct orientation is the next step.
Here is the general process:
- Locate the backup camera at the rear of the vehicle. It is commonly found on the tailgate, above the license plate, inside the license plate light housing, or on the rear bumper depending on your make and model
- Consult your owner’s manual or the camera’s installation guide to identify which side of the camera housing should face upward
- Remove the camera from its mount by unscrewing or unclipping the housing
- Rotate the camera to the correct orientation and reinstall it securely
- Test the image on the display before fully securing everything
- Once the image is correct, tighten all mounting hardware firmly
If you are not sure which orientation is correct for your specific camera, look for a label, arrow, or text printed on the camera housing that indicates “top” or “up.” If the camera has a label, align that side upward when installing.
Fix 3: Inspect and Replace the Mounting Bracket
Go to the back of the vehicle and physically examine the camera mount. Try to move the camera housing by hand. It should be completely firm with zero play or rotation. If it moves even slightly, the mount needs attention.
Inspect the mounting bracket for:
- Cracks or breaks in the bracket body
- Missing or stripped screws
- Rust or corrosion that has weakened the bracket’s grip
- Broken tabs or clips that no longer hold the camera securely
If the bracket is damaged, it needs to be replaced. Some backup cameras come packaged with their own mounting hardware, in which case a camera replacement also solves the bracket problem. If the camera itself is fine, you may be able to source just the bracket from the vehicle manufacturer or an auto parts supplier.
As a temporary measure, some owners use a small amount of automotive-grade adhesive or mounting tape to hold the camera in position while waiting for a proper bracket. This is not a permanent solution, but it will get the image back to the correct orientation while you sort out the right replacement part.
Fix 4: Reset the Infotainment or Camera System
If a system glitch is causing the upside-down image, a reset will often clear it. There are a few ways to do this, and it is worth trying them in order from least invasive to most invasive.
Soft reset (easiest):
- Turn the vehicle completely off
- Remove the key from the ignition or open the driver’s door to ensure the system fully powers down
- Wait at least 10 minutes
- Restart the vehicle and check the camera image
Battery disconnect reset:
- Turn the vehicle off
- Open the hood and disconnect the negative battery terminal
- Wait 15 to 20 minutes to allow all residual power to drain from the system
- Reconnect the battery terminal
- Start the vehicle and check the camera image
Be aware that disconnecting the battery will also reset other vehicle settings, including your radio presets, clock, and any personalized driver profiles. It is a minor inconvenience but worth it if it clears a persistent system glitch.
Factory reset through the infotainment system:
Most modern infotainment systems include a factory reset option buried in the settings menu. This restores all software settings to their original defaults. Check your owner’s manual for the exact steps. After a factory reset, you will need to reconfigure your preferences, but the camera settings will return to their default state, which for most vehicles means a correctly oriented image.
Professional diagnostic scan:
If none of the above resolves the issue, a professional diagnostic scan can identify whether there is a fault code stored in the camera control module or the infotainment system. A technician can then clear those codes and, in some cases, reprogram the module to restore correct functionality.
Fix 5: Replace a Defective or Low-Quality Camera
If you have worked through all of the above steps and the image is still displaying incorrectly, or if you have confirmed through the steps above that the camera itself is the problem, a replacement is necessary.
When choosing a replacement camera, here are the key things to look for:
- OEM compatibility: A replacement camera designed specifically for your vehicle make, model, and year will integrate cleanly with your existing display system and mounting points
- Image quality: Look for a camera with at least 720p resolution, a wide viewing angle of at least 120 to 150 degrees, and good low-light performance
- Weatherproofing: The camera lives outside the vehicle. Make sure the replacement has an IP67 or IP68 waterproof rating at a minimum
- Brand reputation: Stick to brands with a track record on your specific vehicle. Cheap, unbranded cameras may work initially but tend to develop problems quickly
If you are not confident in selecting or installing the replacement yourself, a dealership or a car audio and electronics shop can source and install the right camera for your vehicle. Always have the image tested on screen before the installer fully closes everything up.
Backup Camera Upside Down: A Quick Diagnostic Summary
| Situation | Most Likely Cause | First Fix to Try |
|---|---|---|
| Problem appeared right after a new camera was installed | Camera installed upside down | Remove and reinstall in correct orientation |
| Camera worked fine, then image suddenly flipped | Loose mounting bracket or settings change | Check bracket, then check settings |
| No physical changes were made, but image is flipped | Settings accidentally changed | Adjust camera flip setting in infotainment menu |
| Settings correction works temporarily but image flips again | System malfunction or software glitch | Perform a full system reset |
| Image has multiple quality issues alongside upside-down display | Defective or low-quality camera | Replace the camera |
| Camera housing moves when touched by hand | Damaged or loose mounting bracket | Inspect and replace the bracket |
How to Prevent This Problem From Happening Again
Once you have resolved the upside-down image, a few simple practices will help keep the backup camera working correctly going forward.
- Buy quality cameras. If you are replacing a backup camera, do not go for the cheapest option available. A camera that costs a few dollars more from a reputable brand will last significantly longer and perform more reliably than a no-name unit. Cheap cameras introduce problems like upside-down images, poor image quality, and early failure that ultimately cost more to deal with than you saved on the initial purchase.
- Have cameras professionally installed. Incorrect installation is one of the leading causes of this problem. If you are not experienced with automotive electronics installation, paying a professional to do it correctly the first time is money well spent.
- Check the mounting hardware periodically. Give the camera housing a gentle push every few months as part of your normal vehicle inspection routine. If it feels loose, tighten the hardware before it has a chance to let the camera rotate out of position.
- Keep the camera lens clean. Dirt and grime on the lens do not cause an upside-down image, but they do degrade image quality. A quick wipe with a soft cloth during each car wash keeps the lens clear and the image sharp.
- Be cautious with system updates. Infotainment system software updates occasionally reset camera settings to a default state. After any update, check that your camera image orientation and other settings are still configured the way you had them.
When to Get a Professional Involved
Most backup camera orientation problems can be resolved without professional help. But there are situations where bringing in a technician is the right call.
- The image flip comes back repeatedly even after you correct it through the settings, suggesting a system-level fault that basic resets have not resolved
- You have replaced the camera and reinstalled it correctly but the image is still wrong, which may point to a wiring issue or a fault in the display module
- The infotainment system has no camera flip setting and you cannot identify any other physical cause for the upside-down image
- The problem is accompanied by other camera issues such as a black screen, no signal, intermittent display, or a frozen image
A car audio and electronics shop or a dealership service center can diagnose camera system issues with the right equipment. They can pull fault codes from the camera control module, test the signal path from camera to display, and identify whether the problem is in the camera, the wiring, or the display unit itself.
Does a Backup Camera Issue Affect Your Safety Systems?
This is worth addressing because it comes up often. On most vehicles, the backup camera operates as a standalone display system. An upside-down image is a display problem, not a safety system fault. Your parking sensors, if your vehicle has them, operate independently from the camera and will continue to function normally.
That said, on some newer vehicles, the rear camera is integrated with other driver assistance features such as rear cross-traffic alert or rear automatic emergency braking. If your vehicle has these features and the camera is malfunctioning, those systems may also be affected. Check your instrument cluster for any additional warning lights when the camera issue is present. If you see warnings related to parking assistance or rear collision alert, mention those to your technician as part of the diagnosis.
An upside-down backup camera is annoying, but it is also a fixable problem with a clear set of causes and solutions. Work through the checks methodically, start with the easiest fixes first, and you will almost certainly have a correctly oriented image before you need to spend any serious money. And when you do replace a camera, buy a quality unit from a reputable brand and have it installed properly. That single decision prevents most backup camera problems before they start.