
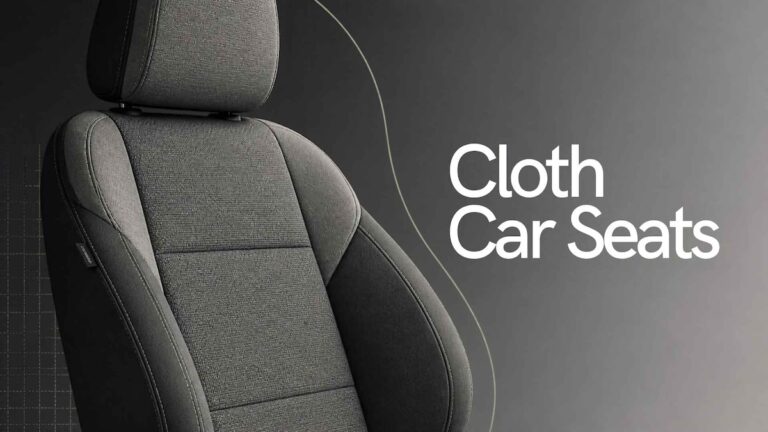
I get this question a few times every winter, usually from someone who just bought a used car with cloth seats and wishes it had heated seats like their last one did. They assume heated seats are a leather-only feature because that’s how it’s marketed on most trim levels. It’s not true, and honestly, the heating element doesn’t care what material is sitting on top of it.
Heated seats run on a thin heating pad, usually a carbon fiber or wire-mesh element, tucked under the seat cover and the foam cushion. That pad doesn’t know or care if it’s under leather, vinyl, or cloth. What matters is how the material handles heat and flex over time, and cloth actually does that job just fine. I’ve installed heating kits under cloth seats plenty of times and never had a comeback because the fabric couldn’t take it.
So if you’re wondering whether your fabric seats are stuck being cold forever, they’re not. Let’s get into what the job actually involves, what it costs, and where people get it wrong.
Why cloth handles a heating element just as well as leather
Leather got the reputation as the “heated seat material” mostly because it was the premium trim option on cars that also happened to come with heated seats as a package deal. It’s not because cloth has some weakness that keeps it from being heated.
Cloth is actually pretty forgiving material to work with when you’re installing a heating pad underneath it. It flexes with the seat foam, it doesn’t crack or dry out from heat cycling the way older leather can, and it breathes a bit better so you’re less likely to get that overheated, clammy feeling some leather heated seats give you on a long drive. I’ve had customers tell me their cloth heated seats feel more evenly warm than the leather ones in their previous car, and I think that’s a fair observation. Leather tends to heat in a more concentrated spot right where the element sits, while cloth and the foam underneath it seem to spread the warmth out a little more.
None of this means cloth is “better” for heated seats in some absolute sense. It just means there’s no real downside, material-wise, to adding heat to a fabric seat. The decision mostly comes down to cost, comfort preference, and how much you care about cleaning stains later.
What you actually gain by going with cloth over leather
If you’re cross-shopping materials and heated seats are part of the decision, here’s the honest breakdown of where cloth pulls ahead.
It handles temperature swings without drama
Cloth doesn’t get brittle in the cold or sticky in the heat the way some leather and vinyl can. The heating element cycles on and off as the seat warms up, and cloth just doesn’t react badly to that repeated warm-up and cool-down pattern. I haven’t seen cracking or dry-rot type damage on fabric seats from heating elements the way I occasionally see on cheaper leather or leatherette trim after years of use.
It’s genuinely more comfortable for a lot of people
Fabric tends to run softer against skin and doesn’t get that cold-slap feeling leather gives you on a freezing morning before the heater kicks in. It also doesn’t stick to bare skin in summer, which is a small thing until you’re wearing shorts in July and your leather seat is doing its best skillet impression.
It costs less, by a wide margin
This is the big one for most people. Fabric seat material runs roughly $100 to $200, while leather seating surfaces run $700 to $1,000. If you’re reupholstering as part of this project, or replacing a seat that’s too far gone to retrofit, that price gap is significant.
It comes in way more colors, patterns, and textures
Leather is mostly limited to a handful of standard colors, black, tan, chestnut, maybe gray. Cloth opens up a much wider range of patterns, weaves, and colors, so if you’re doing custom interior work or just want something that doesn’t look like every other car on the lot, fabric gives you more room to work with.
| Factor | Cloth seats | Leather seats |
|---|---|---|
| Material cost | $100 to $200 | $700 to $1,000 |
| Heat tolerance | Handles cycling well, no cracking | Can dry out or crack over years of heat cycling, especially cheaper leather |
| Comfort in cold | Warms quicker, less “cold slap” | Starts cold, takes longer to feel comfortable |
| Comfort in heat | Breathes better, less sticking | Can feel sticky or hot in direct sun |
| Cleaning | Absorbs stains and odors, harder to clean | Wipes clean easily, more stain-resistant |
| Color and pattern options | Wide variety | Limited to a handful of standard tones |
Where cloth comes up short
I’m not going to pretend fabric is perfect. There are a couple of real tradeoffs you should know about before you commit.
Stains and odors are a bigger headache
Spill coffee on leather and you wipe it off. Spill coffee on cloth and you’re potentially looking at a permanent stain if you don’t get to it fast. Fabric also holds onto odors, cigarette smoke being the big one, and it’s a magnet for dust mites if you’ve got allergies in the house. Removable, washable seat covers solve most of this if it’s a concern, and they’re cheap insurance for a car that sees kids, pets, or a lot of fast food on the go.
It wears out faster in high-use areas
Fabric fades in direct sun over the years and shows wear patterns on the bolsters and seat bottom sooner than leather typically does. If you’re the type who keeps a car a long time and racks up serious mileage, this is worth factoring in. It’s not a dealbreaker, just something to expect down the road.
None of these downsides have anything to do with the heating element itself. There’s no known issue with heated cloth seats failing or underperforming because of the fabric. The wear and cleaning concerns exist whether the seat is heated or not, they’re just general cloth seat realities.
What the installation job actually involves
This is the part most articles skip, and it’s the part that actually matters if you’re trying to decide whether to DIY it or pay a shop. Adding a heating element to an existing cloth seat isn’t a bolt-on part, it’s a seat teardown job.
Here’s roughly how it goes when I or another tech does this:
- Remove the seat from the car. Seat bolts are usually accessible after sliding the seat all the way forward and back to expose the rail mounts. On most cars this also means disconnecting the seat belt pretensioner and any seat position sensors before you lift it out.
- Strip the seat cover off the frame and foam. This takes patience. Seat covers are held on with hog rings, hidden clips, and sometimes factory stitching that has to be carefully released without damaging the material.
- Carve a shallow recess into the foam for the heating pad to sit in, so it doesn’t create a lump under the fabric once the cover goes back on.
- Install the heating element (carbon fiber pad or heated wire mesh, depending on the kit) onto the seat bottom and seat back, then route the wiring down through the frame toward where the switch and controller will live.
- Wire it into a switch, either tapping into the factory heated seat switch location if your trim level has the blank button plate, or adding an aftermarket rocker switch and running power through a fused circuit, usually off the accessory circuit or a dedicated relay.
- Reinstall the seat cover over the element, re-clip or re-ring everything back into place, and reinstall the seat into the car.
- Test it through a full heat cycle, checking both heat levels if the kit has more than one setting, and confirm the seat still sits level with no lumps or pinched wiring.
That last step matters more than people think. A pinched wire under a seat rail is one of the more common comebacks I’ve seen on this kind of job, it works fine for a few weeks then shorts out or stops heating when the seat position shifts and pinches the wire against the track.
A word about seat weight sensors
Here’s something worth flagging that doesn’t get mentioned enough. Many modern seats have an occupant classification sensor built into the cushion that tells the airbag system whether a person (versus an empty seat or a bag of groceries) is sitting there, which affects airbag deployment. If a heating kit installer isn’t careful routing wires or doesn’t account for that sensor during the foam recess cut, there’s a real risk of damaging or interfering with it. The result can be a seat occupancy fault or, worse, an airbag system that doesn’t behave the way it’s supposed to. This is one of the reasons I’d lean toward a shop with actual experience doing this specific job rather than a general upholsterer who’s never worked around a modern seat’s sensor wiring. The NHTSA vehicle safety resources are a good read if you want to understand how occupant sensors tie into airbag deployment before you let anyone start cutting into your seat foam.
What it costs and how long it takes
Pricing on this job isn’t fixed, it moves around based on your seat’s complexity, the kit quality, and who’s doing the labor.
| Factor | Typical range |
|---|---|
| Cost per seat (parts and labor) | $300 to $400 |
| Time to complete per seat | Roughly 2 to 5 days, depending on shop backlog and seat complexity |
| Fabric seat material (if replacing covers too) | $100 to $200 |
| Leather seat material for comparison | $700 to $1,000 |
The cost spread comes down to a few things: your location (labor rates vary a lot shop to shop), the quality of the heating kit (cheap kits exist, and they tend to fail sooner), how many seats you’re doing at once, and the make and model of your car. A seat with a lot of integrated electronics, side airbags, or complex bolster stitching is going to take longer and cost more than a basic bench seat in an older truck.
The 2 to 5 day window sounds long for what seems like a straightforward wiring job, but most of that time is the teardown and reassembly of the seat cover itself, not the wiring. A shop juggling other jobs might also not have your seat as the only thing on the bench, so turnaround stretches out. If timing matters to you, ask upfront how long your specific seat will take, don’t assume it’s a same-day job.
Will it hold up over time?
Yes, assuming two things go right: the fabric itself is decent quality, and whoever installs the kit knows what they’re doing. A heating element installed into a seat with worn-out, thin foam and already-fraying fabric isn’t going to last as long as one installed into a seat that’s in good shape to begin with. The element isn’t the weak link, the surrounding material and the quality of the install are.
I’d put most of the long-term reliability weight on finding a shop with a track record doing this specific job, not a generalist who’s willing to give it a shot. Ask to see examples of past installs, and ask what brand of heating kit they use. Kits vary quite a bit in element durability and how they handle flex over thousands of seat adjustments.
Common problems I see after the fact
A handful of issues account for most of the comebacks on this type of installation. Knowing them ahead of time can save you a headache.
- Seat heats unevenly: usually means the element shifted during cover reinstallation, or the foam recess wasn’t cut deep enough, bunching the pad in one spot.
- Heat stops working after a few months: often a wiring issue, check for a pinched wire near the seat rail or a blown fuse before assuming the element itself failed.
- Switch doesn’t respond: can be a bad ground connection or a failed relay if the installer wired it through a standalone circuit instead of tapping factory wiring.
- Seat occupancy warning light comes on: a sign the install disturbed the seat’s weight sensor wiring, this needs to go back to the installer immediately, don’t ignore it since it ties into airbag function.
- Lumpy or uneven seat feel: cosmetic but annoying, usually from the foam recess being cut unevenly or the element not sitting flat before the cover went back on.
Most of these are installer errors rather than product failures. A reputable shop will stand behind the labor and fix these free of charge if they show up within a reasonable window after the install.
DIY versus taking it to a shop
I’ll be straight with you here. This isn’t a weekend bolt-on job like swapping a battery or changing brake pads. It involves seat teardown, careful fabric handling, wiring into either a factory switch location or a new circuit, and in a lot of modern cars, working around an airbag occupancy sensor you really don’t want to mess up.
If you’ve got real upholstery experience and you’re comfortable with basic 12-volt wiring, a DIY heated seat kit is doable, there are kits sold for exactly this purpose with instructions included. But if your seat has side airbags built into the bolster, or you’re not fully sure how to identify and avoid the occupant sensor wiring, I’d pay a shop that specializes in seat and upholstery work. The cost difference between doing it yourself with a $60 to $100 DIY kit and paying $300 to $400 for a professional install isn’t big enough to justify the risk of damaging an airbag-related sensor or ruining a seat cover you can’t easily replace.
What I’d actually do
If it were my car and it had basic cloth seats with no side airbags built in, I’d consider a DIY kit if I had some patience and basic tools. If the seats have integrated side airbags or any kind of weight sensor system, which is most cars built in the last 10 to 15 years, I’m taking it to a shop that’s done this job before and can show me they know where that sensor wiring runs.
The one clear takeaway here: cloth seats can absolutely be heated, the fabric isn’t the limiting factor, the quality of the install is. Get a shop with real experience, confirm they understand your seat’s occupancy sensor layout if it has one, and budget for the 2 to 5 day turnaround rather than expecting it done same-day. Done right, a heated cloth seat holds up just as well as a heated leather one, and you’ll keep more money in your pocket getting there.