
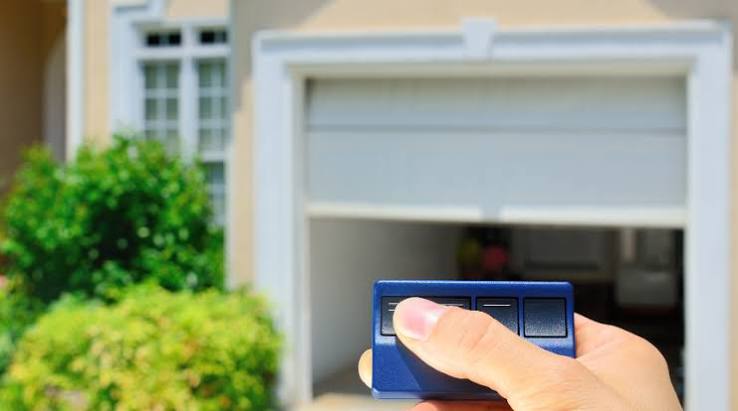
You pull into the driveway after a long day, tap that familiar button built into your rearview mirror, and nothing happens. The garage door just sits there, unmoved, while you sit there, annoyed. Now you are stuck digging through the glove box for a spare remote you are not even sure still has batteries in it.
HomeLink is one of those features you never think about until it stops working. Built directly into your vehicle, it lets you open and close your garage door without carrying a separate clicker around. When it functions properly, it is almost invisible, just a quiet convenience baked into your daily routine. When it fails, though, it becomes the most annoying part of your commute.
The good news is that most HomeLink failures come down to a handful of common culprits, and nearly all of them are fixable without calling in a professional. Let’s work through what typically goes wrong, how to diagnose it properly, and how to get your system talking to your garage door again.
Why HomeLink Stops Working in the First Place
Before jumping into fixes, it helps to understand what HomeLink actually does behind the scenes. Your vehicle’s system essentially mimics your garage door remote, learning its frequency and code pattern so it can send the exact same signal your physical opener sends. When that learned signal gets disrupted, lost, or simply falls out of sync, HomeLink stops doing its job.
Most issues trace back to one of these general categories:
- Synchronization problems between the vehicle system and the garage door receiver.
- Rolling code technology causing mismatches during programming.
- Signal interference from nearby electronics.
- Weak signal strength due to range or battery issues.
- Programming errors from an incomplete or rushed setup process.
Knowing which category you are dealing with narrows your troubleshooting considerably, so let’s break each one down individually.
The Most Common Culprits and How to Fix Them
Your Remote and Receiver Have Fallen Out of Sync
This is usually the first thing worth checking, mainly because it is also the easiest to fix. If your HomeLink system and your garage door opener receiver have drifted out of sync, the fix is simply resetting and reprogramming the connection between them.
Different garage door brands handle this reset slightly differently. Chamberlain openers, for example, often require pressing and holding specific buttons on the actual opener unit to clear its memory before starting fresh. If you are unsure of your specific brand’s reset sequence, a quick search using your opener’s model number will usually turn up exact instructions.
Rolling Codes Are Doing Their Job Too Well
Here’s the thing about rolling codes: they exist purely for security, changing the signal every single time your garage door operates so nobody can intercept and reuse an old code to break in. That security comes at a small cost, though, since it occasionally complicates the initial programming process.
Newer models from brands like Genie and Liftmaster have streamlined this process considerably compared to older systems, making rolling code synchronization much less of a headache than it used to be. Even so, if you are working with an older opener, expect the programming sequence to require a bit more patience and precision.
Something Nearby Is Interfering With the Signal
Electronic interference is a sneaky problem because it does not announce itself clearly. Your HomeLink system might work perfectly fine most days, then randomly stop responding for no obvious reason, only to work again later. That pattern often points toward interference rather than a hardware failure.
Take a look around your garage for devices that could be competing for the same frequency range. LED shop lights, certain wireless security cameras, and even some baby monitors have been known to cause this kind of disruption. Try removing or repositioning suspect devices and see if that clears up the signal.
Weak Signal or Limited Range
If your HomeLink only works when you are parked in a very specific spot in your driveway, or if the range seems to have shrunk over time, signal strength is likely your issue. Two things typically drive this: the position of your garage door receiver, and the condition of whatever battery powers your original remote that HomeLink learned its code from.
Check for physical obstacles between your vehicle and the garage door opener that might be blocking the signal path. While you are at it, replace the battery in your original remote even if it seems to still be working, since a weakening battery can transmit a signal just strong enough to program correctly but too weak for reliable daily use.
How to Properly Program Your HomeLink System
Whether you are setting up HomeLink for the first time or starting fresh after a reset, the programming process follows a fairly predictable sequence. Precision matters here more than speed, so resist the urge to rush through it.
Getting Started
- Find your HomeLink buttons. These typically live on the rearview mirror, the overhead console, or occasionally the driver’s side visor, depending on your vehicle.
- Clear any existing programming. Press and hold the two outer HomeLink buttons simultaneously until the LED indicator starts flashing. This can take up to 20 seconds, so do not give up too early.
Programming a Non-Rolling Code Opener
Older garage door openers that use fixed codes rather than rolling codes follow the simplest programming path:
- Press and hold your chosen HomeLink button along with the button on your physical garage remote at the same time.
- Keep holding both until the HomeLink LED begins flashing rapidly, which confirms the programming was successful.
Programming a Rolling Code Opener, Like Intellicode Systems
Rolling code systems require an extra step, since the code itself changes constantly and needs to be actively taught to your vehicle:
- Press and hold your chosen HomeLink button until the LED starts flashing slowly rather than rapidly.
- Walk over to your actual garage door opener unit, usually mounted on the ceiling of your garage, and press its dedicated learn button.
- Within 30 seconds, hurry back to your vehicle and press the same HomeLink button three separate times. This teaches the system to recognize the current rolling code.
That 30 second window trips people up more than any other part of this process. If you take too long walking back to your car, the opener’s learn mode will time out and you will need to start the sequence over from the beginning.
When Programming Just Will Not Take
If you have followed every step carefully and your system still refuses to program correctly, work through this checklist before assuming something is seriously broken:
- Confirm compatibility. Not every garage door opener works with every HomeLink system, particularly on older or unusual models.
- Check your remote’s battery. A weak battery is one of the most common reasons programming attempts fail partway through.
- Repeat the sequence slowly and carefully. Rolling code programming especially depends on precise timing, so rushing through it is a common source of failure.
If the LED indicators still are not responding the way they should after multiple careful attempts, dedicated troubleshooting resources specific to your vehicle make and garage door opener brand can help pinpoint what standard steps might be missing.
Reading the Signs: What Your LED Indicator Is Actually Telling You
The small LED light on your HomeLink system communicates more than people realize, assuming you know how to interpret it.
| LED Behavior | What It Likely Means |
|---|---|
| Steady, solid light | System is functioning and programmed correctly |
| Slow blinking | System is in programming mode, waiting for input |
| Rapid blinking | Programming was just completed successfully |
| No light at all | Possible power issue or system fault |
Exact signal meanings can vary slightly between vehicle manufacturers, so cross-checking against your owner’s manual is worth the extra two minutes if you notice a pattern that does not match what is described here.
Resetting Your HomeLink System From Scratch
Sometimes the cleanest solution is simply wiping the slate clean and starting over. This makes sense particularly when you suspect a miscommunication between your vehicle and the garage door opener that basic troubleshooting has not resolved.
To perform a full reset, hold down the two outer HomeLink buttons at the same time until the indicator light shifts from solid to flashing, which typically takes about 20 seconds. Once you see that flashing pattern, release the buttons. This clears the stored memory entirely, giving you a genuinely fresh start for reprogramming.
Do Not Overlook Basic Power and Battery Problems
It is easy to assume a complex electronic failure when the real issue is something embarrassingly simple, like a dying battery or a tripped circuit.
- Check the battery in your original garage remote, since HomeLink is only as reliable as the signal it originally learned from.
- Confirm your vehicle’s electrical systems are functioning normally overall, since a broader electrical issue can sometimes affect HomeLink specifically.
- Verify the garage door opener itself has power. A tripped circuit breaker or a blown fuse on the opener’s side will stop everything from working, regardless of how well your vehicle’s system is functioning.
In the real world, a surprising number of “HomeLink is broken” complaints actually turn out to be a garage opener that lost power overnight due to a tripped breaker. Always rule out the boring, obvious stuff before assuming your vehicle’s system needs deeper repair.
Advanced Troubleshooting for Stubborn Problems
Sometimes basic resets and reprogramming attempts simply do not stick. When that happens, it is time to dig a little deeper.
When Synchronization Keeps Failing Despite Your Best Efforts
If standard programming steps are not working, double-check whether your garage door opener specifically uses rolling code technology, since this requires that extra learn-button step covered earlier. Pay close attention to your LED indicators during this process. A solid green light generally signals successful programming, while a red light often indicates an error somewhere in the sequence.
Distance matters here too. Make sure your vehicle sits within reasonable range of the garage door opener’s antenna throughout the entire programming process, since attempting this from too far away is a common reason synchronization attempts fail repeatedly.
If compatibility seems to be the underlying issue, particularly with newer opener models or gate systems, check the manufacturer’s website or HomeLink’s own compatibility resources. Some modern openers genuinely require an additional adapter to work with HomeLink, which is worth confirming before you spend another hour troubleshooting something that was never going to work without extra hardware.
Recovering From Overwritten or Completely Lost Codes
Occasionally, HomeLink’s memory gets overwritten or simply loses its stored code entirely, usually after a battery disconnect, a system update, or in rare cases, a random glitch. When this happens, a full reset is your starting point.
Press and hold the two outer HomeLink buttons until the LED shifts from solid to blinking, which clears everything stored in memory. From there, keep your original garage remote close by, since you will need it to retrain HomeLink on your opener’s current code from scratch.
If your original remote has gone missing entirely, contact your garage door opener’s manufacturer about obtaining a replacement transmitter. Without an original signal source to learn from, HomeLink genuinely cannot reprogram itself, no matter how many times you cycle through the reset sequence.
During reprogramming, keep nearby electronics turned off or out of the way, since interference at this exact moment can prevent the memory function from saving correctly. And if you have gone through every step multiple times without success, a full factory reset through your vehicle’s dealership might be the last resort before professional help becomes necessary.
Keeping Your HomeLink and Garage Door System Running Long Term
Once everything is working properly again, a bit of regular maintenance goes a long way toward preventing a repeat headache down the road. This applies both to your HomeLink system and to the physical garage door hardware it communicates with.
Simple Maintenance Habits Worth Building
- Check sensor alignment periodically. Misaligned safety sensors can prevent your garage door from closing properly, which sometimes gets mistakenly blamed on HomeLink itself.
- Test the door’s balance. Lift the door manually about halfway and let go. A properly balanced door should stay in place rather than falling or shooting upward.
- Lubricate moving parts annually. A silicone-based lubricant applied to hinges, rollers, and tracks reduces noise and prevents premature wear.
Replacing Burnt Out LED Bulbs
When the light in your garage door opener burns out, replacing it is straightforward:
- Set up a sturdy ladder positioned safely beneath the opener unit.
- Unscrew the light cover carefully, then remove and replace the bulb.
- Use a bulb specifically designed for garage door openers, since standard household LED bulbs can sometimes interfere with the remote signal frequency.
Replacing Safety Sensors
The photo-eye sensors mounted near the bottom of your garage door track exist purely for safety, stopping the door from closing on a person, pet, or object in its path. If one fails, replacement is a manageable task:
- Loosen the screws securing the sensor to the door frame.
- Disconnect the wiring from the old sensor and connect it to the replacement unit.
- Confirm the new sensor is properly aligned with its counterpart on the opposite side before securing everything back into place.
A misaligned sensor after replacement will usually cause the opener to refuse closing the door entirely, often accompanied by a blinking light on the opener unit itself, so double-check alignment carefully before considering the job finished.
Frequently Asked Questions
Can weather affect my HomeLink system’s performance?
Extreme cold can occasionally weaken battery performance in your original garage remote, which indirectly affects HomeLink’s signal strength since it relies on that same learned code. Beyond that, weather typically has minimal direct effect on the vehicle-side system itself.
Do I need to reprogram HomeLink after a dead car battery?
Usually not, since HomeLink programming is generally stored in non-volatile memory that survives a battery disconnect. That said, in rare cases a full battery drain can cause the system to lose its programming, in which case reprogramming from scratch becomes necessary.
Why does HomeLink work sometimes but not consistently?
Intermittent performance usually points toward either a weakening battery in your original remote, interference from nearby electronics, or a receiver antenna that has shifted position over time. Work through the interference and battery checks covered earlier before assuming a bigger hardware failure.
Is it possible to program HomeLink for more than one garage door?
Yes, most HomeLink systems support programming multiple buttons for different openers, gates, or even other compatible devices like home lighting systems. Each button gets programmed individually following the same steps outlined above.
A properly working HomeLink system is one of those small conveniences that makes daily life just a little smoother, right up until the moment it stops cooperating. Work through the checks in order, starting with the simple stuff like batteries and interference before assuming you need a full reset or professional help. Get it dialed in once, maintain it properly, and you will not think about that little button on your mirror again until the next time you actually need it to just work.