
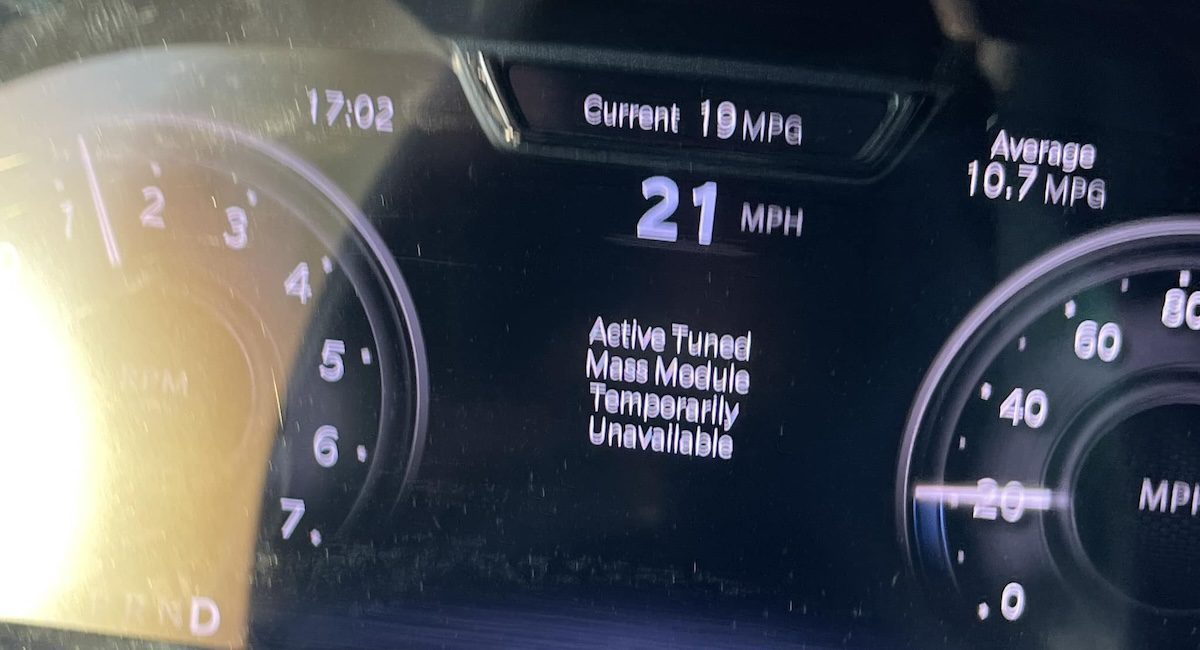
If you drive a Dodge and you have seen the message “Active Tuned Mass Module Temporarily Unavailable” pop up on your dashboard, you are probably wondering what on earth that system even is, let alone why it is throwing a warning. It is not one of the more familiar warnings like a low tire pressure or check engine light. But it does mean something specific is not working, and understanding it will help you figure out whether this is something you can address yourself or whether it needs a professional diagnosis.
Let us break it all down from the beginning.
Table of Contents
What Is the Active Tuned Mass Module and What Does It Do?
The Active Tuned Mass Module, or ATMM, is a noise and vibration control device found on certain Dodge vehicles, particularly models with high-output V8 engines like the Challenger and Charger with the 6.2L supercharged Hellcat or Redeye engines. It looks like a small canister and is mounted directly to the vehicle’s frame rails.
Inside that canister are solenoid-activated weights. The module uses those weights to generate a precisely timed counter-vibration that cancels out unwanted engine and road vibration. The concept is similar to noise-canceling headphones, where an opposing signal is introduced to neutralize an unwanted one. In this case, instead of sound waves, it is physical vibration being neutralized.
The result when everything works correctly is a noticeably smoother, quieter cabin experience. You get the performance of a supercharged engine without the droning vibration that would otherwise work its way through the frame and into the cabin at idle and low speeds.
The system works alongside an underhood sensor that continuously monitors vibration levels coming from the engine. That sensor feeds real-time data to the ATMM, which then adjusts the movement of its internal weights accordingly to counter whatever vibration the sensor is detecting. It is a continuous, dynamic process happening every moment the engine is running.
When the warning message appears, it means the ATMM has lost the ability to perform this function. Either the sensor is not feeding it information, the module is not receiving power, or the module itself has failed. Without the ATMM doing its job, engine vibration at idle and low speeds becomes noticeably more prominent. The cabin feels rougher, sounds louder, and the overall refinement of the driving experience drops.
What Causes the “Active Tuned Mass Module Temporarily Unavailable” Warning?
There are several possible causes, and they range from straightforward electrical issues to physical component failure. Here is a detailed look at each one.
1. A Problem With the Underhood Sensor
This is the most common cause of this warning, and it is the first place to look. The underhood sensor is the ATMM’s primary source of information. Without accurate data from the sensor, the module has no way of knowing what vibration it needs to cancel. When the sensor fails or loses its ability to communicate, the module defaults to unavailable mode and the warning appears.
Several things can go wrong with the underhood sensor:
- The sensor body can develop cracks over time, particularly due to heat cycling in the engine bay. Once cracked, contaminants like oil vapor, moisture, or debris can get inside the sensor housing and interfere with its readings or physically damage the internal components
- If the sensor was recently replaced, it may not have been installed correctly. An improperly seated sensor, a connector that is not fully clicked in, or a sensor that is the wrong part number for the vehicle will all result in the module receiving no signal or a corrupted one
- The sensor’s connector can corrode over time, particularly in climates with road salt exposure or high humidity, which degrades the electrical contact between the sensor and the wiring harness
When you are diagnosing this warning, the underhood sensor should be your first point of physical inspection.
2. Wiring Problems
The ATMM and the underhood sensor both depend on electrical connections to function. Wiring issues can disrupt communication between the sensor and the module, cut power to the module entirely, or introduce resistance into the circuit that causes erratic or missing signal transmission.
Common wiring faults in this system include:
- Frayed or broken wires along the wiring harness connecting the sensor to the module or the module to the vehicle’s power supply
- Corroded pins inside connectors, which can look fine from the outside but create significant resistance or an open circuit
- Rodent damage, which is a genuine concern on performance vehicles that are stored in garages or parked near areas where rodents seek shelter. Rodents chew through wiring insulation and can sever connections entirely
- Wires that have chafed through their insulation by rubbing against a sharp edge or hot surface in the engine bay, causing intermittent shorts
- Improperly routed replacement wiring after a previous repair that left a section of wire in contact with a moving or hot component
Wiring faults can produce intermittent symptoms, meaning the warning may appear and disappear seemingly at random. That inconsistency is actually a useful diagnostic clue. A fault that comes and goes when you wiggle the harness is a connection issue. One that is always present regardless of vibration or movement is more likely a broken wire or failed component.
3. A Blown Fuse
The ATMM, like most electrical components in a modern vehicle, is protected by a fuse. If that fuse blows, the module loses power entirely and cannot operate. From the vehicle’s perspective, the module has gone offline, and the warning message appears to let you know.
A fuse typically blows due to an electrical overload or a short circuit somewhere in the circuit it protects. If the fuse is blown and you replace it only to have it blow again shortly afterward, there is an underlying short circuit in the ATMM wiring or the module itself that needs to be found and fixed before a fuse will hold.
Checking the fuse is one of the quickest and cheapest diagnostic steps available and should be done early in the process.
4. A Damaged or Failed ATMM Module
The module itself can fail. Internal components can wear out, the solenoid mechanism can degrade, or internal electronics can develop faults. External physical damage, such as impact from road debris, can also affect the module given its mounting position on the frame rails where it is relatively exposed to the underside of the vehicle.
Module failure is typically a diagnosis of exclusion. You check the sensor, the fuse, and the wiring first. If all of those are intact and functioning correctly but the warning persists, the module itself is the likely culprit.
This is also worth noting: external factors can sometimes trigger the warning without indicating a true component failure. Driving conditions including very rough roads, extremely low tire pressure, or certain road surfaces can cause unusual vibration patterns that temporarily overwhelm or confuse the system. In these cases, the warning may appear briefly and then clear on its own once driving conditions return to normal. If the warning is persistent across all driving conditions, however, something physical is wrong.
How to Diagnose the Active Tuned Mass Module Warning Properly
The most important step before spending any money on parts is getting an accurate diagnosis. A lot of time and money gets wasted when people replace components based on guesswork. Here is how to approach this systematically.
Start With a Diagnostic Scan
Connect a scan tool to your vehicle’s OBD-II port and pull all stored fault codes. The codes associated with the ATMM will point directly at which part of the system triggered the warning. You are looking for codes that reference the active tuned mass module, the underhood sensor, or associated communication circuits.
A standard basic OBD-II scanner may not access the body control module or the ATMM-specific module codes. For a complete read, you ideally need a scanner that supports Chrysler/Dodge proprietary protocols, or you can have the codes pulled at a Dodge dealership or a shop with the appropriate equipment. Many dealership service departments will pull codes without charge as part of an initial assessment.
Write down every code that appears, not just the ATMM-related ones. Additional codes from other modules can help build a picture of whether this is an isolated ATMM issue or part of a broader electrical system problem.
Perform a Visual Inspection of the Underhood Sensor
Locate the underhood sensor using your vehicle’s service manual. On most Dodge Challenger and Charger models with the ATMM system, the sensor is positioned in the engine bay where it can effectively detect powertrain vibration.
Inspect the sensor for:
- Visible cracks in the sensor housing
- Signs of moisture or oil contamination that has gotten inside through a crack
- Corrosion on the connector pins
- A connector that is not fully seated, the locking tab should be clicked fully into place
- Any signs of heat damage or physical impact
If the sensor was recently replaced, verify that the part number matches what the vehicle requires. An incorrect sensor, even one that physically fits in the same location, may not produce the correct signal type or range for the ATMM to interpret properly.
Check the Fuse
Locate the fuse responsible for the ATMM circuit. Your owner’s manual or the fuse box diagram printed inside the fuse box cover will identify which fuse controls this system. Pull the fuse and inspect it visually. A blown fuse will have a visible break in the metal strip inside the transparent casing, or in more severe cases, the casing itself may show burn marks.
If the fuse is blown, replace it with one of the exact same amperage rating. Do not use a higher-rated fuse as a substitute, as doing so removes the overcurrent protection the fuse is designed to provide and can lead to wiring damage or fire in a fault condition.
Inspect the Wiring Harness
Trace the wiring harness from the underhood sensor to the ATMM module and from the module to its power supply. Look for any visible damage along the length of the harness. Pay particular attention to areas where the harness passes near a heat source, a sharp metal edge, or a moving component, as these are the most common locations for chafing damage to develop.
Disconnect and inspect each connector in the circuit. Look for green or white corrosion on the pins, bent pins, or pins that have backed out of their connector housing. A small pick tool can help reseat backed-out pins, but if the corrosion is significant, the connector will need to be cleaned with electrical contact cleaner or replaced.
Inspect the ATMM Module Itself
Locate the module on the frame rails. Inspect the exterior for any signs of physical damage, corrosion, or impact marks. Check the module’s mounting hardware to confirm it is secure and that the module has not shifted position. Inspect the connector at the module for the same corrosion and seating issues described for the sensor connector.
If everything checks out physically and the scan codes point to the module itself as the fault, professional diagnosis is the next step before committing to a module replacement.
How to Fix the Active Tuned Mass Module Temporarily Unavailable Warning
Once you have identified the cause, here is how to address each one.
Fix 1: Replace the Underhood Sensor
If the sensor is cracked, contaminated, or otherwise damaged, it needs to be replaced. Use the vehicle’s service manual to confirm the correct part number for your specific model year and engine combination. Install the new sensor in the correct orientation and ensure the connector is fully seated and locked.
After replacement, clear the stored fault codes using a scan tool and take the vehicle for a test drive to confirm the warning does not return. If the warning clears and stays gone, the sensor was the root cause.
Fix 2: Repair or Replace Damaged Wiring
Wiring repairs in the ATMM circuit should be done properly rather than with a quick tape-over of a damaged section. A proper repair involves cutting out the damaged section of wire, splicing in a replacement section using heat-shrink solder connectors or a proper crimp and seal approach, and routing the repaired harness away from whatever caused the original damage.
Corroded connectors should be cleaned with electrical contact cleaner and blown dry with compressed air before reconnection. If the corrosion is severe enough to have damaged the pins, the connector housing and terminals will need to be replaced rather than cleaned.
If wiring repair is outside your comfort zone, this is a job for an auto electrician. Improper wiring repairs in a performance vehicle’s vibration control system can create new faults or intermittent issues that are harder to diagnose than the original problem.
Fix 3: Replace the Blown Fuse
Replace the fuse with one of the exact same amperage rating as specified for the circuit. As noted above, if the replacement fuse blows again quickly, stop and find the underlying short circuit before installing another fuse. Repeatedly blowing fuses without addressing the root cause can damage wiring and other components.
Fix 4: Replace the ATMM Module
Module replacement is the most involved repair on this list. The ATMM is not a universal part. It must be matched to the specific vehicle, and on some Dodge models it requires programming or calibration after installation to work correctly with the vehicle’s other control systems.
This is a job that should be handled by a Dodge dealership or a shop that has Chrysler/Dodge factory-level diagnostic and programming capabilities. An independent shop without the right software may be able to install the physical module but cannot complete the programming, leaving the system non-functional even with a new part installed.
Before authorizing a module replacement, ask the shop to confirm through their diagnostic tools that the module itself has failed rather than assuming it based on the warning message alone. Module replacement is expensive, and you do not want to pay for it if a sensor or wiring repair would have resolved the issue.
How Much Does It Cost to Fix the Active Tuned Mass Module Warning?
| Cause | DIY Cost | Professional Repair Cost |
|---|---|---|
| Blown fuse replacement | $1 – $5 | $20 – $50 with labor |
| Corroded connector cleaning and reseating | $10 – $20 (contact cleaner) | $50 – $150 with labor |
| Wiring repair | $15 – $50 (parts only) | $100 – $400 depending on scope |
| Underhood sensor replacement | $50 – $150 (parts only) | $150 – $350 with labor |
| ATMM module replacement and programming | Not recommended for DIY | $600 – $1,500 depending on model and shop |
| Diagnostic scan | $0 with your own scanner | $100 – $150 at most shops |
Start with the inexpensive checks. In many cases, a blown fuse, a cracked sensor, or a corroded connector is the entire problem, and the total repair cost is well under $100.
Will the Warning Go Away On Its Own?
Sometimes, yes. If the warning appeared due to a temporary condition such as an unusually rough road, extremely low tire pressure, or a brief signal dropout from the sensor, it may clear on its own once normal driving conditions resume.
But if the message is persistent, meaning it appears every time you start the car or stays on continuously during a drive, that is telling you the system has detected a real fault that is not going away on its own. Persistent warnings need to be diagnosed and addressed.
Check your tire pressures if the warning appeared suddenly and out of nowhere. Low tire pressure changes the vibration characteristics of the vehicle significantly and can confuse the system. Correcting the tire pressure sometimes clears the warning without any further action needed.
Does the ATMM Warning Affect Driving Safety?
The ATMM system is not directly related to any safety-critical function. Your engine, transmission, brakes, and steering all work independently of the ATMM. With the system offline, the vehicle is still fully drivable and safe to operate.
What you will notice is increased vibration and noise in the cabin, particularly at idle and lower engine speeds. On a Hellcat or Redeye engine, that difference can be quite apparent. The engine’s character at low speeds becomes more pronounced without the module actively canceling the vibration. It is not damaging to the engine or any other component, but it is a noticeable change in the driving experience of a vehicle specifically engineered to minimize that kind of refinement compromise.
Dodge Models Most Likely to Display This Warning
| Dodge ModelEngineMost Common ATMM Cause Reported | ||
|---|---|---|
| Dodge Challenger Hellcat | 6.2L Supercharged V8 | Underhood sensor cracking, wiring faults |
| Dodge Challenger Redeye | 6.2L Supercharged V8 | Sensor failure, module failure |
| Dodge Charger Hellcat | 6.2L Supercharged V8 | Corroded connectors, blown fuse |
| Dodge Durango SRT Hellcat | 6.2L Supercharged V8 | Wiring damage, sensor issues |
The ATMM system is specific to high-output supercharged V8 applications where vibration cancellation provides the most noticeable benefit. If you own one of these models and are seeing the warning, the information in this guide applies directly to your vehicle.
The ATMM warning is one of those problems where the diagnostic work matters far more than jumping straight to a part replacement. A cracked sensor costs under $150 to fix. A module replacement can cost over a thousand. Spend the time to pull codes, inspect the sensor, check the fuse, and trace the wiring before authorizing any significant repair. You will almost certainly find the real cause before you get to the module, and you will save yourself a substantial amount of money in the process.