
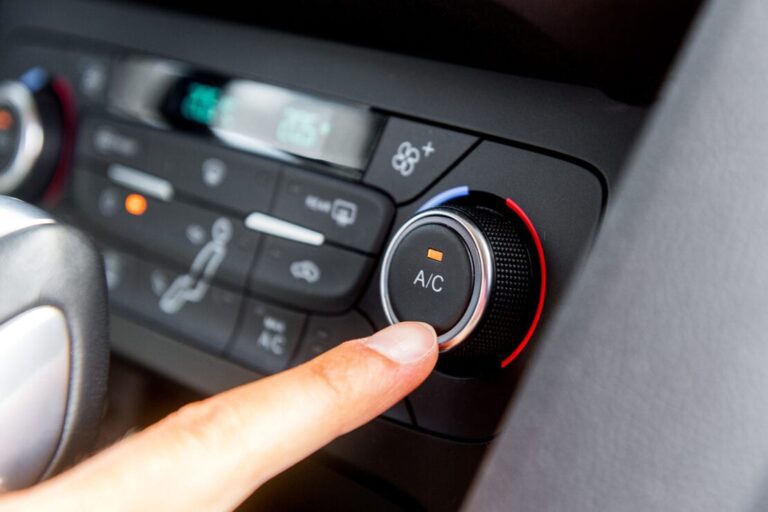
Few things ruin a morning faster than climbing into a freezing car. You turn the dial, you wait, and all you get is a blast of cold air that makes the situation worse. If your Mini Cooper heater is not working, do not panic. This is a common issue among Mini owners, and it is rarely a mystery that cannot be solved.
You might be dealing with a simple fix like a low coolant level, or it could be something more involved like a stuck blend door actuator. The key is knowing where to look and what to test first. We have broken down the most likely culprits and the exact steps you can take to get warm air flowing again. Let us get into the garage and sort this out.
Why Is Your Mini Cooper Heater Blowing Cold Air?
Before you start buying parts, you need to understand the basics of how your heating system works. It is not magic. It is a simple loop of hot coolant and air. The engine generates heat, the coolant absorbs it, and that hot liquid travels to the heater core. A blower fan then pushes air across that core, which warms the cabin.
If any link in that chain breaks, you get cold air. The problem could be mechanical, electrical, or even just a matter of trapped air in the system. Here are the four main suspects you need to check when your Mini Cooper heater is not working.
1. Low Coolant or Air Pockets in the System
This is the most common fix and the easiest to check. Your heater core relies on a steady stream of hot coolant. If the reservoir is low, there simply is not enough hot liquid to generate heat. In many cases, the engine might still run at a safe temperature, but the heater core sits higher than the engine block. If the fluid level drops, the core is the first thing to go dry.
Low coolant is often a sign of a leak. You might see a puddle under the car, or you might notice a sweet smell inside the cabin. That smell is coolant leaking from the heater core itself. If you find the level low, top it off with the correct mixture of coolant and distilled water. But do not stop there. You need to find out where it went.
Air pockets are another sneaky culprit. If you recently had work done on the cooling system, air can get trapped in the heater core. This acts like a plug, preventing hot coolant from flowing through. You need to bleed the system to remove these pockets. There is a bleed screw on the coolant expansion tank on most Mini models. With the engine cold, open the bleed screw and fill the tank until coolant flows out without bubbles. Close it, run the engine, and check the heat.
How to Check for Coolant Leaks
- Visual Inspection: Look for white or orange crusty residue on hoses and the radiator.
- Check the Oil Dipstick: If the oil looks milky or frothy, coolant is mixing with the oil. This is serious.
- Pressure Test: If you cannot find the leak visually, a cooling system pressure tester can help pinpoint it.
2. Stuck Thermostat
The thermostat is a valve that controls the flow of coolant to the radiator. When the engine is cold, it stays closed to help the engine warm up quickly. Once the engine reaches operating temperature, it opens up to let the coolant flow and dissipate heat.
If the thermostat gets stuck open, the engine might never reach full operating temperature. This means the coolant is constantly circulating through the radiator, cooling it down too much. The result? You guessed it. Cold air blowing from the vents even though the engine is running perfectly fine.
If your temperature gauge on the dashboard is sitting lower than usual, or if it takes forever to reach the middle mark, a stuck thermostat is your likely culprit. Replacing a thermostat is not a difficult job, but it requires draining some coolant and being careful with the housing bolts. They can be brittle.
3. Failed Heater Blower Motor or Resistor
Sometimes the heat is there, but you just cannot feel it. If the blower motor is dead, no air is moving through the vents at all. You might hear a clicking sound or a whirring noise, but the fan does not spin. The blower motor is located behind the glove box, and it is a common failure point on high-mileage Minis.
There is also a component called a blower motor resistor. This little module controls the fan speed. If it fails, you might only have one speed, usually the highest setting, or the fan might not work at all. When the resistor fails, it usually takes the motor with it. That is why mechanics often replace both parts at the same time.
Here is a quick test. Turn on the fan and switch through all speeds. If it works on speeds 3 and 4 but not on 1 and 2, the resistor is probably bad. If it does not work on any speed, check the fuse first, then test the motor directly with a 12-volt battery.
4. Faulty Heater Control Valve or Blend Door Actuator
This is where things get a bit more technical. The heater control valve is a vacuum-operated or electronic valve that controls the flow of hot coolant into the heater core. If this valve fails, it can either block the flow completely or let it flow constantly, which causes a different issue where the heat is always on.
The blend door actuator is an electric motor that moves a flap inside the dashboard. This flap mixes hot and cold air to reach your desired temperature. If the actuator strips its gears or the motor burns out, the flap gets stuck. If it is stuck on the cold position, you will never get warm air, regardless of how high you crank the temperature dial.
You can often hear a clicking or ticking sound coming from behind the dashboard when the actuator is failing. It is a tedious job to replace because it requires getting into the tight spaces behind the center console. But it is doable if you are patient and have the right tools.
The Step-by-Step Fix: From Simple to Complex
Now that you know the main components, let us walk through the actual repair process. We are going to start with the cheapest and easiest fixes and work our way up to the more labor-intensive jobs.
Check and Bleed the Cooling System
Pop the hood and find the coolant expansion tank. It is usually a white plastic tank with a blue or black cap. Check the level against the markings on the side. If it is low, you need to add the correct coolant. Mini recommends a specific phosphate-free coolant, but you can use a high-quality G48 or G30 coolant that is readily available at auto parts stores.
To bleed the system:
- Park the car on level ground and let the engine cool completely.
- Locate the bleed screw on the expansion tank.
- Slowly open the bleed screw to release any pressure.
- Fill the tank with coolant until it reaches the MAX line.
- Close the bleed screw and start the engine.
- Let the car idle for 10 minutes with the heater set to maximum heat.
- Turn the car off, let it cool, and re-check the coolant level. Top off if necessary.
This process removes any air that might be blocking the heater core. If you do this and the heat starts blowing hot, you have solved your problem. If not, move on to the next step.
Test and Replace the Thermostat
If your car is running cold on the gauge, the thermostat is suspect. You can test it by feeling the upper radiator hose. If the hose stays cool while the engine warms up, the thermostat is stuck closed. If the hose warms up immediately and the engine never gets hot, it is stuck open.
Replacing the thermostat on a Mini Cooper involves:
- Draining the coolant into a clean container.
- Removing the air intake duct and maybe the coolant hose.
- Unbolting the thermostat housing from the engine block.
- Replacing the thermostat and the housing if it is made of plastic. Plastic housings warp and crack over time.
- Reassembling and refilling the coolant.
This job takes about an hour or two. It is a great beginner DIY project for a Mini owner.
Inspect and Replace the Blower Motor Resistor
If the fan is not working, this is your next stop. The resistor is usually located near the blower motor under the dash on the passenger side. It might be clipped in or held by a couple of screws.
Here is the thing: do not just replace the resistor. If the resistor failed, it is often because the blower motor is drawing too much current. That is a sign the motor is on its last legs. If you only replace the resistor, it will burn out again in a few weeks. Bite the bullet and replace the motor too. The motor is usually held in by three screws and a wiring harness clip. It is a tight fit, but you can do it without removing the entire dashboard.
Replace the Heater Control Valve
The heater control valve is located on the firewall, usually on the passenger side. It has two coolant hoses going to it. On older Minis, this valve is vacuum-operated. On newer models, it is electronic.
To test it, you can apply vacuum directly to the valve. It should click and hold vacuum. If it does not, it is bad. For the electronic version, you will need a scan tool to command it open and closed. If it does not respond, it is faulty.
Replacing this valve requires clamping off the coolant hoses to prevent a mess. It is a straightforward swap, but you need to make sure you install it in the correct orientation. The arrow on the valve indicates the flow direction.
Fix the Blend Door Actuator
This is the most labor-intensive fix on the list. The blend door actuator is buried deep in the dashboard. On some models, you can access it by removing the driver-side lower dash panel. On others, you might need to remove the entire center console.
If you hear a clicking noise behind the dash when you adjust the temperature, this is your problem. The actuator has plastic gears that strip out over time. Once they are stripped, the motor spins but cannot move the door.
Replacing it requires patience and a flexible socket set. You will be working in awkward positions. If you are not comfortable with this level of disassembly, this is the job to hand over to a professional.
Preventive Maintenance: Keep the Heat On
Once you have fixed the issue, you want to make sure it does not happen again. A little preventive care goes a long way with European cars.
Regular Coolant Flushes
You should flush your cooling system every 30,000 miles or every two years, whichever comes first. Old coolant becomes acidic and can eat away at the heater core and the water pump. A fresh flush keeps the system clean and prevents blockages.
When you do a flush, use the correct fluid. Do not use universal coolant. It can foam up and cause air pockets.
Check Your Hoses
Spend five minutes every month feeling the coolant hoses. They should be firm but not rock hard. If they feel swollen, cracked, or brittle, replace them. A burst hose on the highway is not just inconvenient; it can cause the engine to overheat and warp the cylinder head. That is a repair that costs more than the car is worth.
Listen for Unusual Sounds
Your car talks to you. You just have to listen. If you hear a whining noise from the blower motor, it is telling you the bearings are dry. If you hear a clicking from the dash, the actuator gears are grinding. Addressing these sounds early prevents a full failure later.
Table: Quick Diagnostic Guide
| Symptom | Likely Cause | Difficulty Level | Estimated Cost |
|---|---|---|---|
| No heat at idle, but heat returns when driving | Low coolant or air pocket | Easy | $20 |
| Engine temp gauge never reaches middle | Stuck open thermostat | Moderate | $60 |
| Fan only works on highest speed | Blower motor resistor | Easy | $40 |
| No air flow at all | Blown fuse or dead blower motor | Moderate | $150 |
| Clicking noise from behind dashboard | Failing blend door actuator | Hard | $100 |
| Hot air on one side, cold on the other | Dual-zone actuator issue or low coolant | Moderate | $80 |
When to Call a Professional
There is no shame in admitting when you are out of your depth. If you have checked the coolant, replaced the thermostat, and tested the blower motor, but you still have no heat, it is time to bring in a specialist. The heater core is buried deep in the dashboard. Replacing one involves removing the entire dash assembly. It is an 8-hour job for a professional.
If you see smoke coming from the vents or smell a sweet, syrupy odor, stop driving the car immediately. That is a leaking heater core, and the coolant is evaporating on the hot engine. Not only is this dangerous to your health, but it can also cause the engine to overheat and fail.
When you take your car to a shop, do not just say my heater is broken. Give them the details. Tell them what you have already checked. This saves them diagnostic time and saves you money on labor.
Final Thoughts on Your Mini Cooper Heater
Getting the heat back in your Mini Cooper is usually a matter of working through the system logically. Start with the cheapest fix, the coolant, and work your way up to the more complex parts. Most of the time, the problem is something simple like a low fluid level or a dead resistor. Those are jobs you can handle in a weekend with basic hand tools.
But if the problem is deeper, do not let it slide. Driving with a non-functional heater is not just uncomfortable; it is a safety hazard. A foggy windshield on a cold morning is a recipe for an accident.
Have you ever had to replace a heater core? How long did it take you? Share your experience in the comments below. Your story might just help another Mini owner get through a cold winter.