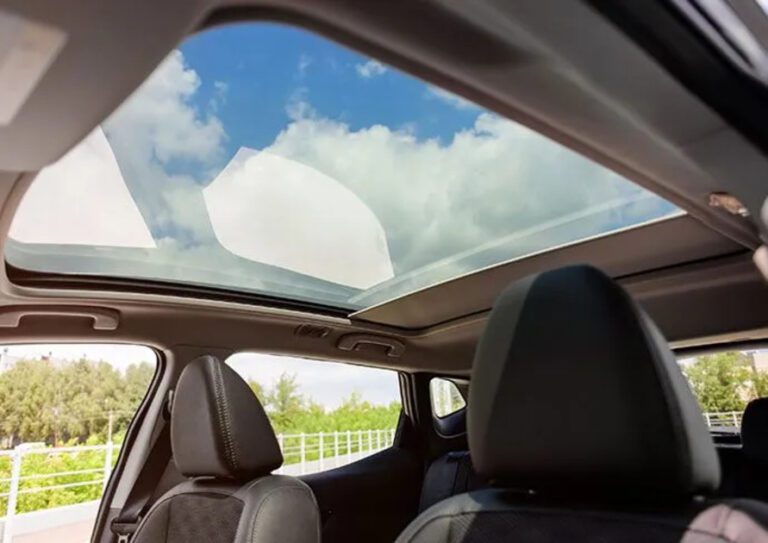
If you own a Ford Explorer with a sunroof, chances are you have dealt with a wet headliner or that sinking feeling of discovering a puddle on your seat after a rainstorm. It is one of those problems that starts small and gets worse fast. Water inside a vehicle is never “just a little water.” Left unchecked, it can destroy your interior, grow mold, and fry electrical components that cost a fortune to replace.
The good news? Most sunroof leaks on the Ford Explorer come down to a handful of known causes, and many of them are fixable without a massive repair bill. Let us walk through everything you need to know, from what is causing the leak to how to find it, fix it, and keep it from coming back.
Table of Contents
Why Your Ford Explorer Sunroof Is Leaking (And What Is Really Going On)
Before you can fix anything, you need to understand what you are dealing with. A sunroof leak is rarely one single problem. It is usually a combination of factors, and diagnosing the wrong one means you will waste money and still end up with a wet interior. Here is a breakdown of the most common culprits.
A Worn or Damaged Sunroof Seal
The rubber seal that runs around the perimeter of your sunroof is the first line of defense against water. Over time, that rubber dries out, cracks, shrinks, and loses its ability to form a tight barrier. Think of it like the weatherstripping on a refrigerator door. Once it goes bad, things stop staying where they are supposed to.
On the Ford Explorer, sunroof seals tend to degrade faster in regions with extreme heat or cold. If you live somewhere with brutal summers or freezing winters, your seal has been through the wringer. UV exposure alone is enough to turn a perfectly good rubber seal brittle within a few years.
Run your finger along the seal when the sunroof is closed. If it feels stiff, cracked, or you can see visible gaps anywhere around the glass, that seal needs to be replaced. It is not something you can patch with tape and hope for the best. A new seal is the only real fix.
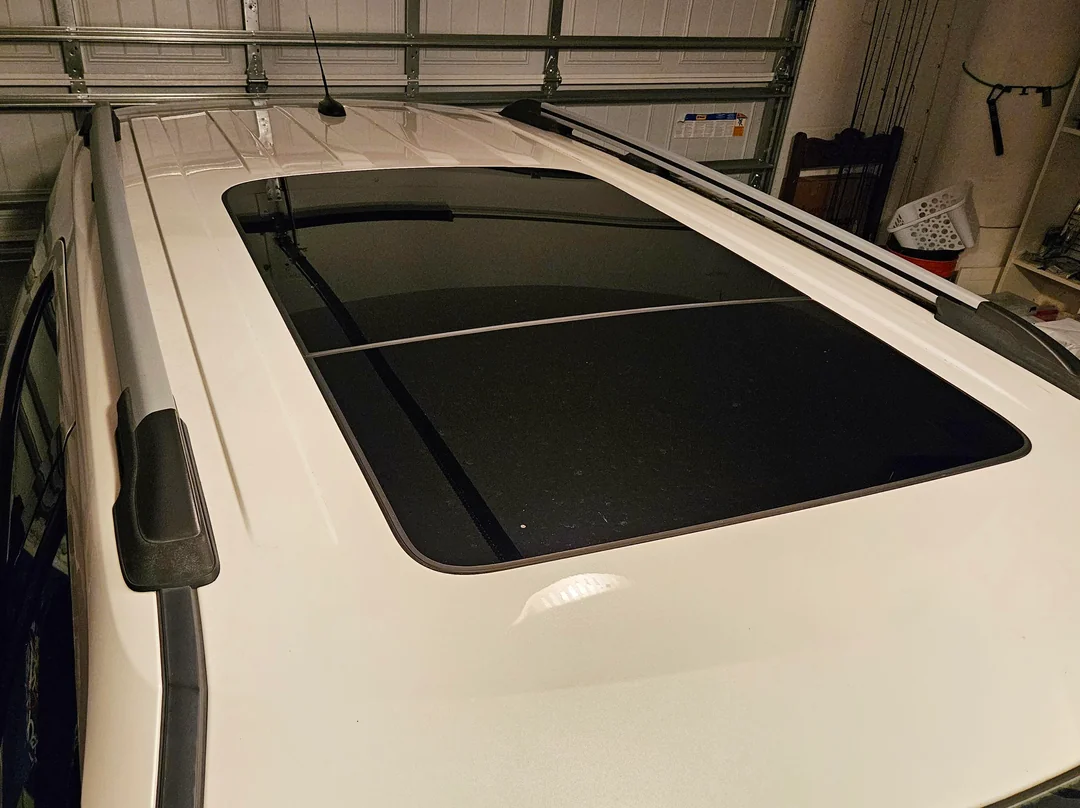
Blocked Drain Tubes: The Most Overlooked Cause of All
Here is the thing most Explorer owners do not realize. Even when your sunroof is working perfectly and the seal is intact, water still gets past the glass panel. That is actually by design. The sunroof system on your Explorer has a small trough or tray around the opening that collects rainwater, and four drain tubes, one at each corner, carry that water down through the body of the vehicle and out underneath.
It is a clever system, but it has one major weakness. Those drain tubes get clogged. Leaves, pine needles, dirt, roof debris, and gunk from trees all settle into that tray and eventually block the drains. When the drains are blocked, the tray fills up like a bathtub. Eventually, the water has nowhere to go except into your cabin.
This is actually the number one cause of sunroof leaks on the Ford Explorer, and it catches a lot of owners off guard because the sunroof itself looks perfectly fine. The glass closes, the seal looks okay, and yet water is still dripping onto the headliner or pooling in the footwells. Clogged drains are almost always the reason.
If you park under trees regularly, you are at higher risk. Even if you do not, seasonal debris can build up faster than you would expect, especially during fall.
Defective Parts Straight From the Factory
Sometimes it is not wear and tear. Sometimes the parts were never right to begin with. A number of Ford Explorer owners, particularly those with newer models, have reported sunroof leaks that showed up within the first year or two of ownership. In those cases, the issue often traced back to a manufacturing defect, whether it was a misaligned sunroof panel, a drain tube that was never properly seated, or a seal that was installed incorrectly at the factory.
If your Explorer is still under the factory bumper-to-bumper warranty and you are experiencing a sunroof leak, get to the dealership before that warranty expires. Ford’s basic warranty covers 3 years or 36,000 miles, and a factory defect causing a water intrusion issue absolutely falls under that coverage.
Do not wait. Dealers occasionally push back on warranty claims, but water intrusion from a sunroof on a relatively new vehicle is a legitimate defect claim. Document everything, take photos, and push if you need to.
Weather Extremes Put Extra Stress on the Entire System
Hailstorms, heavy downpours, and freezing temperatures all take a toll on sunroof components. Rubber seals contract in the cold and can pull away from the frame, creating gaps. Heavy, sustained rain can overwhelm the drainage system even when the drains are only partially clear. Hail can chip or crack the glass, creating micro-fractures that let moisture work its way in over time.
After any major weather event, it is worth doing a quick inspection of your sunroof. You do not need to pull out tools. Just open the sunroof, look at the drain corners, check the seal visually, and pour a small amount of water into the tray to see if it drains freely. Two minutes of checking can save you a lot of grief later.
User Error: Yes, How You Operate the Sunroof Actually Matters
This one is a little uncomfortable to bring up, but it is real. Forcing the sunroof open or closed when it is stiff, trying to manually push it when the motor is struggling, or slamming it shut repeatedly can cause serious damage to the seal and the track mechanism. The seal gets pinched, the alignment shifts, and suddenly you have a gap that did not exist before.
If your sunroof is moving slowly or feels stiff, do not force it. That is a sign the tracks need cleaning and lubrication, not more muscle. A clean, properly lubricated track keeps the sunroof moving smoothly and protects the seal from getting distorted during operation.
Also, always confirm the sunroof is fully closed before you drive into rain or go through a car wash. Partially open sunroofs in an automatic car wash are a fast way to flood your interior in about 90 seconds flat.
Overhead Console Problems Can Make the Situation Worse
The overhead console on your Ford Explorer sits right next to or around the sunroof mechanism. If the console develops a fault that causes the sunroof to stay partially open or prevents it from sealing fully, you have a water intrusion point that activates every time it rains. Some Explorer owners have reported their sunroof not fully closing due to a console or switch issue, and not realizing it until water was already inside the cabin.
If your sunroof button is acting up, if the sunroof seems to stop short of fully closing, or if there is a delay in the motor response, get that console and the sunroof mechanism inspected together. Those two systems are connected, and a small electrical glitch can have a very wet consequence.
How to Track Down a Sunroof Leak on Your Ford Explorer
Finding a leak sounds simple, but water is deceptive. It almost never stays where it enters. Water can sneak in at the sunroof, travel along the headliner, drip down the A-pillar, and end up pooling in the front passenger footwell, making you think the problem is the windshield when it is actually the sunroof drain. Here is how to systematically track it down without guessing.
Start With the Headliner
The headliner is the fabric-covered panel that spans your interior ceiling. It is usually the first place water shows up when the sunroof is leaking. Look for discoloration, water stains, or sagging sections. A sagging headliner almost always means water has been sitting behind the fabric for a while, soaking the foam backing and causing it to separate from the roof panel.
Run your hand gently across the headliner surface near the sunroof and along the edges of the roof panel toward the pillars. If anything feels damp, soft, or spongy, water has already made its way in there. Note the exact location because it will help you narrow down which drain or which section of the seal is failing.
Check the Spare Tire Well in the Trunk
This one surprises people, but it is one of the most reliable indicators of an ongoing water leak. Open your trunk, pull up the cargo floor panel, and look at the spare tire well. If there is standing water, rust staining, or obvious moisture sitting in that well, your Explorer has an active leak somewhere.
Sunroof drain tubes at the rear of the vehicle exit near the rear pillars and can direct water toward the back of the cabin if they are clogged or disconnected. That water eventually finds its way to the lowest point, which on the Explorer is typically that spare tire well. Finding water there tells you the rear drains are almost certainly involved.
Inspect the Interior Lights and Electrical Fixtures
Water and electricity are a bad combination in any situation. If sunroof water is running along the roof, it will eventually find its way into the dome lights, map lights, or the lighting strips near the sunroof frame. Look for condensation or fogging inside any light lens near the roof. Look for corrosion around the light fixture edges or any discoloration of the plastic housing.
Also check the vanity mirror lights on your sun visors. If those show signs of moisture, the headliner is heavily saturated and the leak has been going on for quite a while. At that point, you are not just dealing with a drain issue. You may also be facing mold remediation and headliner replacement.
The Garden Hose Test: A Classic Mechanic Trick
This is a method mechanics have used for decades, and it works perfectly for sunroof leak diagnosis. Close the sunroof completely. Have a helper sit inside the vehicle with a flashlight and a dry paper towel. Start spraying water gently over the sunroof area with a garden hose, beginning at the lowest points first and slowly working your way upward.
Watch for drips, wet spots, or water tracking along the headliner. When your helper spots water appearing inside, note exactly where it is showing up. That will tell you whether you are dealing with a front drain, a rear drain, or a seal failure on one specific side. Do not use a pressure washer for this test. A gentle flow is all you need. High pressure can force water past seals that are actually still functional, and that will completely throw off your diagnosis.
How to Fix a Ford Explorer Sunroof Leak Step by Step
Now that you know what is causing the leak and where it is coming from, let us talk about solutions. Some of these you can handle yourself on a Saturday morning with basic supplies. Others genuinely need a professional. Here is an honest breakdown of both.
Unclogging the Sunroof Drains Yourself
If clogged drain tubes are your problem, this is absolutely something you can tackle at home. It takes about 30 minutes and costs almost nothing. Here is exactly how to do it:
- Open the sunroof fully and look at the four corners of the sunroof tray. You will see small drain holes at each corner. Those are your drain tube openings.
- Clear out visible debris first. Use your fingers or a soft brush to remove any leaves, dirt, or gunk sitting in the tray. Be careful not to push any of this debris into the drain holes themselves.
- Use a can of compressed air. Insert the straw attachment gently into each drain hole and give it a few short bursts. This dislodges soft blockages and pushes them down and out the drain. Do not blast air continuously. Short bursts are more effective and far safer for the drain tube material.
- If compressed air does not clear the clog, try a flexible trim tool or a piece of weed trimmer line. Feed it gently into the drain hole and work it back and forth to break up the blockage. Never use a rigid wire or anything with a sharp edge. Poking a hole in the drain tube creates a much bigger problem than the original clog.
- Test each drain. Pour a cup of water slowly into each corner of the sunroof tray and watch where it goes. It should drain quickly and disappear entirely. If it pools and sits, the clog is still there. If water appears dripping inside the cabin instead of exiting underneath, a drain tube is disconnected or cracked and will need professional attention.
- Check the drain exit points underneath the vehicle. The front drain tubes typically exit near the front wheel wells. The rear drains exit near the rear wheels. Get underneath and confirm these exit points are not pinched, kinked, or plugged from road debris on the outside.
Once the drains are flowing freely, plan to do this cleaning at least twice a year. Spring and fall are the best times since those seasons bring the most debris accumulation.
Replacing a Worn Sunroof Seal
Replacing the seal is a bit more involved, but it is still a manageable DIY job if you are comfortable working with your hands. You will need to order the correct seal for your specific Explorer year and trim level. Seals vary between Explorer generations, so confirm you have the right part number before pulling anything apart.
The basic process involves opening the sunroof, carefully peeling off the old seal, cleaning the channel thoroughly with isopropyl alcohol, and pressing the new seal into place. Some seals are adhesive-backed. Others seat into a groove and are held by friction. Take photos before removing anything so you know exactly how the old seal was positioned and seated.
After installing the new seal, close the sunroof and check for even contact all the way around the perimeter. Then run the garden hose test again to confirm the leak is resolved before calling the job done.
Lubricating the Sunroof Tracks While You Are at It
While you are working on the sunroof, take a few extra minutes to clean and lubricate the tracks. Dry, dirty tracks cause the sunroof to move unevenly, which puts pressure on the seal and can prevent it from seating correctly. Use a silicone-based spray lubricant specifically. Do not use WD-40 or any petroleum-based product. Those attract dirt over time and will make the problem worse.
Wipe the tracks clean first with a dry cloth, apply a thin coat of silicone spray, then open and close the sunroof several times to spread the lubricant evenly through the mechanism. You should notice smoother, quieter operation right away.
When the Job Requires a Dealer or Independent Shop
Some situations genuinely require professional hands. If you have a disconnected drain tube inside the headliner, accessing and reconnecting it means pulling back the headliner. That is a job requiring patience and experience. Doing it wrong means damaging an expensive headliner that will cost hundreds to replace. If the sunroof glass itself is cracked, chipped, or sitting at a misaligned angle, that needs a shop. Same goes for sunroof motor failures or a compromised track mechanism.
Before paying out of pocket for anything, check two things. First, is your vehicle still under any form of warranty coverage? Second, is there an active recall or Technical Service Bulletin on your Explorer’s sunroof?
How to Check for Active Recalls and Technical Service Bulletins
Ford issues Technical Service Bulletins when a known problem affects multiple vehicles of the same model and year. These are not the same as recalls. A recall is mandatory and always free to the owner. A TSB is a documented fix that dealers are trained on, but whether it gets covered at no cost depends on your warranty status at the time of repair.
Check for active recalls on your Explorer by visiting the National Highway Traffic Safety Administration’s recall database. Enter your VIN and it will show every open recall tied to your specific vehicle. If there is one related to the sunroof or water intrusion, get to the dealer. They are legally required to fix it at no charge.
You can also ask the service department directly about any TSBs related to sunroof leaks on your model year. If a known fix exists and Ford has documented it, a good service advisor will tell you about it without you having to drag it out of them.
What Happens to Your Explorer When You Ignore a Sunroof Leak
Let us be straight about what is actually at stake here. A dripping sunroof might feel like a minor annoyance, but if you let it go, the damage compounds fast and the repair bills compound with it. Here is what you are really dealing with when water intrusion goes unaddressed.
Mold and Mildew Take Over the Headliner and Carpet
Water that soaks into foam-backed headliner material does not dry out on its own. The foam traps moisture, and within a few days, mold starts growing in that dark, warm environment. You will likely smell it before you see it. By the time visible mold appears on the surface, the problem has been developing inside for weeks. Mold remediation inside a vehicle is both expensive and time-consuming, and in serious cases, the headliner needs complete replacement rather than cleaning.
Wet carpet has the same problem. Water that reaches the floor soaks the carpet padding underneath, and that padding is nearly impossible to dry completely without removing the carpet entirely. Mold growing beneath your floor carpet is a genuine health hazard for every person who rides in the vehicle regularly.
Electrical Damage That Spirals Into Expensive Repairs
Water inside a vehicle cabin is remarkably efficient at finding electrical components. The Ford Explorer has wiring harnesses, control modules, and connectors routed through the headliner and down the pillars. Water causes corrosion on those connectors, which leads to intermittent electrical faults that are notoriously time-consuming and expensive to diagnose. You might start seeing random warning lights on the dash, windows that stop responding, a dead dome light, or even airbag system faults tied to water-damaged sensors.
Replacing corroded connectors and wiring harnesses is not a quick job. At shop rates of $100 to $150 per hour, a few hours of electrical diagnosis and repair adds up fast. Catching the leak when it first appears is always cheaper than chasing electrical gremlins six months later.
Long-Term Rust Inside the Roof Structure
Here is the consequence most people never think about. The steel structure of your Explorer’s roof and pillars will begin to rust when exposed to standing water over an extended period. Rust eats away at structural integrity quietly, from the inside out. In the event of a rollover accident, a compromised roof structure does not protect occupants the way an intact one would. That is not a scare tactic. It is a documented safety concern for vehicles that have had chronic, untreated water leaks over several years.
Sunroof Leak Repair Cost Guide: What to Budget For
Repair costs vary considerably depending on what is wrong and whether you handle it yourself or take it to a shop. Here is a realistic breakdown so you can plan accordingly.
| Repair Type | DIY Cost | Shop Cost (Labor + Parts) |
|---|---|---|
| Unclogging drain tubes (basic) | $0 to $10 (compressed air) | $75 to $150 |
| Sunroof seal replacement | $20 to $60 (seal only) | $150 to $350 |
| Drain tube reconnection (inside headliner) | Not recommended as DIY | $200 to $400 |
| Sunroof glass replacement | Not recommended as DIY | $300 to $700+ |
| Headliner replacement (water damage) | $100 to $200 (materials only) | $400 to $900+ |
| Mold remediation | Variable by severity | $200 to $600+ |
| Electrical repair (corrosion damage) | Depends on scope | $200 to $800+ |
The gap between catching this early and letting it go is stark. A $10 can of compressed air and 30 minutes of your Saturday morning can prevent a repair bill that runs past $1,000. That math is very hard to argue with.
A Year-Round Maintenance Schedule to Prevent Sunroof Leaks for Good
The best repair is the one you never have to make. Here is a practical, no-nonsense maintenance routine that will keep your Ford Explorer’s sunroof system in solid shape throughout the year.
Every Spring and Fall
- Open the sunroof and clear the tray and drain holes of all debris
- Pour water into each drain corner and confirm it flows freely out the bottom of the vehicle
- Inspect the rubber seal for cracking, stiffness, or visible gaps anywhere around the glass
- Wipe down the tracks and apply a fresh coat of silicone-based lubricant
After Any Major Weather Event
- Do a quick visual check of the seal and drain tray
- Run your hand along the headliner near the sunroof to feel for dampness
- Open the trunk and check the spare tire well for any standing water
Once a Year
- Apply a rubber conditioner or protectant to the sunroof seal to keep it flexible and pliable
- Have a shop inspect the drain tube connections if the vehicle is more than 5 years old
- Check the sunroof glass edges for chips, micro-cracks, or signs of sealant breakdown around the perimeter
This entire routine takes less than an hour spread across the full year. It is the kind of thing that feels unnecessary right up until the day you desperately wish you had done it.
This Problem Is Not Exclusive to the Ford Explorer
The Ford Explorer gets most of the spotlight when it comes to sunroof leaks, but other vehicles in Ford’s lineup deal with the same issues. The Ford Expedition is another model that has generated a notable number of water intrusion complaints, particularly around the liftgate area and the rear section of the roof.
The causes are largely the same across these platforms. Drain tube clogs, seal wear, and disconnected drain hoses are consistently the usual suspects. The prevention strategy is also the same. Regular cleaning and inspection of the drainage system goes a long way toward stopping the problem before it starts.
If you own any Ford SUV with a factory sunroof, the maintenance advice laid out in this article applies directly to your vehicle. The drainage system design is similar across the lineup, and the failure points show up in predictable ways regardless of the specific model.
One thing worth repeating about water leaks in general: water travels. It can move several feet from the actual entry point before you see any evidence of it inside the cabin. A liftgate seal leak on an Expedition might show up as a wet rear cargo area and standing water in the spare tire well, with no visible drip anywhere near the actual source. Always trace water back to its true origin point rather than assuming the wet spot you find is where the water came in.
Quick Reference: Ford Explorer Sunroof Leak Troubleshooting Guide
If you want a fast-reference summary for diagnosing and addressing a sunroof leak, use this decision guide to point you in the right direction.
| Symptom | Most Likely Cause | Recommended First Step |
|---|---|---|
| Water drips from headliner during rain | Clogged drain tubes or failed seal | Clean drains first, then inspect seal |
| Musty smell with no visible water | Slow leak saturating headliner foam | Full inspection, check drains and headliner moisture |
| Water in spare tire well | Rear drain tubes clogged or disconnected | Clean rear drains, check tube connections |
| Water pooling in front footwell | Front drain tubes backing up or overflowing | Clean front drains, check front exit points |
| Headliner sagging or drooping | Long-term water saturation of foam backing | Fix the leak source first, then address headliner |
| Electrical faults appearing after rain | Water reaching wiring through saturated headliner | Professional inspection needed immediately |
| Sunroof not closing fully | Track issue, motor fault, or console malfunction | Professional diagnosis required |
| Leak only occurs during heavy rain | Partially clogged drains causing overflow | Thorough drain cleaning, test with higher water volume |
Answers to the Most Common Ford Explorer Sunroof Leak Questions
Can I still drive my Explorer if the sunroof is leaking?
Technically yes, but you should not be driving it through rain with an active leak. Every wet weather trip speeds up damage to the headliner, carpet padding, and electrical system. At a minimum, keep the vehicle out of rain until the leak is fixed. After any wet weather exposure, check the spare tire well to see whether water has been accumulating back there without you noticing.
Will Ford cover a sunroof leak under warranty?
If your Explorer is within the 3-year/36,000-mile bumper-to-bumper warranty and the leak is caused by a manufacturing defect, it should be covered. If it is clearly wear and tear or owner-caused damage, coverage gets more complicated. Dealers have some discretion on borderline claims. Be polite, be persistent, bring photos and dated notes of when you first noticed the issue, and push back if you get an unreasonable response.
How long does unclogging the sunroof drains actually take?
A basic compressed air cleaning takes 15 to 30 minutes. If you need a flexible tool to break up a stubborn clog, budget 45 minutes to an hour. The drain testing process, which involves pouring water and checking for proper drainage, adds another 10 to 15 minutes on top of that. For most people, this is a very manageable Saturday morning job with no mechanical experience required.
What product should I use to condition the sunroof seal?
Look for a silicone-based rubber protectant that is rated safe for automotive seals. Products like 303 Aerospace Protectant or Gummi Pflege are solid choices that mechanics use regularly. Apply with a clean cloth, allow it to absorb for a few minutes, and wipe off any excess. Done consistently once a year, this dramatically slows down the drying and cracking process that eventually leads to seal failure.
Can silicone sealant from a tube fix a leaking sunroof seal?
It can serve as a very short-term patch on a small pinhole or a narrow gap, but it is not a real repair. Silicone sealant applied to a moving sunroof seal will crack and peel as the sunroof operates, sometimes within a few weeks. The right fix is full seal replacement. Tube sealant might buy you a few days of dry weather, but do not count on it past that.
My Explorer has a panoramic sunroof. Does everything above still apply?
Yes, with one important note. Panoramic sunroofs have more glass surface area and more seal length, which means more potential failure points along the perimeter. They also typically have a more complex drainage system. The cleaning, inspection, and lubrication advice all applies directly, but the stakes are slightly higher because more water flows over a larger surface during rain. If you have a panoramic sunroof, consider increasing the drain cleaning frequency to three times per year rather than two.
Straight Talk From a Mechanic Who Has Seen This Too Many Times
In this line of work, you see a lot of vehicles roll in with damage that was entirely preventable. The owner spent $800 on mold remediation and headliner work because they ignored a slow drip for eight months. Another customer paid $400 in diagnostic labor to trace a mysterious electrical fault back to a corroded connector that got wet from a clogged sunroof drain. These are not rare situations. They happen constantly, and they almost always trace back to a maintenance step that cost nothing and took 20 minutes.
Some shops, frankly, will quote you a hefty repair bill before they even check whether the drain tubes are simply clogged. Always start with the basics yourself. Open the sunroof. Clear out the tray. Run some water and watch where it goes. You might resolve the entire problem right there in your driveway without spending a dollar.
If the drains are clear, the seal looks good, and water is still getting in, then yes, it is time to get professional eyes on it. A disconnected tube inside the headliner or a subtle crack in the glass requires hands-on inspection. But know what you are dealing with before you hand over your keys and your wallet.
The Ford Explorer is a capable, well-built SUV. A sunroof that is properly maintained should hold up for the life of the vehicle with no significant issues. Neglect is what creates the problem. So here is a simple question worth sitting with: when did you last actually open that sunroof tray, look at those four drain holes, and confirm they are clear?