You get in your Dodge Charger, fire up the engine, and the screen is completely black. No UConnect logo, no loading screen, nothing. Just a dark rectangle staring back at you where your infotainment system should be. If you rely on that screen for navigation, music, backup camera, or phone connectivity, this is not a minor inconvenience. It brings a lot of your vehicle’s features to a complete standstill.
The frustrating part is that a black screen can mean several different things. It could be something as simple as a software glitch that clears up with a quick reset. Or it could point to a blown fuse, a wiring problem, or a failing head unit that needs professional attention. The key is knowing how to work through the possibilities in the right order so you are not wasting time or money chasing the wrong fix.
Table of Contents
This guide covers every common cause of the Dodge Charger screen not turning on, what to check first, and exactly how to address each issue.
Why Your Dodge Charger Screen Won’t Turn On: Every Possible Cause
1. A Blown or Loose Fuse
This is one of the first things to check and one of the easiest to fix. The infotainment system and UConnect screen are protected by fuses in your Dodge Charger’s fuse box. If a power surge, electrical fault, or even a slow degradation takes out one of those fuses, the screen loses power and goes dark.
What makes this tricky is that a fuse can appear fine visually but still be broken internally. A truly blown fuse will usually show a visible break in the metal strip inside the casing, but not always. When in doubt, test it or just swap it with a known good fuse of the same amperage rating.
The fuse box in the Dodge Charger is typically located under the hood and in some models there is also one inside the cabin near the driver’s side dashboard. Your owner’s manual has a diagram showing which fuse corresponds to the radio and infotainment system. Look for labels like “radio,” “UConnect,” “infotainment,” or “multimedia.”
2. Battery Problems
A weak or failing car battery can cause all kinds of strange electronic behavior, and a screen that refuses to turn on is one of them. The infotainment system requires a stable, consistent voltage to operate. When the battery cannot deliver that, the system may fail to boot, shut off unexpectedly, or just stay dark.
This is especially common in older Chargers where the battery is nearing the end of its life. You might notice that everything else in the car works fine, the engine starts, the lights come on, but the screen stays black. That can happen because the screen’s electronics are more sensitive to voltage instability than the basic electrical systems in the vehicle.
Corroded battery terminals make the problem worse. Even a fully charged battery cannot deliver its full power if the terminals are coated in corrosion that acts as a resistor in the circuit.
3. Loose or Faulty Wiring Connections
The screen and head unit are connected to the vehicle’s electrical system through a series of wiring harnesses and connectors behind the dashboard. Over time, vibration from driving, temperature cycling, and general wear can loosen these connections. A connector that is 90% seated might work intermittently for a while, then stop working altogether.
This cause is more likely if your screen has been cutting in and out before going completely dark, or if it only works sometimes when you hit a bump or turn a certain way. Intermittent screen behavior before a complete failure is a classic sign of a connection problem rather than a component failure.
4. Corrosion on Electrical Connectors
Corrosion is the enemy of electrical connections. When moisture gets into a connector, whether from humidity, a minor water intrusion event, or just condensation over years of temperature changes, it oxidizes the metal contacts inside. That oxidation increases electrical resistance and can eventually block the signal or power flow entirely.
This is a common issue in vehicles that have been exposed to flooding, heavy rain, or that live in high-humidity environments. It can also happen in vehicles that have had windshield or door seal leaks that let moisture into the cabin over time. The corrosion often forms slowly and gradually degrades the connection until the screen stops working entirely.
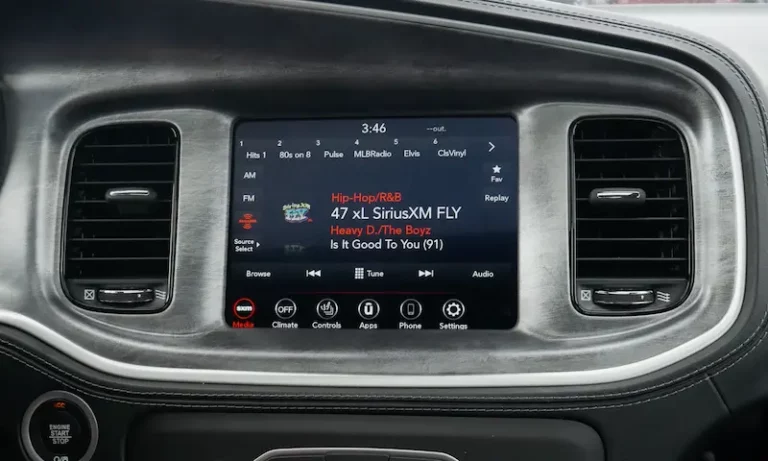
5. UConnect Software Glitch or Crash
The UConnect system runs on software, and like any software, it can freeze, crash, or get into a stuck state where it simply does not boot up correctly. This happens to perfectly healthy hardware. A software fault that occurred during a previous shutdown, a failed update, or even a voltage interruption while the system was active can leave the system in a state where it will not start the next time you get in the car.
This is actually one of the most common reasons for a Dodge Charger screen going dark, and it is also one of the easiest to fix. A simple soft reset resolves the majority of software-related screen issues without any parts or professional help required.
6. Head Unit Failure
The head unit is the central hardware component that powers the entire infotainment system. It contains the processor, memory, and all the circuitry that runs UConnect and displays everything on the screen. If the head unit itself has failed, whether from an internal component failure, heat damage, or a power surge, the screen will not turn on regardless of what else you try.
Head unit failures tend to be all-or-nothing. Either the screen works or it does not. If you have already tried the resets and confirmed the fuses and wiring are fine, a failed head unit becomes the likely culprit.
7. Backup Camera or Navigation System Interference
In some cases, a fault within the backup camera system or the navigation module can interfere with the broader infotainment system and prevent the screen from displaying properly. These components communicate with the head unit, and a serious fault in one of them can affect the entire system’s ability to boot up or display content.
If your screen issues started right after problems with your backup camera or navigation, this connection is worth investigating.
How to Fix a Dodge Charger Screen That Won’t Turn On
Step 1: Try a Soft Reset First
Before you do anything else, try this. It takes about 30 seconds and fixes the problem more often than you would expect.
A soft reset forces the UConnect system to shut down completely and restart fresh. Here is how to do it:
- Make sure the vehicle is running or at least in accessory mode with the ignition on.
- Press and hold the volume knob or the power button on the infotainment panel. On most Dodge Charger models, this is the volume knob on the left side of the center console screen. Hold it for 10 to 15 seconds.
- Release the button and wait. The screen may go completely dark for a moment before the UConnect boot screen appears.
- Give it 30 to 60 seconds to fully boot up before assuming it did not work.
If the screen comes back on, great. Drive on. But keep an eye on it. If it goes dark again within a few days, the soft reset was masking a deeper issue that needs to be addressed properly.
Here is a helpful walkthrough showing this process and some related troubleshooting steps:
Step 2: Check the Fuses
If the soft reset does not work, the next step is the fuse box. Here is how to check it properly:
- Turn the vehicle off before accessing the fuse box.
- Open your owner’s manual and locate the fuse diagram. Find the fuses labeled for the radio, UConnect, multimedia, or infotainment system. There may be more than one relevant fuse.
- Pull each relevant fuse using a fuse puller or a pair of needle-nose pliers. Look at the metal strip inside the transparent casing. A broken or burnt strip means the fuse is blown.
- Replace any blown fuses with new ones of the exact same amperage rating. The amperage is printed on the top of the fuse. Do not substitute a higher-rated fuse, as this eliminates the protection the fuse is meant to provide.
- If you are unsure whether a fuse is good or blown visually, use a multimeter set to continuity mode to test it. Touch one probe to each end of the fuse. A good fuse will show continuity. A blown fuse will not.
- Reconnect the fuse, start the vehicle, and check whether the screen comes on.
One important note: if you replace a fuse and it blows again almost immediately, there is an underlying electrical fault drawing too much current. Do not keep replacing fuses. Get the wiring and electrical system inspected by a professional to find and fix the short circuit first.
Step 3: Inspect and Address Battery Issues
Testing the battery takes about five minutes with a multimeter and can rule out or confirm this cause quickly:
- With the engine off, set your multimeter to DC voltage and touch the red probe to the positive battery terminal and the black probe to the negative terminal.
- A healthy battery should read 12.5 to 12.7 volts at rest. Below 12.0 volts indicates a discharged battery. Below 11.8 volts and the battery may be too far gone to recover reliably.
- Check the battery terminals for corrosion. A white or bluish-green powdery buildup on the terminals needs to be cleaned off. Use a mixture of baking soda and water, apply it to the terminals, let it bubble for a moment, scrub with a terminal brush or old toothbrush, rinse with a small amount of clean water, and dry thoroughly.
- Make sure the terminal clamps are tight and not able to wiggle on the battery posts. A loose clamp is functionally the same as a bad connection even if there is no visible corrosion.
- If the battery is discharged, try charging it with a battery charger and then testing the screen again. If the battery will not hold a charge or keeps dying, replace it.
Also have the alternator tested if you are replacing the battery. A failing alternator will drain a new battery just as fast as it drained the old one.
Step 4: Check the Wiring and Connections Behind the Head Unit
This step requires a bit more confidence and the right tools, but it is worth doing if the previous steps have not resolved the issue. Here is what to do:
- Remove the trim panel around the infotainment screen. On most Dodge Charger models, this can be done by carefully prying around the edges of the center console trim panel with a plastic trim removal tool. Work slowly and gently to avoid cracking the plastic.
- Once the trim is off, you will see the head unit mounted in the dash. It will have wiring harnesses plugged into the back of it.
- Without fully removing the head unit, check whether the harness connectors are fully seated. Push each one firmly until you feel it click. A connector that looks connected but is slightly misaligned or not fully seated is enough to cause problems.
- Look at the wiring harnesses themselves. Check for any wires that look pinched, chafed through their insulation, or show signs of heat damage. Check the connectors for corrosion or discolored pins.
- If you find corroded connectors, use electrical contact cleaner spray to clean the pins. Let it dry fully before reconnecting.
- Reassemble the trim panel and test the screen.
If you are not comfortable pulling the dash apart yourself, this is a reasonable job to take to an audio or electronics specialist who works on automotive infotainment systems.
Step 5: Update or Reset the UConnect Software
If the screen does come on but behaves erratically, freezes frequently, or the soft reset only provides a temporary fix, a software issue with UConnect is likely the cause. Here is how to address it:
Check for software updates:
- Visit the official Dodge or UConnect website and enter your vehicle’s VIN number to check whether a software update is available for your specific model and UConnect version.
- If an update is available, you can often download it to a USB drive and install it through the vehicle’s USB port. The instructions provided with the update file will walk you through the process step by step.
- Alternatively, a Dodge dealership can update the software for you, usually within an hour.
Perform a factory reset:
- Go into the UConnect settings menu if the screen is accessible at all.
- Look for “System,” “General Settings,” or “Reset” options.
- Select the factory reset or master reset option and confirm.
- Be aware that this will erase all your paired devices, saved radio stations, navigation history, and personalized settings. You will need to set everything up again from scratch.
Here is another helpful video that walks through UConnect troubleshooting on the Dodge Charger:
Step 6: Troubleshoot the Backup Camera and Navigation System
If the screen problem started around the same time you noticed backup camera or navigation issues, look at those systems specifically. A backup camera that has failed due to a damaged lens, water intrusion, or a wiring fault can sometimes cause the infotainment system to struggle with screen management.
- Inspect the backup camera lens at the rear of the vehicle for cracks, heavy dirt, or signs of moisture inside the camera housing.
- Check the wiring harness that runs from the camera to the head unit for any visible damage.
- Check for navigation software updates separately from the main UConnect system update, as the navigation module sometimes runs on independent software.
- If the camera or navigation system is damaged, having those components repaired or replaced may clear up the screen issues as well.
Step 7: Inspect or Replace the Head Unit
If every other step has been completed and the screen still will not turn on, the head unit itself may have failed. This is the last resort diagnosis because head unit replacement is one of the more expensive repairs in this list.
Before committing to a full replacement, have a professional confirm the diagnosis. An automotive electronics technician can test the head unit directly, verify whether it is receiving power and sending output signals, and confirm whether the unit is the problem or whether the issue is somewhere earlier in the circuit.
If replacement is confirmed as necessary, you have a few options:
- OEM replacement from the dealership: This ensures a factory-matched unit that integrates perfectly with your vehicle’s systems. It is the most expensive option but the most seamless.
- Remanufactured head unit: Several companies sell rebuilt OEM head units for significantly less than a new unit. These can be a good value, but verify the warranty and the seller’s reputation before purchasing.
- Aftermarket head unit: Aftermarket options are available at various price points and can offer expanded features, but compatibility with your Charger’s specific wiring harness and features like backup camera integration and UConnect functionality needs to be verified before purchasing.
Diagnosis at a Glance: Match Your Symptom to the Likely Cause
| Symptom | Most Likely Cause | First Fix to Try |
|---|---|---|
| Screen suddenly went black, no other issues | Software glitch or blown fuse | Soft reset, then check fuses |
| Screen flickers or cuts in and out before going dark | Loose wiring connection | Check and reseat wiring harnesses |
| Screen black, other electronics also behaving oddly | Weak or dead battery | Test and charge or replace battery |
| Screen was working, stopped after an update | Software bug from failed update | Factory reset or software reinstall |
| Fuse replaced, blew again immediately | Short circuit in wiring | Professional electrical diagnosis |
| Screen black, no response to soft reset or fuse swap | Head unit failure | Professional diagnosis, possible replacement |
| Screen issues started with backup camera problems | Camera fault affecting head unit | Inspect and repair backup camera system |
What Does It Cost to Fix a Dodge Charger Screen That Won’t Turn On?
| Repair | Estimated Cost |
|---|---|
| Soft reset | Free |
| Fuse replacement | $1 to $10 |
| Battery replacement | $100 to $200 |
| Battery terminal cleaning | Free to $30 (DIY) |
| UConnect software update (dealer) | $50 to $150 |
| Wiring repair | $100 to $400 |
| Backup camera repair or replacement | $100 to $350 |
| Head unit replacement (OEM, dealer) | $800 to $1,500+ |
| Head unit replacement (remanufactured) | $300 to $700 |
Working through the free and inexpensive fixes first is always the right approach. A large percentage of Dodge Charger screen issues are resolved at the soft reset or fuse replacement stage. Do not skip to head unit replacement without ruling out the simpler causes first.
Preventing This Problem From Coming Back
Once you have the screen working again, a few habits can help keep it that way:
- Keep the UConnect software updated. Dodge periodically releases software patches that fix known bugs and stability issues. Staying current reduces the chance of software-related screen failures.
- Maintain the battery. Have it tested annually, especially after the three-year mark. A battery that is starting to fail stresses all the vehicle’s electronics, including the infotainment system.
- Address water leaks immediately. If you notice any signs of water intrusion into the cabin, whether through the windshield, door seals, or sunroof drains, fix it before it reaches the wiring harnesses behind the dash.
- Do not ignore intermittent screen behavior. A screen that occasionally flickers or briefly goes dark is telling you something is starting to fail. Chasing that problem while it is still intermittent is much easier and cheaper than waiting until it fails completely.
A black screen on your Dodge Charger is annoying, but it is almost always fixable. Start with the soft reset, work through the fuses and battery, and if you are still stuck, move to the wiring and professional diagnosis. Nine times out of ten, you will find the answer before you ever need to replace the head unit.