You shift into reverse, start backing out of a parking space, and nothing. No beeps, no tone, no warning that the shopping cart behind you is about to introduce itself to your bumper. Your reverse parking sensors have gone quiet, and you are left wondering whether to trust your mirrors or just hope for the best.
Parking sensors that stop beeping are a common problem, and the good news is that most causes are straightforward to identify and fix. Some you can handle in your driveway in under 10 minutes. Others might need a professional, but even then, knowing what is actually wrong helps you avoid getting overcharged for a repair that did not need to happen.
Table of Contents
This guide walks through every possible reason your reverse parking sensors have gone silent, how to diagnose which one applies to your situation, and what to do about it.
How Reverse Parking Sensors Work
Before jumping into causes, a quick understanding of the system helps with diagnosis.
Reverse parking sensors use ultrasonic technology. Each sensor embedded in your rear bumper emits a high-frequency sound wave that is beyond the range of human hearing. When that wave hits an object behind the vehicle, it bounces back to the sensor. The system calculates how long it took for the wave to return, converts that into a distance measurement, and triggers an audible alert, the beeping you normally hear, based on how close the object is.
The system activates automatically when you put the vehicle into reverse, and the beep frequency typically increases as you get closer to an obstacle. At very close range, many systems produce a continuous tone rather than individual beeps.
For this to work, several things have to be in order: the sensors need clean, unobstructed faces to send and receive signals, the wiring connecting them to the control module has to be intact, the control module itself has to be functioning, and the audio output device has to be working. A failure anywhere in that chain can result in no beeping.
Every Reason Your Reverse Parking Sensor Is Not Beeping
1. Dirty or Obstructed Sensors
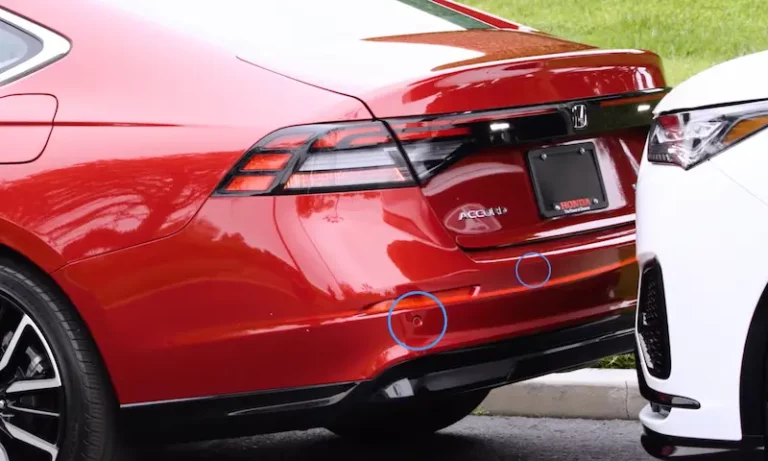
This is the most common cause by a significant margin, and it is also the easiest to fix. The sensor faces in your rear bumper need to be clean and clear to transmit and receive their ultrasonic signals. Anything covering them, whether it is dried mud, road grime, ice, snow, thick wax, or even insect residue, interferes with the signal and can cause the system to malfunction or go completely silent.
This problem is most noticeable after driving on muddy roads, after a winter storm that left ice buildup in the bumper area, or after a professional car wash where wax was applied to the bumper. Winter is particularly notorious for this because slush and road salt can form a crusty layer over the sensor faces that is not immediately obvious at a glance.
One thing many people overlook: if your bumper was recently repainted or repaired after a minor collision, the sensor faces may have been coated with paint or body filler during the process. Ultrasonic signals cannot pass through paint that is thicker than the original factory application. If the sensors stopped working shortly after bumper work was done, this is almost certainly why.
2. The System Has Been Turned Off
Many vehicles have a button or menu option that allows the driver to disable the parking sensor system. If someone else drove your vehicle recently, or if you accidentally pressed the parking sensor button while adjusting something else on the center console, the system may simply be switched off rather than faulty.
Check your dashboard for a parking sensor button, often marked with a car icon and sensor lines. If it is illuminated in a way that indicates it is off, press it to re-enable the system. Your vehicle’s owner’s manual will confirm the exact location and how to verify the system status.
3. A Blown Fuse
The parking sensor system is powered through a fuse in your vehicle’s fuse box. A blown fuse cuts power to the entire system, which means no signals from the sensors and no beeping from the speaker. This can happen from a power surge, a short circuit in the system, or simply age and electrical fatigue.
The advantage of a blown fuse as the cause is that it affects the entire system at once. If your parking sensors stopped working completely with no intermittent behavior beforehand, a blown fuse is a strong candidate to check early.
4. A Failed Individual Sensor
The sensors themselves are physical components that can fail. They are exposed to road debris, moisture, temperature extremes, and physical impacts every time you drive. A sensor that has cracked its housing, corroded internally, or suffered a direct impact from a minor parking bump can fail and stop transmitting.
When a single sensor fails in a system with multiple sensors, the behavior depends on the system design. Some vehicles will continue to operate the remaining sensors and alert you with a fault warning on the dashboard. Others will disable the entire system when they detect that one sensor is not responding correctly. Either way, a failed sensor needs to be replaced to restore full system function.
5. Wiring or Connection Problems
Each parking sensor connects to the vehicle’s wiring harness through a small electrical connector. Over time, these connectors can corrode, especially in climates where road salt is common. They can also loosen from vibration or become damaged if the bumper has been removed and reinstalled during previous repairs.
Wiring damage along the harness itself is also possible. The harness runs through the bumper area and can be chafed by sharp edges, pinched during bumper repairs, or damaged by rodents in vehicles parked in garages or rural areas. A wire with intermittent contact will produce inconsistent sensor behavior, and a completely severed wire will take one or more sensors offline entirely.
6. Faulty Control Module or Parking Aid Module
The parking sensor system is managed by a control module, sometimes called the Parking Aid Module (PAM) depending on the vehicle manufacturer. This module receives data from all the sensors, processes the distance calculations, and sends the appropriate beep signal to the speaker. When the module fails, the whole system goes down regardless of whether the sensors themselves are working.
Module failures are less common than sensor or wiring failures, but they do happen, particularly on higher-mileage vehicles or those that have experienced water damage in the cabin area where the module may be located. Module faults often store diagnostic trouble codes that can be retrieved with an OBD scanner.
7. Speaker or Buzzer Failure
Here is a cause that is easy to overlook. The beeping sound that you hear from your parking sensors comes from a dedicated speaker or buzzer, often mounted inside the cabin near the dashboard or A-pillar area. If this speaker fails, the sensors may be functioning perfectly and detecting obstacles accurately, but you will never hear any alert because the audio output is broken.
A failed speaker or buzzer is worth considering if you have recently had interior work done on the vehicle, if you noticed the sound quality of the parking sensor alerts gradually deteriorating before they stopped, or if on a scan tool the system shows the sensors are active but no audible alert is produced.
8. Incorrect Sensor Installation or Alignment
If the parking sensor system is aftermarket and was recently installed, or if the bumper and sensors were reinstalled after a repair, incorrect installation can cause the system to malfunction. Sensors that are mounted at the wrong angle will not send and receive their ultrasonic signals in the correct detection zone. Sensors that are not making solid contact with the wiring harness connectors will not transmit data to the module.
Some aftermarket sensor kits also require specific spacing and positioning relative to the ground and the bumper edge. If the installation did not follow the manufacturer’s specifications, the sensors may appear to be installed correctly but are actually aimed incorrectly for reliable obstacle detection.
9. Environmental Interference
Ultrasonic sensors are occasionally affected by environmental conditions. Very heavy rain, thick snow falling directly toward the rear of the vehicle, or even heavy exhaust condensation in extremely cold temperatures can sometimes cause the system to behave erratically or produce continuous false alerts. In response to too many false readings, some systems may temporarily mute themselves or go into a fault state.
If your sensors stopped beeping during a specific weather event and resumed working normally afterward, environmental interference is the likely explanation rather than a component failure.
How to Diagnose Why Your Reverse Parking Sensors Stopped Beeping
Work through these steps in order. Start with the free and simple checks before moving to the more involved diagnostics.
Step 1: Verify the System Is Turned On
Check the parking sensor button on your console or dashboard. Verify through the vehicle’s settings menu if applicable. Confirm that the system activates when you shift into reverse by listening for any startup tone the system produces when it initializes. Many parking sensor systems emit a brief beep or tone when reverse gear is engaged, even before any obstacle is detected. If you hear that startup tone, the system is powered and active.
Step 2: Clean the Sensors
Inspect the sensor faces in the rear bumper. Get close and look at each one. They should be clean and have no coating of dirt, mud, ice, wax, or paint. Here is how to clean them properly:
- Use a soft cloth or microfiber towel dampened with warm soapy water. Mild dish soap works fine.
- Gently wipe each sensor face in a circular motion. Do not scrub hard or use abrasive cloths, as this can scratch the sensor surface.
- For ice buildup, use warm water carefully poured over the sensor area. Do not use boiling water on plastic bumper components.
- For hardened mud or road grime, let the soapy water soak for a minute before wiping.
- Dry the area with a clean cloth when done.
- Test the system by reversing toward a known obstacle at a safe, controlled distance.
If the system works after cleaning, you have found your cause. Make a habit of including the sensor faces in your regular car washing routine to prevent the issue from recurring.
Step 3: Check the Fuse
- Turn the vehicle off before accessing the fuse box.
- Locate the fuse box using your owner’s manual. Most vehicles have at least one in the engine compartment and one inside the cabin.
- Use the fuse diagram on the fuse box cover or in the manual to find the fuse labeled for parking sensors, parking aid, object detection, or similar.
- Remove the fuse using a fuse puller or needle-nose pliers and inspect it. A blown fuse will have a visibly broken metal strip inside the transparent casing.
- If the fuse is blown, replace it with a new one of the exact same amperage. The rating is printed on top of the fuse.
- Retest the system.
If the new fuse blows immediately or soon after replacement, there is a short circuit somewhere in the system. Stop replacing fuses and have the wiring inspected. Repeatedly replacing a fuse without addressing the underlying cause can create additional electrical damage.
Step 4: Test the Individual Sensors
A functioning ultrasonic sensor makes a faint clicking or ticking sound as it emits its pulses. This is too quiet to hear normally but can be detected by placing a finger lightly against the sensor face while the system is active (vehicle in reverse). Here is how to test them:
- Start the engine and shift into reverse to activate the parking sensor system.
- Carefully and safely, with the vehicle stationary and the parking brake on, touch each sensor face lightly with a fingertip. A working sensor will produce a barely perceptible vibration or clicking sensation. A completely inactive sensor will feel completely still.
- Alternatively, use a mechanic’s stethoscope placed against the bumper near each sensor to amplify the clicking sound of an active sensor.
- If one or more sensors produce no vibration or sound while others do, those silent sensors are likely failed or not receiving power.
Step 5: Inspect the Wiring and Connectors
Access the back side of the bumper by partially removing the bumper liner or trim panel. This varies by vehicle, but on most cars it involves removing a few plastic push-pin fasteners that secure the bumper liner inside the wheel well area.
Once you have access, look at each sensor’s connector:
- Is the connector fully seated? Push each one firmly to confirm it is locked in place.
- Are there any green or white powdery deposits inside the connector indicating corrosion? Clean with electrical contact cleaner if present.
- Look at the wiring harness as it routes from the sensors toward the vehicle body. Look for any sections where the wire insulation has been worn through, pinched, or cut.
Repair any damaged wiring using proper automotive-grade connectors and heat-shrink tubing. Do not use twist-and-tape repairs in areas exposed to moisture and vibration.
Step 6: Use an OBD Scanner to Read Fault Codes
A quality OBD-II scan tool that can access manufacturer-specific systems (not just generic engine codes) can communicate with the Parking Aid Module and retrieve fault codes stored by the system. These codes will point directly to which sensor is faulted, whether there is a wiring issue, or whether the module itself has logged an internal fault.
Generic OBD scanners found at parts stores often cannot access parking system modules. You may need a vehicle-specific scanner or a shop with professional diagnostic equipment for this step. Dealerships can access these codes, and many independent shops that specialize in your vehicle’s brand will also have the necessary tools.
How to Fix Reverse Parking Sensors That Are Not Beeping
Fix 1: Clean the Sensor Faces
Covered in the diagnosis section above. This is the fix for dirty or obstructed sensors and takes under five minutes. If paint or body filler from a bumper repair is covering the sensor faces, that needs to be addressed by having the sensors carefully masked during any future bumper repair work, or by having a body shop clean the sensor areas down to the correct depth.
Fix 2: Replace the Blown Fuse
Replace with a new fuse of the exact correct amperage. Verify the system works afterward. If the fuse blows again, stop and investigate the wiring for a short circuit before replacing another fuse.
Fix 3: Replace Failed Sensors
Replacing a parking sensor is a job most confident DIYers can handle. Here is the general process:
- Purchase a replacement sensor that matches your vehicle’s make, model, and year. OEM sensors are the safest choice for guaranteed fit and compatibility. Aftermarket sensors can work but verify compatibility carefully before purchasing.
- If the sensors are color-matched to your bumper, you will need to either buy a pre-painted sensor in your color code or have the new sensor painted before installation.
- Access the back of the bumper by removing the bumper liner or partially dropping the bumper. The specific access method varies by vehicle, so consult your service manual or a model-specific forum for guidance.
- Disconnect the wiring connector from the old sensor by pressing the release tab and pulling the connector free.
- Remove the old sensor from its bezel. Most sensors twist out counterclockwise. Some push through from the front with a retaining clip at the back.
- Install the new sensor into the bezel and rotate or snap it into place.
- Reconnect the wiring connector until it clicks securely.
- Reinstall any trim or liner panels removed for access.
- Test the system by reversing toward an obstacle.
Fix 4: Repair the Wiring
Corroded connectors should be cleaned with electrical contact cleaner and inspected for bent or damaged pins. Connectors with severely corroded pins should be replaced rather than cleaned, as corrosion inside the pin terminals can return quickly.
Damaged wiring should be repaired by splicing in new wire of the correct gauge using proper butt connectors or solder-and-heat-shrink connections. If a significant section of the harness is damaged, a wiring harness repair kit or a replacement section of harness from a salvage yard may be the better approach.
Fix 5: Reset or Replace the Parking Aid Module
Some parking system faults can be cleared with a module reset, which can be performed either through a scan tool or by disconnecting the vehicle battery for 10 to 15 minutes and allowing the module to cycle off completely before reconnecting.
If the module has physically failed, replacement is necessary. Module replacement on most vehicles requires programming to the vehicle’s VIN and configuration, which typically needs to be done at a dealership or a shop with the appropriate programming software. A replacement module that is not programmed to the vehicle will not function.
Fix 6: Replace the Parking Sensor Speaker or Buzzer
If diagnosis confirms the sensors and module are working but no sound is produced, the speaker or buzzer is the likely culprit. The location of the parking sensor speaker varies by vehicle, but it is typically inside the cabin, often near the dashboard or in the trunk or cargo area. Replacement is usually straightforward once the speaker is located, though getting to it may require removing some trim panels.
Choosing Aftermarket Sensors: What to Know Before You Buy
If you are replacing sensors and want to save money with aftermarket options, here are the key things to verify before purchasing:
- Compatibility: Confirm the sensor matches your specific vehicle make, model, and year. Sensors from different manufacturers have different connector types and signal characteristics.
- Frequency matching: Parking sensors operate at specific ultrasonic frequencies, typically 40 to 48 kHz. Mixing sensors of different frequencies within the same system can cause unreliable operation.
- Color matching: If your sensors are painted to match your bumper, check whether the aftermarket sensor comes pre-painted in your color code or needs to be painted separately.
- Brand reputation: Cheap, unknown-brand sensors from online marketplaces frequently fail quickly or never work correctly. Stick to established aftermarket brands with genuine reviews from your vehicle community.
Maintenance Tips to Prevent Future Sensor Problems
- Include the bumper sensor areas in your regular car wash routine. Dirty sensors are the leading cause of parking sensor problems and are entirely preventable.
- Inspect the sensor bezels after any bumper repair. Confirm they are properly seated and the sensors are not being squeezed or grounded out against the bumper structure.
- Avoid high-pressure washing directly at the sensor faces at close range. The sensors are designed for normal road moisture, not a pressure washer at 12 inches.
- Apply a water-displacing product to the sensor housings periodically to help repel moisture from the connectors and slow corrosion.
- If your vehicle is parked outdoors in winter, check the sensor faces before reversing in situations where ice or snow buildup is possible.
How Much Does It Cost to Fix Reverse Parking Sensors?
| Repair | Estimated Cost |
|---|---|
| Sensor cleaning | Free (DIY) |
| Fuse replacement | $1 to $10 |
| Single sensor replacement (OEM part) | $30 to $100 for the part |
| Single sensor replacement (shop labor) | $50 to $150 additional |
| Full set of 4 sensors (aftermarket kit) | $50 to $200 |
| Wiring repair | $75 to $300 depending on extent |
| Parking aid module replacement and programming | $200 to $600+ |
| Speaker or buzzer replacement | $30 to $100 (part and basic labor) |
Reverse parking sensors that have stopped beeping are almost always fixable without replacing the entire system. The overwhelming majority of cases are caused by dirty sensors or a single failed sensor, both of which are inexpensive repairs. Work through the diagnosis in order, start with the free checks, and you will almost certainly find the cause before you reach anything complicated or expensive.
A parking sensor system that you cannot trust is worse than no system at all, because you might assume it is working when it is not. Get it properly diagnosed and repaired, and you can park with confidence again.