
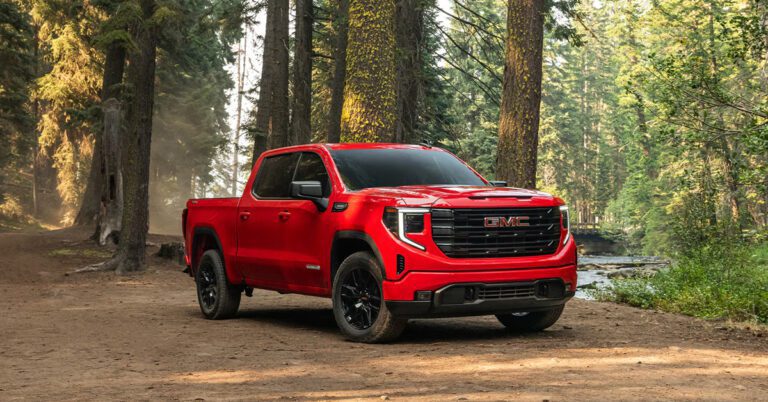
Ninety five degrees outside, you slide into your Sierra, crank the AC to max, and wait for that blast of cold relief. Instead you get lukewarm air, or worse, nothing but the sound of the blower motor working hard for absolutely no reward. If this sounds familiar, you are far from alone.
GMC Sierra trucks earn their reputation as dependable workhorses. Tow heavy loads, haul lumber, survive a decade of daily driving, no problem. But the air conditioning system? That is where a surprising number of these trucks develop a consistent, well-documented weak spot. Owners across multiple model years report strikingly similar complaints, which tells you something important: these are not random flukes, they are patterns.
This guide walks through the most common AC failures Sierra owners run into, what actually causes each one, roughly what repairs cost, and which fixes you can tackle yourself versus which ones deserve a trip to a shop. Grab a cold drink while you still can, because we are about to get into it.
Why the Sierra’s AC System Has a Reputation Problem
Before diving into specific failures, it helps to understand why this issue keeps popping up across forums, YouTube comment sections, and even class action lawsuits. GM builds a genuinely solid truck platform, yet certain AC components seem to have been designed with cost savings in mind rather than long-term durability.
The condenser is the biggest offender, but it is far from the only one. Blend door actuators, blower resistors, compressor clutches, and even climate control software have all shown up repeatedly in owner complaints. Even so, most of these problems share one thing in common: they are diagnosable, and many are fixable without draining your bank account.
The Condenser Leak Epidemic That Plagued 2014 to 2019 Models
If there is one AC problem that defines the Sierra’s reputation, it is the condenser leak issue affecting 2014 through 2019 trucks. This is not a minor complaint buried in a forum somewhere. It became such a widespread issue that GM issued Special Coverage Adjustment 17336 to address it, though plenty of Sierra owners found themselves excluded from that coverage entirely.
What Actually Fails and Why
The condenser in these trucks tends to develop leaks right at the welded joints, with the right vertical weld being the single most common failure point. Over time, vibration, temperature cycling, and road debris impact wear down these welds until refrigerant starts seeping out.
Here is a genuinely useful trick for spotting this early. Look through your front grille at the condenser itself. Oil staining around the weld points is a dead giveaway, since refrigerant oil leaks alongside the refrigerant gas and leaves a visible residue behind.
Watch for these symptoms as the leak progresses:
- Cooling performance that gets gradually worse over weeks or months, not all at once.
- Eventually, a complete loss of cold air despite the system running normally.
- Needing refrigerant recharges more and more frequently, sometimes every few months.
Plenty of owners have documented this exact failure pattern in detail online, showing almost identical leak points across completely different trucks. That kind of consistency is rarely a coincidence in the automotive world.
What Fixing It Actually Costs
Here is the part that stings. Condenser replacement typically runs between $820 and $1,250, depending on whether you go with an original equipment part or a quality aftermarket alternative. Some owners have actually had better luck with aftermarket condensers that feature improved weld designs specifically meant to avoid repeating GM’s original mistake.
In the real world, this means a truck just outside its warranty window can suddenly need over a thousand dollars in AC repair, which explains a good chunk of the owner frustration surrounding this issue. It is also exactly why the class action lawsuit mentioned later in this guide gained so much traction.
Blend Door Actuator Failures: That Annoying Clicking Sound Explained
Hear a clicking or grinding noise coming from somewhere behind your dashboard whenever you adjust the temperature dial? That is almost certainly a blend door actuator on its way out. These small plastic motors control which direction air flows, either through the heater core for warm air or around it for cold air.
How to Recognize This Failure
- Repeated clicking noises specifically when you change the temperature setting.
- One side of the cabin blows cold while the other stays stubbornly warm.
- Temperature controls that seem to have a mind of their own, adjusting on their own or ignoring your input entirely.
- Inconsistent operation where the AC works fine one drive and misbehaves the next.
The root cause almost always comes down to broken plastic gear teeth inside the actuator housing. These gears are small, made of relatively brittle plastic, and simply wear down over years of use, particularly in trucks that experience extreme heat or cold on a regular basis.
Repair Costs and DIY Potential
Professional replacement runs $200 to $500, but here is the good news: the actual parts only cost $45 to $75. That price gap makes this one of the more appealing DIY repairs on this entire list. If your Sierra has dual-zone climate control, keep in mind you might be dealing with multiple actuators, so a failure on one side does not rule out a second failure down the road.
The replacement process does require some dashboard disassembly, but it is well within reach of a moderately confident home mechanic with a Saturday afternoon free and a good repair guide open on their phone.
AC Compressor Clutch Problems: When the Compressor Simply Will Not Engage
Your AC compressor relies on an electromagnetic clutch to connect it to the engine’s power whenever you flip the AC switch. When that clutch fails, the compressor never engages, and no engagement means no compression, and no compression means no cold air, period.
Signs Your Clutch Is the Problem
- The compressor simply does not engage at all when you turn on the AC.
- The pulley spins freely but the clutch slips or cycles on and off unpredictably.
- No cold air despite confirming your refrigerant levels are perfectly adequate.
- Grinding or squealing noises coming from the front of the engine bay.
According to this detailed breakdown of common clutch failures, the usual suspects include worn clutch plates that can no longer make proper contact, a failed electromagnetic coil, or electrical faults preventing the clutch from receiving the signal to engage in the first place.

The Silver Lining Here
Replacing just the clutch, rather than the entire compressor assembly, typically runs $200 to $400. That is a meaningful savings compared to a full compressor swap, and plenty of Sierra owners have successfully gone this route rather than replacing the whole unit, saving hundreds of dollars in the process while still resolving the issue completely.
The Simplest Fix You Are Probably Overlooking: Your Cabin Air Filter
Before you assume the worst, check the cheapest and easiest thing first. A clogged cabin air filter is one of the most overlooked causes of weak AC performance, and it is also the easiest one to fix.
Here is what a dirty filter actually does to your system:
- Increases vent temperatures by roughly 3 to 5 degrees compared to a clean filter.
- Reduces overall airflow through every vent in the cabin.
- Forces your blower motor to work harder than it should, which shortens its lifespan considerably.
- Creates musty odors as trapped debris and moisture build up inside the housing.
Sierra owners should replace this filter every 12,000 to 15,000 miles, or once a year at minimum. Parts cost between $15 and $30, making this by far the most cost-effective piece of AC maintenance available to you. Some owners have reported an immediate, noticeable improvement in cooling the moment they swapped out a severely clogged filter, sometimes within minutes of finishing the job.
Blower Motor and Resistor Trouble: When the Fan Just Will Not Cooperate
If the AC seems to be running fine but no air actually comes through the vents, or if your fan only works on one specific speed, the blower motor or its resistor is likely the culprit.
Common Symptoms
- Zero airflow from any vent despite the system technically running.
- Limited fan speeds, often with only the highest or lowest setting working.
- Excessive noise coming specifically from the blower motor area.
- Unusual rattling or grinding sounds caused by debris that has worked its way into the housing.
The blower resistor is responsible for stepping down power to control fan speed. When it fails, you typically lose every speed except the highest one, since that speed often bypasses the resistor entirely. According to this resistor replacement walkthrough, swapping this part costs between $50 and $150, while a full motor replacement runs $200 to $400.

The resistor is usually tucked behind the glove box, making it fairly accessible for DIY work. The blower motor replacement process requires a bit more disassembly, but it still falls comfortably within reach of most home mechanics willing to follow a step-by-step video.

Electrical Faults Worth Ruling Out Before Spending Big
Here is a mistake plenty of Sierra owners make. They jump straight to assuming a major mechanical failure when the actual problem is something as small and cheap as a blown fuse. Before authorizing any expensive repair, check these electrical components first.
Where to Start Looking
- Fuses numbered 35, 52, 55, 56, and 57, along with relays 67 and 68 depending on your specific model year.
- AC pressure switches, which can prevent compressor operation entirely if they detect abnormal pressure readings.
- Climate control sensors and control modules that interpret your dash inputs.
- Drive belt condition, since a slipping or damaged belt can trigger an automatic AC shutdown as a protective measure.
A surprising number of AC complaints trace back to nothing more than a blown fuse or a tired relay. Before spending hundreds of dollars chasing a phantom compressor problem, take five minutes to check your fuses and relays and rule out the simple stuff first.

Refrigerant Leaks Beyond the Condenser
The condenser gets most of the attention, and rightfully so given how common those leaks are, but it is far from the only spot where refrigerant can escape your system.
Other Places Leaks Commonly Hide
- Schrader valve cores located at the service ports.
- O-rings positioned at various line connections throughout the system.
- The evaporator core, which unfortunately requires dashboard removal to access directly.
- Compressor seals, particularly on higher mileage trucks.
How Professionals Actually Track Down Leaks
- Pressure testing the system to identify whether pressure readings fall within normal range.
- Injecting UV dye into the system, then using a blacklight to trace exactly where refrigerant is escaping.
- Bubble testing suspect areas using simple soapy water, which reveals leaks through visible bubbling.
Plenty of Sierra owners have discovered leak sources they never expected simply by using UV dye and a blacklight. This method catches leaks that a plain visual inspection would completely miss, especially ones hiding behind hoses or tucked into hard to see connection points.
Know Your Model Year: AC Problems Vary Quite a Bit Across Generations
Not every Sierra suffers from the exact same AC problem. The specific failure you are likely to encounter shifts depending on which generation your truck belongs to.
2014 to 2019 Models
- Condenser leaks stand out as the primary concern, as covered extensively above.
- Blend door actuator failures show up frequently as well.
- Some trucks fall under GM Special Coverage 17336, though many owners were left without that protection.
Owners of these model years have expressed real frustration, particularly those whose condensers failed just outside the warranty window. The issue grew serious enough to spark class action litigation, with judges ruling against GM in certain proceedings related to this exact defect.
2007 to 2013 Models
- Blend door actuator problems are especially prevalent in this generation.
- Blower resistor failures happen more often compared to newer trucks.
- Compressor clutch issues show up with noticeable frequency as well.
Owners of these older trucks frequently report blend door actuator trouble as the plastic components become brittle with age. This happens even in trucks that received consistent, careful maintenance throughout their life, which tells you this is more of a design and materials issue than a neglect issue.
2020 and Newer Models
- Dual-zone climate control actuators cause a fair share of complaints.
- Software-related HVAC glitches occasionally require a full system reset to resolve.
- Ice formation at the passenger side vents, which points to a blend door stuck in the wrong position.
Newer Sierra owners report a different flavor of problem entirely, one rooted in software rather than pure mechanical wear. Some of these glitches resolve simply through disconnecting the battery for a few minutes, essentially forcing the climate control module to reboot. These trucks run considerably more complex electronic climate systems, and complexity always comes with its own set of quirks.
A Quick Diagnostic Sequence to Follow Before You Spend a Dime
When your AC starts acting up, work through these steps in order rather than jumping straight to the most expensive assumption.
- Check the basic electrical components first. Fuses, relays, and connections take just minutes to verify and cost nothing to check.
- Test system pressure. Low pressure points toward a leak somewhere in the system, while unusually high pressure suggests a blockage.
- Listen carefully for unusual noises. Different sounds point toward different failures:
- Clicking generally means a blend door actuator.
- Grinding usually points to the compressor clutch.
- Squealing often traces back to belt issues.
- Inspect your cabin air filter. A clogged filter drastically reduces performance and takes seconds to check.
- Look for visible leak signs. Oil stains around fittings or dye traces under a blacklight point directly to leak locations.
- Verify airflow from every vent. Uneven airflow between sides of the cabin strongly suggests a blend door problem.
Quick Reference: Symptoms and Likely Causes
| Symptom | Most Likely Cause | Secondary Cause | Difficulty to Fix |
|---|---|---|---|
| No cold air at all | Low refrigerant | Compressor clutch failure | Moderate |
| Cold air on one side only | Blend door actuator | Dual zone control module | Moderate |
| Clicking noises from dash | Blend door actuator | None | Easy to moderate |
| No airflow whatsoever | Blower motor or resistor | Cabin air filter | Easy |
| Intermittent cooling | Electrical fault | Pressure switch | Easy to moderate |
| Gradual loss of cooling over time | Condenser leak | Other refrigerant leak | Moderate to difficult |
Preventative Habits That Actually Extend AC Life
A little consistent maintenance goes a surprisingly long way toward keeping your Sierra’s AC system healthy for years rather than months. None of this takes much time or money.
- Replace your cabin air filter annually, or every 12,000 to 15,000 miles, whichever comes first.
- Run the AC for at least 10 minutes weekly, even during the winter months.
- Address unusual noises the moment you notice them rather than hoping they go away on their own.
- Pay attention to gradual cooling loss, since that pattern almost always signals a slow leak rather than a sudden failure.
- Have refrigerant levels checked during your routine maintenance visits.
Here’s the thing about running your AC in winter: it sounds counterintuitive, but regular operation keeps internal seals lubricated and prevents them from drying out and cracking. The compressor genuinely needs consistent use to stay healthy, the same way an engine that sits unused for months develops its own set of problems.
Worth Considering: Upgrades for Owners in Extreme Climates
If you live somewhere brutally hot, or if you have already dealt with repeat AC failures on the same truck, a few upgrades beyond factory specification might be worth the investment.
- Higher-quality aftermarket condensers built with improved weld designs that address GM’s original weak point.
- Upgraded compressor clutch assemblies featuring reinforced components built to handle more stress over time.
- Premium cabin air filters with activated charcoal, which improve air quality alongside standard filtration.
- Supplemental cooling fans aimed at the condenser for trucks regularly driven in extreme heat.
These modifications go beyond what GM originally specified, but plenty of Sierra owners in places like Arizona, Texas, and Nevada consider them practically necessary rather than optional. When ambient temperatures regularly climb past 100 degrees, factory-spec cooling sometimes just is not enough margin for comfort.
Frequently Asked Questions
Is it safe to keep driving with a slow condenser leak?
Yes, driving remains safe, but running the AC system low on refrigerant for extended periods can accelerate compressor wear. It is better to address a confirmed leak sooner rather than waiting until cooling disappears entirely.
How can I tell if my Sierra falls under GM’s special coverage for condenser issues?
Contact your local GMC dealership with your VIN in hand. Coverage eligibility depends on specific production dates and regions, so a dealer can confirm your truck’s status directly.
Can a bad blend door actuator damage other parts of my AC system?
Generally no, since the actuator only controls airflow direction rather than refrigerant flow. That said, ignoring the clicking noise for too long can eventually cause the actuator to fail completely, leaving you stuck on one temperature setting.
Why does my AC work fine some days and not others?
Intermittent performance usually points toward an electrical connection issue or a failing pressure switch rather than a straightforward mechanical failure. Start your diagnostic process with the fuses and relays covered earlier in this guide.
A GMC Sierra with a healthy AC system makes summer driving genuinely enjoyable instead of something you white-knuckle through with the windows down and sweat on your brow. Work through the diagnostic steps in order, address small issues before they snowball into expensive ones, and do not ignore that clicking sound just because it seems minor. Your future self, sweating through another July commute, will thank you for taking care of it now.