You jump into your Mini Cooper, twist the key or press the start button, and reach for the radio. Nothing. Dead silence from the speakers. The screen might be blank, the buttons might be completely unresponsive, or the radio could power on but deliver nothing but static. Either way, a quiet cabin in a car that is supposed to be fun to drive is its own special kind of frustrating.
Mini Cooper radios have a reputation for being a bit temperamental. If you browse any Mini owner forum for more than five minutes, you will find threads full of people asking why their head unit went dark, why they cannot get FM reception, or why their buttons stopped responding after a battery swap. You are not imagining things, and you are definitely not alone. The good news is that most of these issues have clear causes and straightforward fixes, many of which you can handle yourself before ever calling a shop.
Table of Contents
Let us walk through everything, from the quick checks you can do in your driveway to the deeper diagnosis that might point toward a head unit replacement. By the end of this, you will know exactly where to look and what to do.
Why Your Mini Cooper Radio Stopped Working: The Full Picture
The radio in a Mini Cooper is not just a standalone device sitting behind the dashboard. It is integrated into the vehicle’s electrical architecture, connected to the battery, the fuse panel, the wiring harness, the antenna circuit, and in newer models, the car’s CAN bus communication network. That means when something goes wrong, the problem could originate from any one of several interconnected systems. Treating the radio as an isolated component is the fastest way to chase the wrong fix and waste money on parts you did not need.
The most common culprits fall into a handful of categories. A power delivery problem, a blown fuse, a wiring issue, a head unit failure, or a signal reception problem. Some of these take five minutes to check. Others require removing trim panels and pulling the head unit. Starting with the simplest possibilities and working toward the more complex ones is always the right approach. Mechanics call this systematic diagnosis. You might call it not buying a new radio when the real issue was a two-dollar fuse.
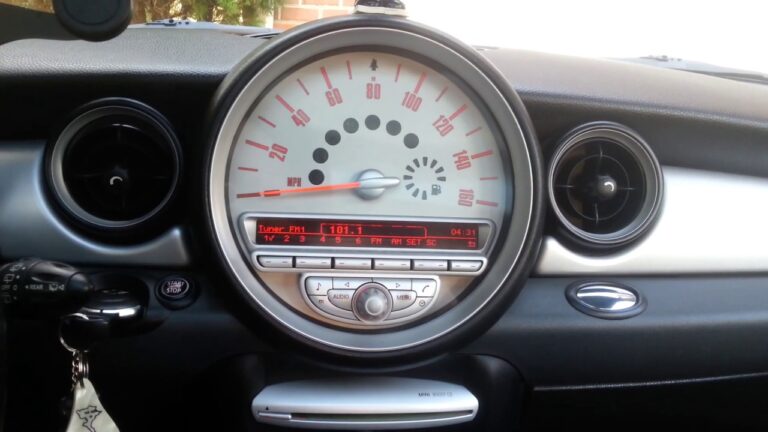
Power Problems That Kill the Radio Before a Note Plays
The radio needs a clean, stable supply of voltage to operate. It typically draws power from two sources. One is a constant live feed from the battery that maintains memory settings and the security code. The other is a switched feed that comes on with the ignition, activating the radio when you start the car. If either of these feeds is interrupted or drops below the minimum voltage threshold, the radio will not work.
Start with the most obvious check. Press and hold the power button for a few seconds rather than just tapping it. Some Mini Cooper radios have a delayed response when the system wakes up cold or after a voltage event. If the button itself feels sticky, mushy, or does not spring back properly, the button mechanism itself could be faulty. This is surprisingly common on high-mileage Mini Coopers where the button contacts wear out or accumulate grime underneath.
The battery is the next place to look. A Mini Cooper battery that is dropping below 12 volts at rest will struggle to keep the radio operational. The car might start just fine but deliver inconsistent voltage to accessory circuits. This is especially noticeable in cold weather when battery performance degrades. Grab a multimeter and put it across the battery terminals with the engine off. You want to see 12.4 volts or higher. Start the engine and check again. A healthy charging system should put out between 13.7 and 14.7 volts. Anything consistently lower points to a failing battery or a struggling alternator.
The alternator is worth its own conversation. On a Mini Cooper, the alternator keeps the battery topped up while the engine runs. If the alternator output is low, the battery drains during driving. The vehicle prioritizes power to critical systems and can cut power to accessories like the radio. A failing alternator often announces itself with flickering interior lights at idle, a battery warning light on the dashboard, or a radio that cuts in and out during driving but works fine at startup. Test the alternator output with a multimeter or have it load-tested at a parts store while the engine is running.
The Fuse Box Is Your First Real Diagnosis Checkpoint
Before you remove a single trim panel or touch the head unit, check the fuses. A blown fuse is the simplest and cheapest fix in automotive electronics, and it causes the same dead radio symptom as a completely failed head unit. Skipping this step and jumping straight to a head unit replacement is an expensive mistake that happens more often than you would believe.
Mini Coopers typically have two fuse box locations. The primary interior fuse box sits under the driver’s side dashboard, usually behind a small access panel. The second location, found on some generations, is in the engine bay near the battery. Your owner’s manual will have a diagram mapping each fuse to its corresponding circuit. Look specifically for fuses labeled “Radio,” “Entertainment,” “Audio,” or “ICS” depending on your model year. Pull the suspect fuse with a fuse puller or needle-nose pliers and hold it up to the light. If the thin metal strip inside is broken, or if the transparent window of the fuse appears cloudy or scorched, that fuse is blown.
Replace a blown fuse only with one of the exact same amperage rating. That amperage number is molded into the top of the fuse and color-coded by standard. Putting in a higher-amperage fuse to prevent future blowing is dangerous and can allow a wiring fault to overheat and start a fire. If the new fuse blows again immediately after the radio is powered on, there is a short circuit somewhere in the radio circuit that needs to be found before you keep replacing fuses.
Some Mini Cooper head units also have a secondary fuse mounted directly on the back of the unit. This requires removing the head unit from the dashboard to access, but if the main fuse box fuses all check out and the radio is still dead, that secondary fuse is worth investigating. It protects the unit’s internal circuitry from surge damage and can blow independently of the main panel fuse.
Wiring Defects That Disconnect the Radio From the Car
A radio in a Mini Cooper talks to the car through a wiring harness connector, typically a multi-pin plug that clicks into the back of the head unit. If that connection becomes loose, corroded, or partially pulled out, the radio may lose power, lose communication with the car’s computer, or simply refuse to produce sound. This can happen after someone works behind the dashboard and nudges the connector during reinstallation, or it can develop gradually from vibration over thousands of miles.
Removing the head unit and checking the connector is not a difficult job on most Mini Coopers. The process typically involves removing the center console trim ring around the radio, unscrewing a few fasteners, and sliding the unit forward. Once it is out far enough, you can inspect the harness connector at the back. Look for any pins that appear pushed back, any greenish-white corrosion on the contact surfaces, or any wires that have pulled loose from the connector body. Push the connector firmly into the head unit socket until it clicks, and reassemble. This fix costs nothing and takes about twenty minutes.
Wiring damage along the harness route is a more serious issue. Road vibration, heat cycling, and the occasional rodent can damage the insulation on radio wiring. The result is a short circuit or an open circuit that kills the radio. Visually trace the wiring from the head unit toward the firewall and the fuse box as far as you can see. Look for any sections where the insulation is worn through, melted, or pinched between body panels. Damaged wiring requires repair with proper connectors and heat-shrink tubing, or full harness replacement. If you are not comfortable with electrical repair work, this is the point where a shop visit is the right call.
The Head Unit Itself: When the Brain of the System Has Failed
The head unit is the central control system for your Mini’s audio experience. It manages the radio tuner, the display, the button inputs, the amplifier output, and in many models the navigation and phone integration. When the head unit fails internally, no amount of fuse replacement or wire inspection will bring it back. Understanding what head unit failure looks like helps you avoid chasing phantom electrical problems.
CD Player Problems That Signal Bigger Internal Issues
A CD player that refuses to load discs, ejects discs immediately, or reads intermittently is often the first sign that a head unit is wearing out internally. The CD mechanism contains a laser assembly that degrades over time. Heat from the dashboard accelerates the process. A disc that spins and skips constantly usually indicates a dirty or failing laser. CD laser cleaning discs exist and are worth trying before assuming the mechanism is dead. If cleaning does not help, and the CD mechanism is the only thing wrong with the unit, you have a decision to make.
In many modern Mini Coopers, the CD player is an increasingly redundant feature anyway. Many owners who upgrade the head unit opt for a unit without a CD slot entirely, using Bluetooth streaming or a USB connection instead. If you are replacing the head unit anyway due to a CD failure, this might be a natural opportunity to upgrade to a more capable unit with Android Auto, Apple CarPlay, or better Bluetooth integration.
Signal Reception Issues That Have Nothing to Do With the Radio Itself
Your radio can be functioning perfectly in terms of power and electronics, yet deliver poor or nonexistent FM reception. This points to the antenna circuit rather than the head unit. Mini Coopers use a variety of antenna configurations depending on the generation. Older models use a traditional external whip antenna or a shark fin on the roof. Newer models integrate the antenna into the windshield glass or rear glass as printed lines that you might have noticed without identifying as antenna elements.
The antenna signal travels from its source through a coaxial cable to an amplifier module, and then into the head unit’s antenna input. Any break in this chain degrades or eliminates reception. A common Mini-specific issue is the antenna booster module that amplifies the signal before it reaches the head unit. These modules are powered by the radio itself, and if they fail, you get a dead quiet radio tuner while everything else on the head unit works fine. The booster module is usually located behind the dashboard or the rear side panels. Testing it requires a known-good module to substitute, or a workshop scan.
A physical antenna that is loose, corroded at its base mount, or missing the rubber gasket that seals it to the roof can also cause reception problems. Water can travel down a loose antenna mount and corrode the coaxial connector. If your reception suddenly got dramatically worse after a car wash or heavy rain, that is a strong clue that moisture has gotten into the antenna circuit.
Environmental interference is a genuine factor for borderline reception. Tall buildings, parking garages, and dense urban environments create radio shadows and signal reflections. If your reception is fine on the highway but terrible in the city, the antenna and amplifier are probably healthy. That is just physics fighting you. Moving to a different location or choosing stations with stronger local transmitters will help more than any repair.
The Security Code Issue That Catches Mini Owners Off Guard
This one deserves its own section because it catches Mini Cooper owners completely off guard every time. Many Mini Cooper radios have an anti-theft security system that activates when the radio loses power for an extended period. After a battery disconnect, a dead battery replacement, or a long-term storage period, the radio may boot up asking for a four or five digit security code. Until you enter that code, the radio stays completely locked. The display might show “SAFE” or “CODE” and nothing else will happen regardless of what buttons you press.
The security code is vehicle-specific and should be recorded in your owner’s manual or on a small card that came with the original paperwork when the car was new. If you bought the car used and no code card was included, you have a few options. The code can sometimes be retrieved by a Mini dealership using the vehicle’s VIN and the radio’s serial number. You can also find the serial number by removing the head unit and reading the label on the casing, then searching for the code through legitimate radio code retrieval services online.
Do not guess the code repeatedly. Most Mini Cooper radios will lock permanently after a set number of incorrect attempts, displaying “ERR” or a permanent lockout screen. Once locked in this way, the only solution is reprogramming at a dealership. Three wrong guesses are often all you get. Write the code down and keep it safe after you retrieve it.
Software Glitches and How to Reset a Frozen Mini Cooper Radio
Modern Mini Cooper head units run embedded software, and like any computer, they can freeze, corrupt, or enter a state where they simply will not respond normally. This can happen after the car battery dies and recovers, after a software update that did not complete correctly, or seemingly at random on high-mileage units where the processor has accumulated operational hours.
A soft reset is always worth trying first. On most Mini Cooper radios, pressing and holding the power button for approximately ten to fifteen seconds will force the unit to restart. Release the button and wait for the unit to reboot. This clears the active memory without losing saved presets or settings. If the soft reset does not work, a hard reset through a battery disconnect can clear a deeper software lockup. Disconnect the negative battery terminal, wait a full fifteen minutes, and reconnect it. The head unit will go through a full initialization cycle as the vehicle’s modules wake up and communicate with each other.
If the radio has received a partial software update and is now stuck in a boot loop or showing unusual behavior, a dealership can perform a full software reflash using Mini’s own diagnostic equipment. This is not an over-the-counter fix. It requires the ISTA diagnostic software and an internet connection to the BMW Group’s servers. On the newer F-series Mini Coopers especially, software updates for the iDrive-based infotainment system are relatively common and well-supported by the dealer network.
Aftermarket Accessories That Accidentally Break the Radio
If your Mini Cooper radio stopped working shortly after you or a previous owner installed an aftermarket accessory, there is a real chance the two events are connected. Dash cameras wired into the fuse box, aftermarket amplifiers tapped into the head unit’s speaker outputs, USB chargers hardwired into the console, and remote starters that tie into the ignition circuit can all interfere with the radio’s power supply or communication network if installed incorrectly.
Common installation mistakes that cause radio problems include tapping into the wrong fuse circuit and overloading it, grounding an accessory to a body panel instead of a proper chassis ground point, and splicing into the wiring harness in a way that introduces noise or voltage drop. If you suspect an aftermarket installation is involved, tracing the problem often means temporarily disconnecting the accessory and seeing if the radio recovers. If it does, the aftermarket installation needs to be corrected by a professional installer who understands the Mini’s electrical architecture.
Spills from the cup holder and center console are another underappreciated cause of radio button failure. Mini Coopers place the cupholders uncomfortably close to the head unit controls on many generations. A coffee spill that drains down through the console can reach the circuit board behind the control buttons, creating a sticky residue that prevents proper electrical contact. If your buttons became unresponsive after a liquid incident, the head unit will likely need to come out for cleaning or assessment. In some cases, the damage is recoverable if the unit is dried and cleaned before corrosion sets in. In others, the liquid has already corroded the contacts beyond repair.
When You Should Replace the Head Unit Entirely
There comes a point in the diagnostic process where you have checked the battery, tested the fuses, confirmed the wiring is solid, entered the security code, performed a reset, and the radio is still dead or malfunctioning. At that point, the head unit itself is the most likely remaining cause, and a replacement is the practical path forward.
You have several options. An OEM replacement unit from a Mini dealership is the cleanest path in terms of fit, compatibility, and feature retention, but it is also the most expensive. Used OEM units from salvage yards are a more affordable option, but you inherit the mileage and wear history of that unit, and there is no guarantee it is in better condition than yours. Aftermarket head units from brands like Pioneer, Kenwood, Sony, or Alpine offer modern features like wireless Apple CarPlay, Android Auto, and Bluetooth at a fraction of the dealership price, but require a fitting kit and wiring adapter specific to your Mini model to install cleanly.
Before you buy any replacement, confirm the following details about your specific vehicle. The year and generation, the trim level, whether it has the base audio or the upgraded Harman Kardon system, and whether there are any integrated navigation or telephone modules that communicate through the head unit. Buying the wrong unit for your generation is a time-consuming mistake that can also cause fault codes in the instrument cluster or other modules that notice the expected head unit is no longer present on the network.
A Logical Diagnostic Sequence to Follow Before Spending a Pound or a Dollar
| Step | What to Check | What to Look For | Approximate Time |
|---|---|---|---|
| 1 | Power button | Sticky, unresponsive, or requires long press | 1 minute |
| 2 | Security code | Display shows “CODE” or “SAFE” after battery event | 5 minutes |
| 3 | Battery voltage | Below 12.4 volts at rest, below 13.7 with engine running | 5 minutes |
| 4 | Fuse box | Blown or corroded fuse in radio circuit | 10 minutes |
| 5 | Soft reset | Hold power button 10 to 15 seconds | 2 minutes |
| 6 | Hard reset via battery disconnect | 15-minute battery disconnect and reconnect | 20 minutes |
| 7 | Wiring harness connector | Loose, corroded, or partially connected plug at head unit | 20 minutes |
| 8 | Antenna circuit | Poor reception only, radio otherwise functional | 30 minutes |
| 9 | Alternator output | Flickering, intermittent radio during driving | 10 minutes with multimeter |
| 10 | Head unit replacement | All above steps passed, radio still failed | 1 to 3 hours |
Keeping Your Mini Cooper Radio Working for the Long Haul
Once the radio is working again, a little attention to prevention goes a long way. Avoid parking in direct sunlight for extended periods. Dashboard temperatures inside a parked car can exceed 70 degrees Celsius in summer, which accelerates the degradation of the LCD display and the electronic components inside the head unit. A dashboard sunshade is a cheap investment that extends the life of your interior electronics significantly.
Keep liquids far away from the center console area. Mini Coopers are not known for generous cup holder placement, and the proximity of drinks to the head unit controls is a design compromise that costs owners dearly every year. A spill guard or simply keeping drinks in a bag is not glamorous advice, but it is effective advice.
Keep the battery in good health and have it tested annually after the three-year mark. A Mini Cooper that is regularly parked for more than a week at a time should be on a battery tender to prevent the deep discharge cycles that shorten battery life and trigger radio security lockouts. A healthy battery means consistent voltage to all the electronics, and consistent voltage means fewer phantom fault codes and random restarts.
If your vehicle is still under any form of warranty coverage, whether factory, CPO, or extended, bring the radio fault to your Mini dealership before attempting any repair yourself. An unauthorized repair, even a fuse swap, can sometimes be used to deny a warranty claim on a related part if the documentation trail is unclear. Get the fault on record with the dealer first, let them inspect it, and have any covered repairs handled under warranty before you pull anything apart.
A Mini Cooper without music is missing a significant part of its personality. This is a car built for driving enjoyment, and the audio system is part of that experience. Follow the diagnostic sequence, rule out each cause methodically, and you will find the problem faster than any random parts-swapping approach would allow. Fix it correctly the first time, and you will be back to your favorite playlist before the week is out.