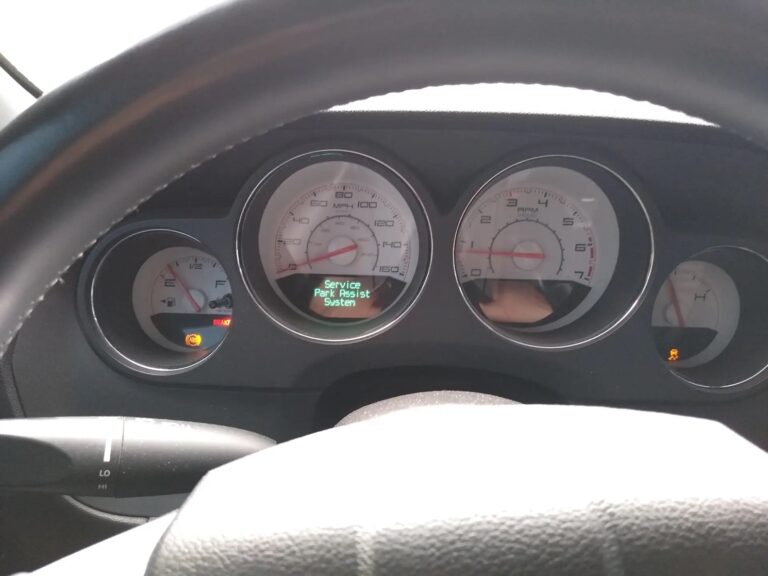
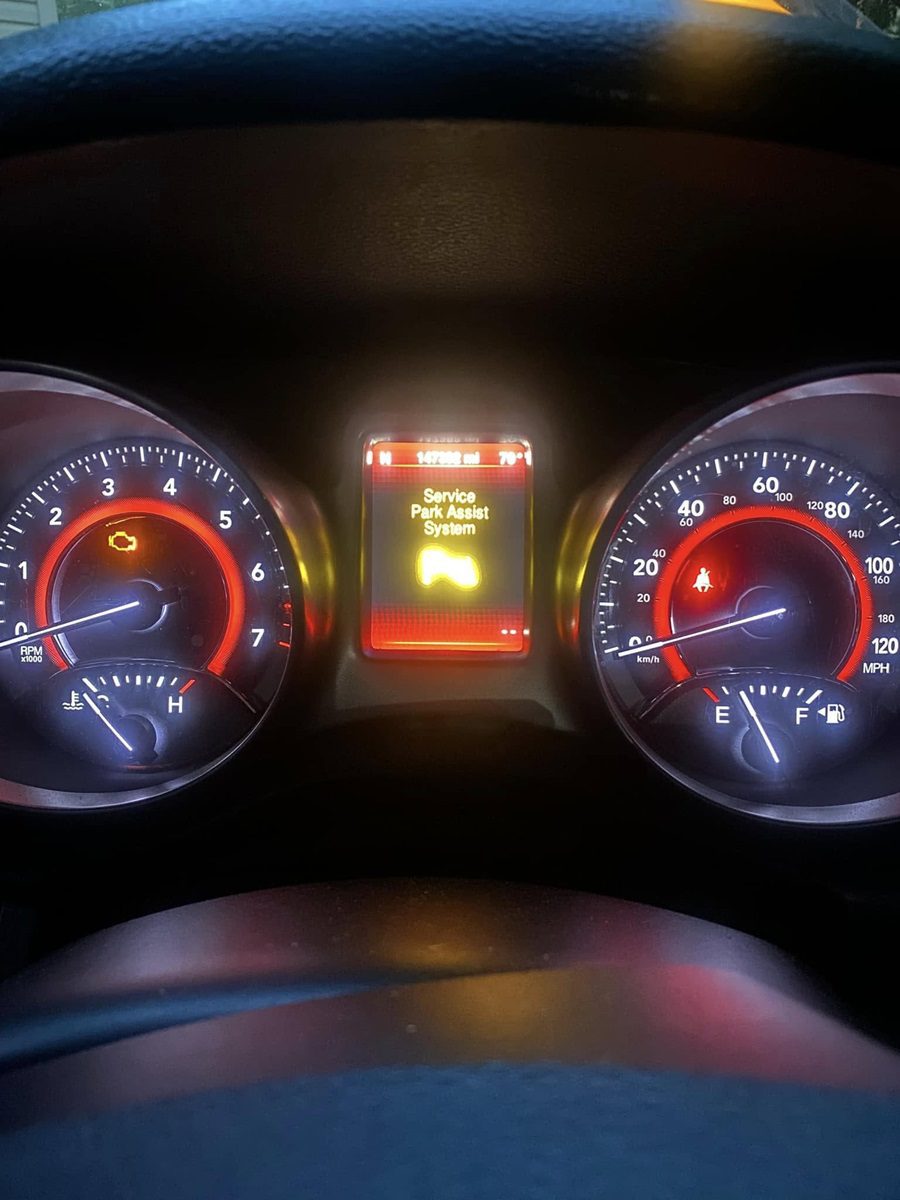
If your Dodge has flashed a “Service Park Assist System” warning on the dashboard, you are probably wondering whether it is something minor or a bigger problem. The good news is that in most cases, this warning traces back to a handful of predictable causes, and several of them are straightforward to fix without a major repair bill. The key is knowing where to look and what to do about it.
This guide covers everything you need to know: what the park assist system actually does, what causes the warning, and how to fix it depending on the root cause.
Table of Contents
What Is the Dodge Park Assist System?
The park assist system on Dodge vehicles, including the Journey and the Ram, is a proximity detection system designed to help drivers navigate tight parking situations safely. It uses a series of ultrasonic sensors embedded in the front and rear bumpers to detect objects in the vehicle’s path while parking. When it detects something close, it alerts the driver through a combination of audible beeps and a visual display that gets more urgent the closer the obstacle is.
These sensors are capable of detecting objects up to approximately 4 feet ahead and 6 feet behind the vehicle, depending on the model. That detection capability is what gives you confidence when backing into a tight spot or pulling forward close to a wall or another vehicle.
Many Dodge models also integrate a backup camera with the park assist system, giving you both a visual and sensor-based picture of what is around you. When any part of this system fails, the “Service Park Assist System” message appears and the system goes offline until the fault is resolved.
What Causes the Dodge Service Park Assist System Warning?
There are several different failure points behind this warning. Some are environmental and temporary. Others involve actual hardware or wiring faults that need repair. Here is each one explained clearly.
1. Dirty or Obstructed Ultrasonic Sensors
This is the most common cause of a park assist warning, and it is also the easiest to fix. The ultrasonic sensors sit in the bumpers of your Dodge, which means they are directly in the path of everything the road throws at them: mud, dust, road salt, insects, and general grime. When enough debris accumulates on the sensor face, the ultrasonic signal it emits cannot travel cleanly. The sensor gets confused, cannot properly read the reflection of its own signal, and the system flags a fault.
This type of fault is particularly common after off-road driving, after heavy rain that splashes thick mud onto the bumpers, or in winter when salt-laden slush coats the lower sections of the vehicle. The sensor does not need to be completely buried in dirt to malfunction. Even a thin film of dried mud or road salt over the sensor face can degrade its signal enough to trigger the warning.
2. Snow and Ice Buildup
Snow and ice are specifically problematic for park assist sensors because they are dense enough to either block the ultrasonic signal entirely or reflect it back in ways that the system interprets as phantom obstacles or signal failure. When snow packs around the bumper area where the sensors are located, the sensors cannot function correctly.
This cause is almost always temporary. Once the snow or ice is removed, the system typically returns to normal operation on its own. But it is worth knowing about so you do not panic when the warning appears after driving through a snowstorm and disappears after a quick cleanup.
3. A Failing or Damaged Park Assist Sensor
Beyond obstruction, sensors can fail from internal electronic failure or physical damage. A low-speed impact to the bumper, even one too minor to cause visible denting, can crack or dislodge a sensor. A stone chip at the right angle can damage the sensor face. Corrosion from prolonged exposure to moisture and road salt can degrade the sensor’s internal components over time.
A physically damaged sensor will produce the warning consistently rather than intermittently, and it will not clear after cleaning. Most Dodge models have multiple sensors per bumper, and the system is usually capable of identifying which specific sensor has failed, which is information you can pull from a diagnostic scan rather than trying to guess by visual inspection alone.
4. Wiring and Connection Problems
Each park assist sensor connects to the park assist control module through a dedicated wiring harness. On the Dodge Journey and Ram in particular, wiring issues in the park assist harness are a known and recurring problem. Wiring faults can include:
- A wire that has broken internally but looks intact externally, often from repeated flexing or vibration near the bumper
- A connector that has corroded at the terminal pins, increasing resistance and disrupting the sensor’s signal
- A wire that has chafed through its insulation from contact with a sharp edge in the bumper area, causing an intermittent short
- Wiring that was incorrectly routed or connected during a previous bumper repair
- A sensor connector that came loose during a bumper repair, car wash, or even aggressive cleaning
Wiring faults are a common culprit on Dodge vehicles that have had any bumper work done, even something as routine as a parking sensor replacement by a shop that is not familiar with the specific routing requirements. The warning appearing shortly after bodywork or a bumper repair is a strong indicator that wiring is involved.
5. Faulty Park Assist Camera
On models equipped with a backup or surround-view camera integrated into the park assist system, a camera fault can trigger the service warning alongside the sensor-based alert. Camera issues can stem from physical damage to the camera lens or housing, a disconnected or corroded camera connector, moisture intrusion into the camera unit, or failure of the camera module itself.
A camera fault is often identifiable by the camera image failing to appear on the screen when reversing, displaying a distorted or frozen image, or showing a black screen. If the camera image is behaving abnormally alongside the park assist warning, the camera is likely part of the problem.
6. Park Assist Control Module Fault
The park assist control module is the electronic brain that receives data from all the sensors, processes it, and generates the alerts for the driver. Like any electronic module, it can develop internal faults from water intrusion, electrical surges, software errors, or simply component aging. When the module itself fails or loses communication with the sensors, the system goes offline and the warning appears.
Module faults can sometimes be resolved with a software update from the dealership. In other cases, the module needs to be replaced. A diagnostic scan will typically identify whether the module is communicating correctly with the sensors or whether it has logged an internal fault code pointing to the module itself.
7. ECU or Body Control Module (BCM) Issues
In some cases, the park assist system warning is not coming from the park assist hardware at all but from a broader communication fault within the vehicle’s electronic network. The park assist system communicates with the Body Control Module and in some configurations with the main ECU. If there is a communication fault in that chain, such as a corrupted BCM, a software glitch after a battery replacement, or a CAN bus communication error, it can produce the park assist warning even when the sensors and camera are physically fine.
This type of fault is more common following a battery change, an electrical repair, or software updates that were not completed correctly. It typically produces the warning alongside other electronic system warnings rather than in isolation.
How to Fix the Dodge Service Park Assist System Warning
Work through these fixes in order from simplest to most involved. Many park assist warnings clear after addressing the straightforward causes, which means you may not need to go further than the first few steps.
Fix 1: Clean the Sensors and Bumper Area
This should always be your first step before anything else. Here is how to do it correctly without damaging the sensors:
- Rinse the bumper area with water to loosen dirt and debris. Do not aim a high-pressure jet directly at the sensors, as high-pressure water forced into the sensor housing can cause internal damage.
- Use a soft cloth or sponge with car wash soap to gently wipe each sensor face. The sensors are usually circular, slightly protruding units in the bumper, typically matching the bumper color.
- For snow or ice removal, use a dedicated snow brush rather than a shovel, ice scraper, or broom. Sharp tools can crack or chip the sensor housing. A soft-bristle brush removes snow without the risk of scratching or dislodging the sensors.
- After cleaning, dry the sensor area with a soft microfibre cloth. Check for any condensation in the sensor housing area.
- Start the vehicle and check whether the park assist warning has cleared.
If the warning clears after cleaning and does not return, dirt or snow obstruction was the cause. Simple as that.
Fix 2: Scan the Vehicle for Fault Codes
If cleaning does not resolve the warning, the next step is pulling the stored fault codes. A diagnostic scanner that can access the park assist module (not just the powertrain module) will show you which specific sensor or circuit is reporting a fault. This is the information you need before spending money on any parts.
Common park assist fault code patterns and what they indicate:
| Fault Pattern | What It Typically Means |
|---|---|
| Single sensor circuit fault (e.g., rear left sensor) | That specific sensor has failed or lost connection |
| Multiple sensor faults at once | Likely a wiring harness issue, power supply fault, or module failure rather than multiple individual sensor failures |
| Camera communication fault | Camera module issue or camera wiring fault |
| Park assist module communication fault | Module failure or CAN bus communication issue |
| No codes stored but warning active | Possible intermittent wiring fault or a temporary glitch (try battery reset) |
The fault code tells you where to focus the repair. Do not replace sensors randomly without this information.
Fix 3: Realign or Reseat Loose Sensors
Park assist sensors can be knocked out of their proper position during car washes, minor impacts, or even during cleaning if too much force is applied. A sensor that is partially dislodged from its bumper mount may still appear normal visually but will not maintain proper alignment with its ultrasonic field, producing inconsistent or failed readings.
Press each sensor firmly into its mount to ensure it is fully seated. The sensor should sit flush with the bumper surface and should not wiggle when gently pressed. If a sensor keeps coming loose, the retaining clip holding it in the bumper may be broken, which requires either a new sensor with an intact clip or a small bracket repair to secure it properly.
Sensor alignment matters too. The sensor should point straight back or straight forward depending on its position, not cocked at an angle. A sensor that is tilted will send its signal at the wrong angle and produce unreliable readings.
Fix 4: Inspect and Repair the Wiring
Wiring inspection for park assist issues requires a systematic approach. Here is how to work through it:
- Locate the wiring harness that runs from the park assist sensors through the bumper to the park assist control module. On most Dodge models, this harness runs along the inside of the bumper structure.
- Inspect each sensor connector for corrosion at the terminal pins. A corroded connector will have green or white buildup at the metal terminals. Clean with electrical contact cleaner and allow to dry fully before reconnecting.
- Trace the harness along its entire route looking for areas where the insulation has worn through, where the harness contacts a sharp edge, or where the harness may have been pinched during previous bumper work.
- Wiggle the harness while a helper watches the live data on a scan tool. If the fault code appears or disappears when the harness is moved in a specific spot, that is the location of the intermittent break.
- Repair damaged sections by replacing the affected connector pigtail or the damaged section of harness. Use proper automotive wire connectors and ensure the replacement wire is the same gauge as the original.
If the park assist warning appeared shortly after a bumper repair or sensor replacement, inspect the wiring at the sensors that were worked on first. A connector that was not fully seated after reinstallation is a very common cause of a park assist fault following bodywork.
Fix 5: Replace a Damaged Sensor
If the diagnostic scan confirms that a specific sensor has failed and cleaning and wiring checks have not resolved the issue, sensor replacement is the next step. Here is the process:
- Identify which sensor the fault code is pointing to. Front and rear sensors are typically numbered or labeled by position (left, center, right) in the diagnostic software.
- Access the faulty sensor. On most bumpers, this involves either pushing the sensor out from behind the bumper fascia or removing the bumper fascia for better access.
- Disconnect the sensor wiring connector and remove the sensor from its mount.
- Install the replacement sensor. Use an OEM sensor or a confirmed-compatible aftermarket sensor for your specific Dodge model and year. Sensor specifications vary between models, and the wrong sensor can cause the system to behave erratically even after installation.
- Reconnect the wiring, reinstall the bumper if it was removed, clear the fault codes, and test the system by placing an object in front of and behind the vehicle to confirm the sensor is detecting correctly.
Park assist sensors on Dodge vehicles are generally not expensive parts, typically ranging from $20 to $80 each for OEM-spec units. Labor to access and replace a sensor is usually modest unless the bumper needs significant disassembly for access.
Fix 6: Inspect and Address the Backup Camera
If the camera is involved in the fault, start by physically inspecting the camera lens. On most Dodge models, the backup camera is mounted in or near the tailgate badge or above the rear license plate. A cracked lens, a lens coated with mud or moisture, or a camera housing with visible damage are all easy to identify visually.
Clean the camera lens gently with a soft cloth and check whether the image quality improves. If the camera image is still distorted, black, or absent after cleaning, pull the camera connector and inspect it for corrosion. A corroded connector can cause the camera to produce a blank or frozen image.
If the connector is clean and intact but the camera is still not functioning, the camera module itself has likely failed and needs replacement. Camera replacement on most Dodge vehicles is accessible without major disassembly, though access to the connector routing can vary by model.
Fix 7: Try a Battery Disconnect Reset
If the warning appeared after a battery change, electrical work, or a software update and no hardware faults are found during inspection, a battery disconnect reset can clear soft electronic faults from module memory. Disconnect the negative battery cable, wait 10 to 15 minutes, reconnect, and check whether the park assist warning returns. This resets all electronic modules and forces them to reinitialize, which can clear temporary communication faults.
Fix 8: Address Module or BCM Faults at a Shop
If all the sensors and wiring check out correctly and the warning persists, the park assist control module or BCM may be at fault. These repairs require professional diagnostic equipment and, in the case of module replacement, programming to match the vehicle’s configuration. Take the vehicle to a shop with Dodge-compatible diagnostic tools for a module-level diagnosis before authorizing any module replacement.
Preventive Habits That Keep the Park Assist System Working
Once you have resolved the warning, a few simple habits will reduce the chance of it coming back.
Clean the Bumpers Regularly
Make sensor cleaning a standard part of every car wash. A few extra seconds wiping the sensor faces with a soft cloth during a regular wash prevents the gradual buildup that eventually triggers the fault. Pay particular attention in winter when road salt accumulates quickly on bumpers.
Avoid Harsh Chemicals Near Sensors and Wiring
When cleaning the bumper area, stick to mild car wash soap and water. Harsh degreasers, solvents, or abrasive cleaners can damage sensor housings, degrade the rubber gaskets around the sensors, and attack the wiring insulation. These are small components with precision-molded housings that are not designed to handle chemical exposure.
Insist on Proper Sensor Handling After Bumper Repairs
If your Dodge needs bumper or bodywork that involves the park assist sensors, make sure the shop handling the repair is aware that the sensors need to be properly reinstalled and that the connectors need to be fully seated. It is worth confirming with the shop before picking up the vehicle that they tested the park assist system after reassembly.
Check for System Updates at the Dealership
Dodge periodically releases software updates for vehicle electronic systems including park assist modules. During routine service visits, ask the service advisor whether any software updates are available for your vehicle’s park assist or BCM software. An updated software version can improve system stability and prevent software-related false warnings.
Approximate Costs for Common Park Assist Repairs
| Repair Type | Approximate Parts Cost | Approximate Total Cost (with labor) |
|---|---|---|
| Sensor cleaning (DIY) | Free | Free |
| Diagnostic scan | N/A | $80 to $130 |
| Park assist sensor replacement | $20 to $80 per sensor | $80 to $250 per sensor |
| Wiring harness repair (minor) | $10 to $40 (materials) | $80 to $250 |
| Backup camera replacement | $50 to $200 | $150 to $400 |
| Park assist control module replacement | $150 to $500+ | $300 to $800+ |
| BCM replacement (if involved) | $200 to $600+ | $400 to $1,000+ |
Final Thought
The Service Park Assist warning on your Dodge is rarely a catastrophic problem, but it does deserve your attention. Start with the simplest fixes first: clean the sensors, check for snow or ice buildup, and pull fault codes before reaching for any parts. In most cases, the repair is not complicated or expensive once you know which specific component is causing the fault. The mistake most people make is skipping the diagnostic step and guessing at parts, which turns a $30 sensor replacement into a frustrating and expensive process of elimination.