
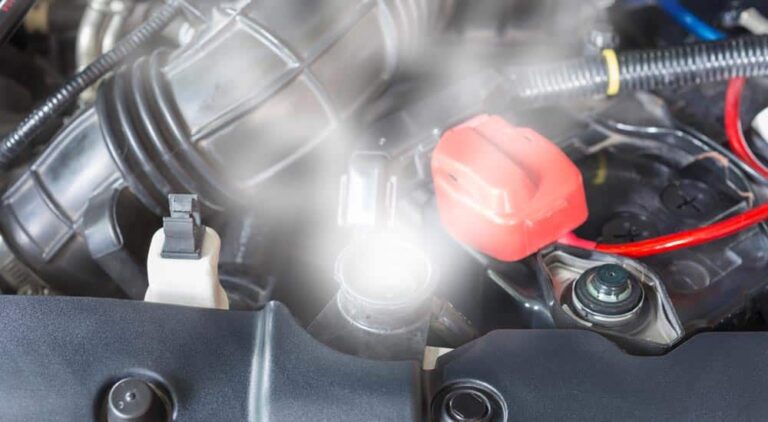
Picture this. You turn on the heater on a cold morning, and instead of warm air, you get a weak breeze that barely takes the chill off your hands. Then, a few miles down the road, you glance at the temperature gauge and notice it climbed faster than it usually does. Neither of these things feels catastrophic on their own, but together, they point to a sneaky little problem that a lot of drivers never think about: air trapped inside the cooling system.
Air does not belong in your coolant. It does not transfer heat the way liquid coolant does, and when it gets stuck in the wrong place, it messes with the entire system that keeps your engine from cooking itself. In this guide, we are going to walk through exactly why air ends up in there, how to spot the warning signs, and what actually happens if you ignore it. By the end, you will know enough to have a real conversation with your mechanic instead of just nodding along while they point at things under the hood.
Why Air Ends Up Trapped in a Cooling System That Was Never Designed to Hold It
Your engine’s cooling system is a closed loop. Coolant, sometimes called antifreeze, circulates continuously through the engine block, the radiator, and the heater core, absorbing heat and carrying it away so your engine does not overheat. In a properly working system, any stray air that sneaks in gets pushed out through the coolant’s expansion tank and released harmlessly.
The problem starts when something in that system stops working the way it should. Coolant expands when it heats up and contracts when it cools down, which naturally creates pressure changes inside the sealed loop. To handle those pressure swings, manufacturers install a two-way valve inside the radiator cap or the expansion tank cap.
That valve has one job during hot operation and a completely different job once things cool down. When pressure builds up from heat, the valve releases the excess into the atmosphere. When the system cools and pressure drops, the valve opens the other direction and lets a controlled amount of air back in to equalize things. It sounds simple, and honestly, when it works right, you never even know it is happening.
Trouble shows up when that valve either fails to do its job correctly or when air gets pulled into the system through some other weak point entirely. Once air gets in and cannot escape properly, it starts causing real problems, and that is exactly what we are going to break down next.
Eight Real Causes of Air Getting Trapped in Your Cooling System
Air does not just appear out of nowhere. It sneaks in through specific weak points, and knowing which one applies to your situation makes diagnosis a whole lot faster. Here is a rundown of the usual suspects, starting with the one that tends to cause the most anxiety.
1. A Faulty Cylinder Head Gasket
The head gasket sits between your engine block and cylinder head, sealing off the combustion chambers from the cooling passages running right next to them. When that gasket gets damaged or was not torqued down correctly during a previous repair, it creates a path for air to get sucked into the cooling circuit whenever pressure inside drops.
Here is the part that makes this cause particularly concerning. A bad head gasket does not just let air in. It can also allow actual exhaust gases from combustion to leak directly into your cooling passages. Once that happens, you are not just dealing with an air pocket anymore, you are dealing with combustion byproducts contaminating your coolant, which is a much bigger and more expensive problem.
2. A Thermostat That Has Gotten Stuck
Your thermostat acts like a traffic cop for coolant flow, opening and closing based on engine temperature to regulate how much coolant circulates through the radiator. When a thermostat gets stuck, whether fully closed or partially jammed, it disrupts the normal flow pattern the entire system relies on.
When flow gets disrupted this way, any air bubbles already present in the system have nowhere to go. They cannot make their way up to the expansion tank and out into the atmosphere like they should. Instead, they just sit there, trapped in whatever pocket of the system they happened to end up in.
3. A Water Pump on Its Way Out
The water pump is the heart of your cooling system, physically pushing coolant through the entire loop. When a water pump develops a leak, it does not just lose coolant outward. It can actually pull air inward through that same leak point, creating exactly the kind of air locks we are talking about.
There is a second failure mode here too. Even without an obvious leak, a worn-out pump simply loses its ability to generate the pressure needed to push air bubbles along and expel them into the expansion tank where they belong. The pump keeps spinning, but it is not doing its job with the force it needs.
4. A Clogged or Broken Expansion Tank Cap Valve
Remember that two-way valve we talked about earlier? When it gets clogged with debris or simply breaks down from age, it stops managing pressure the way it is supposed to. Excess air does not get released properly when the coolant heats up and pressure rises inside the circuit.
The reverse problem happens too. If the valve cannot let air back in properly during cooling to equalize pressure, the system starts pulling air in from other, less controlled points instead, essentially finding the path of least resistance rather than the path the engineers designed.
5. A Leaking Radiator or Heater Core
Both your radiator and your heater core are essentially thin-walled components carrying pressurized coolant. Small cracks can develop in either one over time, especially as the vehicle ages and goes through countless heating and cooling cycles.
During the cooling phase specifically, air can work its way in through these small cracks even if you never notice an actual coolant leak. This is one of the trickier causes to catch because the crack might be too small to leave visible puddles, yet still large enough to let air sneak through when pressure drops.
6. Coolant Levels That Have Dropped Too Low
This one is refreshingly simple compared to the others. When your coolant level drops below the minimum mark, whether from a slow leak somewhere or just gradual evaporation over years of driving, the water pump ends up sucking in air from the expansion tank instead of pure coolant.
Checking your coolant level regularly is genuinely one of the easiest preventive habits you can build, and it directly addresses this specific cause before it ever becomes a problem.
7. Built-Up Deposits Inside the Cooling Passages
Over years of operation, mineral deposits and corrosion byproducts can build up along the inner walls of your cooling circuit. This buildup narrows the passages, reducing how much coolant can flow through at any given moment.
When flow gets restricted this way, the normal circulation pattern breaks down, and air bubbles that would otherwise get carried along and expelled just end up stuck in place. Flushing your cooling system periodically helps prevent this kind of buildup from ever becoming severe enough to cause trouble.
8. Worn Hoses, Pipes, and Seals
Rubber hoses dry out and crack with age. Metal pipes can develop pinhole corrosion. Clamps loosen over time from constant vibration and heat cycling. Any one of these small failures creates an opportunity for air to leak into the system whenever internal pressure drops below atmospheric pressure outside.
This is often the most overlooked cause simply because each individual point of failure seems minor. A slightly loose clamp here, a slightly cracked hose there. But taken together, these small failure points add up to a system that is far more prone to air intrusion than it should be.
Quick Reference Table: Causes and What They Actually Affect
| Cause | What Goes Wrong | Additional Risk |
|---|---|---|
| Faulty head gasket | Air sucked in when pressure drops | Exhaust gases may contaminate coolant |
| Stuck thermostat | Disrupted flow traps air bubbles | Uneven engine heating |
| Bad water pump | Air pulled in through leak, or insufficient pressure to expel bubbles | Reduced overall coolant circulation |
| Broken cap valve | Pressure cannot equalize properly | Air sucked in from other weak points |
| Leaking radiator or heater core | Air enters through small cracks during cooling | Slow, hard to detect coolant loss |
| Low coolant level | Pump draws in air instead of liquid | Reduced cooling capacity overall |
| Internal deposits | Narrowed passages disrupt circulation | Reduced heat transfer efficiency |
| Worn hoses and seals | Multiple small leak points allow air intrusion | Gradual, hard to pinpoint air accumulation |
The Warning Signs Your Cooling System Is Fighting an Air Problem
Here is the tricky part about diagnosing air in your cooling system. You cannot actually see air bubbles trapped inside a sealed loop without opening things up. That means you have to rely on indirect clues, the kind of symptoms that show up in how your car behaves rather than something you can spot with a flashlight.
White Smoke Coming From the Exhaust
This is one of the more alarming symptoms on this list, and for good reason. White smoke from your tailpipe often means coolant has found its way into the combustion chamber, typically through a failed head gasket. The same pathway that lets coolant leak into the cylinders can also let combustion gases leak the other direction into your cooling passages.
If you notice this symptom, do not treat it as a minor inconvenience. This points toward a head gasket problem that needs professional attention promptly, since continuing to drive with combustion gases contaminating your coolant accelerates damage throughout the entire cooling system.
A Heater That Refuses to Blow Warm Air
Here is a symptom almost every driver has experienced at some point without realizing what it actually meant. Your heater blows cold or lukewarm air while your car sits idling, but once you rev the engine above roughly 3000 RPM, warm air finally starts flowing.
This pattern is a fairly reliable indicator of trapped air specifically. At higher RPM, the water pump spins faster and generates more pressure, which can temporarily push trapped air bubbles past the blockage point and allow warm coolant to actually reach the heater core. At idle, that extra pressure disappears, and the air pocket goes right back to blocking proper flow.
Your Engine Warms Up Suspiciously Fast
Normally, an engine takes a predictable amount of time to reach operating temperature. When air interferes with proper coolant circulation, that timeline can shrink noticeably, with temperature climbing faster than usual and sometimes pushing above the normal operating range.
Here is an interesting detail worth watching for. During this kind of rapid warm-up, your radiator itself might feel cold or only mildly warm to the touch, even while your temperature gauge climbs. This mismatch often points toward a thermostat stuck in the closed position, working alongside trapped air to prevent proper circulation through the radiator.
Coolant Level That Keeps Dropping
If you find yourself topping off your coolant reservoir more often than seems normal, that recurring low level is not just a symptom of air in the system, it is also one of the root causes feeding the problem in the first place. Low coolant and trapped air tend to reinforce each other in a frustrating cycle.
Visible Signs of a Coolant Leak
Wet spots underneath your vehicle, dried white or greenish crusty residue along hose connections, or staining around the radiator and reservoir all point toward an active or previous coolant leak. Any of these leak points doubles as a potential entry point for air whenever system pressure drops below atmospheric levels.
Quick Symptom Checklist
| Symptom | Likely Explanation |
|---|---|
| White smoke from exhaust | Coolant entering combustion chamber, likely head gasket failure |
| Cold heater at idle, warm heater at higher RPM | Trapped air blocking heater core flow at low pump pressure |
| Faster than normal warm-up, radiator stays cool | Stuck thermostat combined with trapped air |
| Frequently low coolant level | Active leak feeding air intrusion |
| Wet spots or crusty residue near hoses and radiator | Physical leak point, potential air entry source |
How to Actually Check Whether Air Is the Culprit
Reading about symptoms is useful, but at some point you need to actually get hands-on and confirm what is going on under the hood. Here is a practical, step-by-step approach that does not require a full professional diagnostic setup, though it also will not replace one if things turn out to be serious.
Step One: Inspect Every Hose and Connection Point
Start with a visual and physical inspection of the radiator hoses and every connection point throughout the cooling system. Look closely at the joints for cracking, and check whether the clamps holding everything together are still tight and properly seated.
Here is something worth keeping in mind while you do this. A small crack does not always leak visible coolant, especially if it is oriented in a way that only opens up under negative pressure. That same tiny crack can absolutely let air sneak in when the system pressure drops during cooling, even without ever producing a puddle underneath your car.
Step Two: Check the Water Pump’s Actual Performance
With the engine running and warmed up, carefully place your hand on the radiator hose leading away from the water pump. You should feel distinct pulsations from the coolant moving through, similar to feeling a pulse in your wrist.
Also, listen closely for any unusual grinding, squealing, or knocking sounds coming from the pump area, and look for any visible signs of coolant weeping from around the pump housing itself. A pump that feels weak, sounds off, or shows any leakage deserves further professional evaluation.
Step Three: Watch for Bubbles in the Expansion Tank
Once your engine has reached normal operating temperature, carefully observe the coolant inside the expansion tank while someone gently revs the engine up toward 3000 RPM. Persistent bubbling that appears specifically during this rev-up, rather than just normal circulation movement, often indicates gas escaping from somewhere it should not be, most commonly pointing toward a head gasket issue.
Pay close attention to whether this bubbling coincides with a gradually dropping coolant level and any white smoke from the exhaust. If all three symptoms show up together, that combination strongly suggests a damaged cylinder head gasket rather than a simpler, cheaper cause.
A word of caution here. Never open a hot radiator cap or expansion tank cap to check for bubbles. The pressurized, superheated coolant inside can cause severe burns instantly. Always let the engine cool down substantially before opening anything in the cooling system.
What Actually Happens When Air Gets Trapped Inside
Understanding the mechanics here helps explain why this problem matters beyond just an inconvenient cold heater. Air is significantly lighter than antifreeze, which means it naturally rises and accumulates at the highest points within the cooling circuit rather than mixing evenly throughout.
Those trapped air pockets act like a plug, physically blocking coolant from circulating properly through whatever section of the system they occupy. When this happens near the heater core, you get the cold-heater symptom we already discussed. When it happens in other critical areas, the consequences get more serious.
Reduced circulation means your engine loses some of its ability to shed heat effectively. Over time, this can push operating temperatures higher than they should be, and sustained overheating is one of the most damaging things that can happen to an engine. Warped cylinder heads, blown gaskets, and even cracked engine blocks can all trace back to prolonged overheating that started with something as seemingly minor as trapped air.
In other words, what looks like a mild annoyance today can snowball into a genuinely expensive repair if it gets ignored long enough. This is exactly why catching and addressing air in your cooling system early matters so much.
How Mechanics Actually Remove Air From the System
Once the underlying cause gets identified and repaired, whether that means replacing a worn hose, fixing a leaking gasket, or swapping out a failing water pump, the trapped air itself still needs to be properly purged from the system. This process is commonly called bleeding the cooling system, and it matters just as much as fixing the original problem.
The Basic Bleeding Process
Most vehicles include a dedicated bleed valve somewhere on the highest point of the cooling system, often located near the thermostat housing or at the top of the radiator. Here is a general outline of how the process typically works, though specific steps vary by vehicle make and model.
- With the engine cold, top off the coolant reservoir to the proper level using the correct coolant type for your vehicle
- Open the designated bleed valve, if your vehicle has one, to allow trapped air an escape path
- Start the engine and let it idle with the heater set to maximum heat and the fan on, which helps draw coolant through the heater core
- Watch for a steady stream of coolant, free of bubbles, coming from the bleed valve before closing it
- Continue running the engine while periodically checking and topping off the reservoir as trapped air escapes and coolant level settles
- Take the vehicle for a short test drive, then let it cool completely and recheck the coolant level one more time
This process sometimes needs to be repeated more than once, especially on vehicles with complex cooling system layouts or after a major repair like a head gasket replacement. Patience matters here. Rushing the bleeding process often means leaving residual air pockets behind, which brings back the same symptoms you were trying to fix in the first place.
Why This Is Often Best Left to a Professional
While the basic concept sounds straightforward, properly bleeding a cooling system on many modern vehicles can genuinely be more complicated than it appears. Some vehicles require specific procedures, particular RPM ranges, or even specialized tools to fully purge trapped air from certain sections of the system.
Getting it wrong does not just waste your time. Incomplete bleeding can leave your engine running hotter than it should for an extended period without any obvious dashboard warning, quietly causing wear that you will not notice until something fails. If you are not confident in your ability to fully complete this process, a shop with proper experience and equipment is worth the investment.
Preventing Air Problems Before They Start
Since diagnosing and fixing trapped air can be genuinely tricky, prevention is honestly your best strategy here. A handful of simple habits go a long way toward keeping your cooling system sealed properly and functioning the way it was designed to.
Check Your Coolant Level Regularly
Make it a habit to glance at your coolant reservoir every month or so, and always before any long road trip. Catching a slowly dropping level early lets you address a small leak before it grows into a bigger problem that introduces significant air into the system.
Do Not Ignore a Weak Heater
If your heater starts performing inconsistently, especially showing that cold-at-idle, warm-at-higher-RPM pattern we discussed earlier, treat it as an early warning sign rather than a minor annoyance. Addressing it while the underlying cause is still small and simple saves you money and hassle down the road.
Replace Aging Hoses and Clamps Proactively
Rubber degrades over time regardless of how well you maintain your vehicle otherwise. If your hoses are showing visible cracking, softness, or bulging, replacing them proactively costs relatively little compared to dealing with the air intrusion and potential overheating that results from waiting until they fail completely.
Flush Your Cooling System on Schedule
Following your manufacturer’s recommended interval for a full coolant flush helps prevent the kind of internal deposit buildup that restricts flow and traps air bubbles. Check your owner’s manual for the specific interval recommended for your vehicle, since this varies depending on coolant type and vehicle age.
Address Overheating Symptoms Immediately
If you ever notice your temperature gauge climbing unusually high, pull over safely and let the engine cool before continuing. Continuing to drive an overheating vehicle risks turning a simple air-related issue into severe engine damage, the kind of repair bill that dwarfs anything discussed in this article so far.
When It Is Time to Bring in a Professional
Some of what we have covered here, checking coolant levels, inspecting hoses visually, feeling for pump pulsations, falls within reach of a reasonably confident do-it-yourself approach. Other situations genuinely call for professional diagnostic equipment and experience.
- White smoke from the exhaust paired with dropping coolant levels strongly suggests a head gasket issue that needs proper diagnosis, often involving a pressure test or a specific chemical test for combustion gases in the coolant
- Persistent air in the system despite bleeding attempts suggests an ongoing leak or failing component that needs to be identified before the bleeding process will actually hold
- Any sign of actual overheating, meaning the temperature gauge climbing into the red zone, deserves immediate professional attention rather than continued driving
- If you are simply not comfortable working around a pressurized, hot cooling system, there is no shame in leaving this one to a shop with the right tools and training
A qualified mechanic has access to specific diagnostic tools, including pressure testers and combustion leak detectors, that can pinpoint exactly where air is entering the system far more precisely than the at-home checks we covered earlier. For anything beyond a simple low coolant top-off, getting a professional opinion is money well spent given how expensive the consequences of prolonged overheating can become.
A Final Word on Taking Air Problems Seriously
Air trapped in your cooling system rarely announces itself with a dramatic failure right away. It shows up quietly, through a lukewarm heater on a cold morning or an engine that seems to warm up just a touch faster than it used to. Those small clues are exactly the moments worth paying attention to, because the fixes at this early stage are almost always cheaper and simpler than what comes later if the problem gets ignored.
Pop your hood this weekend, check that coolant level, take a look at your hoses, and pay attention to how your heater behaves the next few times you start your car cold. Catching this early is not complicated, and it just might save you from a much bigger repair bill down the road.