
Your Mini Cooper will not start. You turn the key, the engine cranks, but nothing catches. Or maybe the car just died on you mid-drive for no obvious reason. Before you panic and start imagining a massive repair bill, there is a good chance the fix is something surprisingly simple: resetting the fuel pump.
Mini Coopers, like most modern vehicles, have a built-in safety mechanism called an inertia switch. This switch is designed to cut off fuel supply automatically if the car is involved in a collision or rollover. Smart engineering, right? But here is the thing: that same switch can trip unexpectedly from a hard bump, a minor fender bender, or sometimes for reasons that are not entirely obvious. When it trips, the fuel pump shuts off, and the car goes nowhere.
Table of Contents
The good news is that resetting it does not require a dealership visit or a specialist. With the right information and a bit of patience, this is something most Mini Cooper owners can handle in their own driveway. This guide covers exactly how to do it, where to find the fuel pump and inertia switch, what tools you need, and what to watch out for along the way.
What the Fuel Pump Actually Does (And Why Resetting It Matters)
The fuel pump sits between your fuel tank and your engine. Its job is exactly what the name suggests: it pumps fuel from the tank through the fuel lines to the engine. Without it working properly, your engine does not get the fuel it needs to run, and the car will either not start at all or will stall out while driving.
In a Mini Cooper, the fuel pump is an electric pump, meaning it runs on power from the vehicle’s electrical system. It is controlled partly by the inertia switch, which acts as a kill switch in crash situations. The moment the inertia switch detects a sharp, sudden impact, it cuts power to the fuel pump. No power, no fuel delivery, no engine.
This is a deliberate safety feature. In a real accident, you do not want fuel spraying around freely near sparks or heat. Cutting the fuel pump immediately reduces fire risk. But the downside is that any significant jolt, even a curb hit or a rough road impact, can trigger the switch unnecessarily.
When that happens, the fix is not to replace the pump or tear into the fuel system. You simply reset the inertia switch, restore power to the pump, and the car runs normally again.
How to Tell If the Fuel Pump Is Your Problem
Before jumping straight to the reset procedure, it is worth confirming that the fuel pump is actually the issue. A tripped inertia switch has a pretty specific set of symptoms, and they are different from other fuel system problems like a clogged fuel filter or a failing pump motor.
Here is what you are likely to experience when the inertia switch has tripped:
- The engine cranks normally when you turn the key, but it will not fire and start
- The car may have stalled suddenly while driving and refused to restart
- There was a recent impact, bump, or accident before the problem started
- You cannot hear the brief hum of the fuel pump priming when you first turn the ignition key to the “on” position (before actually starting the car)
That last point is a useful quick test. On a functioning fuel system, if you turn the ignition to the “on” position without cranking the engine, you should hear a faint humming sound from behind the rear seat area that lasts about two seconds. That is the fuel pump priming the system. If you hear nothing, either the pump is not getting power (tripped inertia switch) or the pump motor itself has failed.
A tripped inertia switch is the simpler and cheaper possibility, so always check that first.
Where to Find the Fuel Pump on a Mini Cooper
Mini Cooper fuel pump location can vary depending on the model year and generation you are working with. Here is a breakdown of where to look.
The Engine Compartment (Older Models)
On older Mini Cooper models, the inertia switch that controls the fuel pump is located inside the engine bay. Open the hood and look on the driver’s side of the engine compartment. Specifically, you are looking between the brake master cylinder and the hood hinge. It is a small, typically red or black button-topped component mounted on a bracket.
When the switch has tripped, the button on top will be popped up slightly. Pressing it back down resets it. Simple as that, at least in theory. We will cover the full process in detail below.
Access Panels in the Engine Bay
Some Mini Cooper variants have protective covers or panels in the engine bay that shield fuel system components. If you open the hood and cannot immediately spot the inertia switch or the pump components, look for any plastic covers or panels that could be hiding them. These are usually held in place by clips or small bolts and can be removed without much effort.
Under the Rear Seat Cushion (R56 and Newer Models)
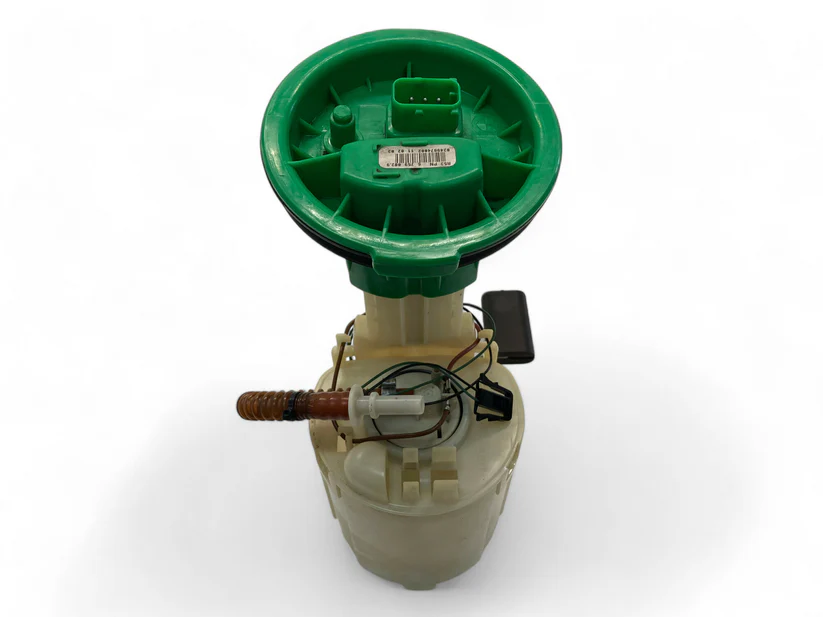
On the Mini Cooper R56 and some other newer models, the actual fuel pump sits beneath the rear seat cushion rather than being accessible from the engine bay. This is a very common setup on modern vehicles since the fuel pump lives inside or on top of the fuel tank, which is mounted under the rear of the car.
To access it:
- Open the rear door and locate the rear seat cushion.
- Press down firmly on the front edge of the cushion and lift upward. Most Mini Cooper rear seat cushions release without any tools needed.
- With the cushion removed, you will see the carpet underneath. Carefully fold or lift the carpet back to reveal the fuel pump access panel in the vehicle’s floor.
- The access panel is usually a round or rectangular cover secured by screws or bolts. Remove it to gain direct access to the fuel pump assembly sitting on top of the fuel tank.
Even if the inertia switch is located in the engine bay, knowing where the actual pump sits is useful, particularly if you ever need to replace the pump itself rather than just resetting the switch.
Tools and Materials You Will Need Before You Start
Getting everything together before you start is worth doing. Nothing is more frustrating than getting halfway through a job and realizing you are missing a key tool. Here is what you need for this job.
| Tool or Material | What It Is Used For |
|---|---|
| 10mm socket and ratchet | Loosening the mounting bracket on the inertia switch |
| Brass punch | Repositioning the inertia switch without damaging it |
| Rubber mallet | Gently tapping the brass punch to push the switch back into place |
| Screwdrivers (flathead and Phillips) | Removing trim panels, access covers, and clips |
| Socket set (assorted sizes) | General fastener removal throughout the job |
| Adjustable wrench | Handling fasteners of varying sizes |
| Replacement O-ring seal | Required if you are opening the fuel pump assembly itself |
| Replacement fuel pump (if needed) | Only necessary if the pump motor has actually failed, not for a simple reset |
One important note on parts: if you do end up needing to replace components like the O-ring or the fuel pump itself, use genuine Mini Cooper parts wherever possible. Aftermarket parts for fuel system components can vary wildly in quality, and a poor-quality O-ring that fails can cause a fuel leak, which is a serious safety issue.
For a basic inertia switch reset, you may not need most of these tools at all. Sometimes it is as simple as pressing a button. But having the full toolkit available means you are prepared if you discover something more complex once you get in there.
How to Reset the Mini Cooper Fuel Pump: Step-by-Step
Now for the actual procedure. Work through these steps carefully and do not rush. Taking your time here will prevent mistakes that could turn a simple job into an expensive one.
Step 1: Safety First, Always
Before you touch anything under the hood or inside the car, disconnect the battery. This is non-negotiable when working around fuel system components. Fuel vapors are flammable, and any electrical spark near an open fuel system is a serious hazard. Disconnecting the negative terminal of the battery eliminates that risk.
Also make sure the car is parked on a flat, stable surface with the parking brake applied. Do not attempt this job on a slope or unstable ground.
Step 2: Locate the Inertia Switch
Open the hood and make your way to the driver’s side of the engine compartment. Look between the brake master cylinder and the hood hinge. The inertia switch is a small component, often with a colored button on top (commonly red or black depending on the model year). If you are struggling to find it, pull out your owner’s manual and look up the fuel pump inertia switch location for your specific model.
When the switch has tripped, the button will be visibly raised or popped up compared to its normal flush position. That is your confirmation that this is your problem.
Step 3: Loosen the Mounting Bracket
Use your 10mm socket and ratchet to loosen the mounting bracket that holds the inertia switch in place. You do not need to remove it completely, just loosen it enough to allow the switch to move slightly so you can reset it properly.
Step 4: Reset the Switch
Place the tip of the brass punch against the inertia switch button. Using the rubber mallet, tap the brass punch gently but firmly. The goal is to push the switch button back down into its original locked position until you feel or hear it click into place.
Why brass? Because brass is a soft metal that will not damage the switch housing or create sparks the way a steel punch might. Always use a brass punch for this kind of work around fuel system components.
Do not over-strike it. A few firm taps should be all it takes. If the button is not clicking into position after several attempts, the switch itself may be damaged and need replacement rather than just resetting.
Step 5: Tighten the Mounting Bracket
Once the switch has clicked back into position, tighten the mounting bracket back down with your 10mm socket. Make sure it is snug but do not over-tighten it. Stripping a mounting bracket on a small switch like this is an unnecessary headache.
Step 6: Reconnect the Battery
With the switch reset and the bracket secure, reconnect the negative battery terminal. Make sure the connection is tight and clean before moving on.
Step 7: Test Before You Assume It Is Fixed
Turn the ignition key to the “on” position without cranking the engine. Listen carefully near the rear of the car. You should hear that brief two-second hum from the fuel pump priming the system. If you hear it, great. The pump has power again.
Now start the engine. If it fires up normally and runs smoothly, you have successfully reset the fuel pump. Take the car for a short test drive to confirm everything is behaving as it should before calling the job done.
What If the Car Still Will Not Start After the Reset?
This is where it gets a bit more involved. If you have reset the inertia switch, confirmed it has clicked back into place, reconnected the battery, and the car still will not start or the fuel pump still has no prime sound, then the inertia switch was not actually your problem, or there is an additional issue sitting alongside it.
Here are the most likely reasons the car is still not starting:
- The inertia switch itself is damaged. If the switch will not click back into its reset position, or if it trips again immediately, the switch may be faulty and needs to be replaced. Replacement inertia switches are relatively inexpensive parts.
- The fuel pump motor has failed. If the pump motor has burned out, resetting the switch will not help because the motor itself cannot run. A failed pump will need a full replacement. This is more involved and typically requires accessing the pump under the rear seat cushion as described earlier.
- A blown fuse. The fuel pump circuit is protected by a fuse. Check your fuse box (there is usually one in the engine bay and one inside the cabin) for any blown fuses related to the fuel pump circuit. Your owner’s manual will show you which fuse corresponds to the fuel pump.
- A wiring issue. Damaged or corroded wiring between the inertia switch and the fuel pump can cut power to the pump without the switch being at fault. This kind of electrical diagnosis is best done with a multimeter.
- A clogged fuel filter. If the pump is running but the engine still will not start or runs rough, a severely clogged fuel filter could be restricting fuel flow to the point where the engine cannot get enough to run. Fuel filter replacement is a routine maintenance item that is easy to overlook.
Work through these possibilities in order from simplest to most complex. Check the fuses first since that takes about two minutes and costs nothing. Then inspect the wiring. If those both check out, then start thinking about pump replacement or calling in a professional.
Replacing the Fuel Pump on a Mini Cooper: What That Job Actually Involves
If the diagnosis points to a failed fuel pump motor rather than a tripped inertia switch, here is a realistic picture of what the replacement job involves. This is not meant to scare you away from doing it yourself, but you should go in knowing what you are dealing with.
What Makes This Job More Complex Than Just a Reset
Fuel pump replacement requires you to work directly with the fuel system. That means there will be residual fuel present when you open the pump assembly, and you need to handle that safely. Here is what the replacement process generally involves on a Mini Cooper R56:
- Relieve the fuel system pressure before opening anything. This is done by pulling the fuel pump fuse while the engine is running and allowing the engine to run until it stalls from fuel starvation. This safely depressurizes the system.
- Disconnect the battery.
- Remove the rear seat cushion and carpet as described earlier to access the fuel pump cover panel.
- Remove the access panel cover screws or bolts. Under the panel, you will see the top of the fuel pump assembly sitting in the fuel tank opening.
- Disconnect the fuel pump electrical connector and the fuel lines. Have rags ready to catch any residual fuel that drains out when you disconnect the lines.
- Use a fuel pump lock ring tool (specific to Mini Cooper, available from most auto parts stores) to remove the lock ring that holds the pump assembly in the tank.
- Carefully lift the old pump assembly out of the tank, noting the orientation of the fuel level sending unit arm so you install the new one in the same position.
- Install the new pump assembly with a new O-ring seal. Do not reuse the old O-ring. A deteriorated or improperly seated O-ring will cause a fuel leak from the tank, which is a fire hazard.
- Reinstall the lock ring, reconnect the fuel lines and electrical connector, reinstall the access panel, carpet, and seat cushion.
- Reconnect the battery and reinstall the fuel pump fuse. Turn the ignition to “on” several times (without cranking) to allow the new pump to prime the system fully before starting the engine.
This is a doable DIY job for someone with moderate mechanical experience and the right tools. But if you are not comfortable working around fuel, or if you have never done this type of job before, having a professional do the pump replacement is a perfectly reasonable choice.
How Much Does This Cost at a Shop vs. Doing It Yourself?
Understanding the cost difference between DIY and professional repair helps you make an informed decision about which route to take.
| Repair Type | DIY Cost | Professional Shop Cost |
|---|---|---|
| Inertia switch reset | Free (or under $15 for tools if needed) | $50 to $100 (diagnostic fee) |
| Inertia switch replacement | $15 to $40 for the part | $80 to $150 parts and labor |
| Fuel pump replacement (R56) | $100 to $250 for the part | $350 to $700 parts and labor |
| Fuel filter replacement | $20 to $60 for the part | $100 to $200 parts and labor |
For a simple inertia switch reset, paying a shop diagnostic fee just to have someone press a button does not make much financial sense. This is genuinely one of those jobs where doing it yourself saves real money. Fuel pump replacement is where the calculation gets more interesting. If you are comfortable with the process, the DIY savings are substantial.
Keeping Your Mini Cooper Fuel System in Good Shape Long-Term
Resetting the fuel pump solves the immediate problem, but it is worth thinking about what you can do to keep the entire fuel system running reliably for the long haul. Mini Coopers are performance-oriented vehicles, and fuel system health directly affects how the car drives.
- Use quality fuel. Mini Coopers, particularly the Cooper S models with turbocharged engines, are designed to run on higher octane fuel. Using the manufacturer-recommended octane rating protects the engine and reduces carbon buildup that can affect fuel injectors and the fuel system overall.
- Do not run the tank too low. The fuel pump is actually cooled and lubricated by the fuel surrounding it inside the tank. Running consistently on a near-empty tank causes the pump to run hotter than it should, which accelerates wear and shortens pump life. Try to keep at least a quarter tank at all times.
- Replace the fuel filter on schedule. A clogged fuel filter forces the pump to work harder to push fuel through. Over time, that extra strain burns out pump motors prematurely. Check your owner’s manual for the recommended fuel filter replacement interval and stick to it.
- Address unusual symptoms quickly. Hard starting, hesitation under acceleration, rough idle, and sudden drops in fuel economy are all early warning signs that the fuel system needs attention. Catching these early almost always results in a cheaper repair than waiting until something fails completely.
- Know where the inertia switch is. Now that you have read this guide, you know exactly where the switch lives and what to do if it trips again. Keep that information handy. If the car suddenly will not start after an impact or a rough drive, that switch is the first thing to check.
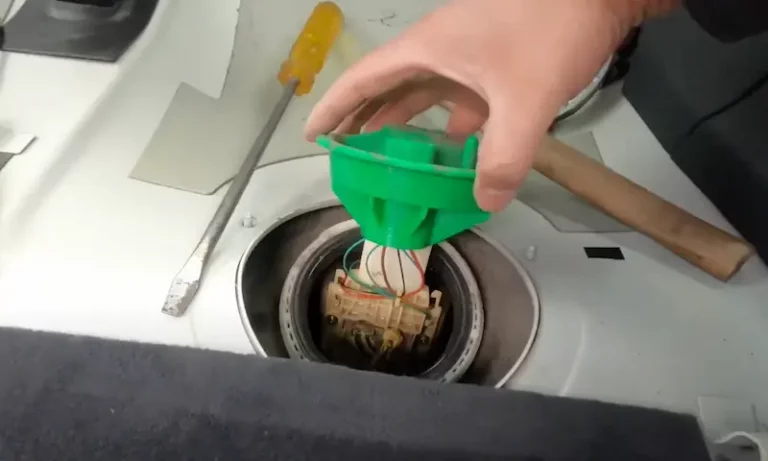
Watch the Reset Process in Action
Reading through the steps is helpful, but watching someone actually do the job makes it click faster. This video walks through the fuel pump reset process on a Mini Cooper so you can see exactly what to expect before you start.
Watching the process once before you head out to your driveway can save you from making avoidable mistakes and give you the confidence to get through it without second-guessing yourself at every step.
A Few Things Mini Cooper Owners Often Get Wrong With This Job
After seeing a lot of these jobs go sideways, here are the most common mistakes to avoid:
- Not disconnecting the battery first. Working around fuel with the electrical system live is genuinely dangerous. Do not skip this step even if the job looks simple from the outside.
- Assuming the pump is bad without checking the switch first. A fuel pump replacement is significantly more work and expense than a switch reset. Always start with the easiest possible cause and work your way toward complexity.
- Skipping the fuel pump prime test after the repair. Before you start the engine, turn the ignition to “on” a few times to allow the pump to prime. Starting the engine immediately after a pump replacement without priming it first can cause air lock in the fuel lines, which makes it seem like the repair failed even when it did not.
- Reusing the old O-ring during pump replacement. This is where fuel leaks come from after pump replacements. Always install a new O-ring and make sure it seats correctly before tightening the lock ring.
- Using the wrong tools on the inertia switch. Using a steel punch or a screwdriver to tap the switch back into place risks damaging the switch housing or creating a spark. Use brass. Always.
The fuel pump reset on a Mini Cooper is genuinely one of the simpler things you can do yourself at home, but small mistakes can turn it into something more complicated. Take it step by step, use the right tools, and you will have the car back on the road without spending a dollar at a shop.
If your Mini Cooper suddenly will not start and you have not been in any kind of accident or impact recently, the inertia switch is still worth checking before anything else. It costs you nothing but a few minutes, and you might be surprised how often that little button is all that stands between you and a running engine.