
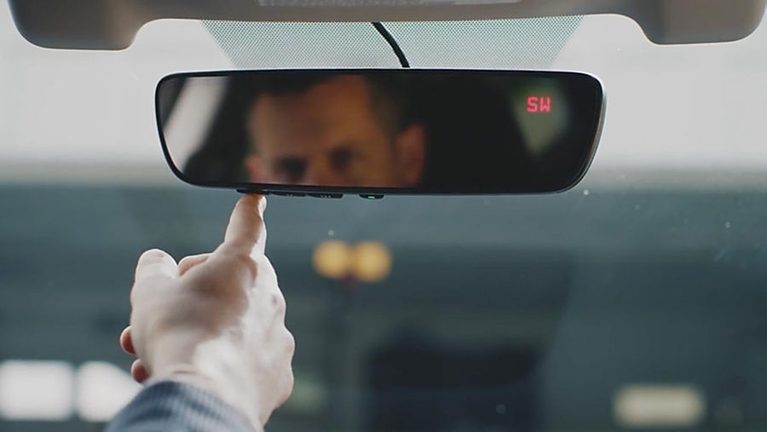
At least once a month, a Subaru owner pulls up to our shop bay, points at the rearview mirror, and tells me the garage door buttons on their car are dead from the factory. Last spring it was a guy with a Forester who had spent forty minutes in his driveway mashing button one until his thumb had a dent in it. Nothing was wrong with his mirror. He had finished the first half of the pairing routine with his handheld clicker, skipped the ceiling motor sync step, and then accidentally erased the memory while trying to fix it.
If you’ve ever tried to pair a Subaru HomeLink mirror using the quick-start card in the glovebox, you know why people get frustrated. The factory instructions make it sound like every garage door opener on earth responds the exact same way. In real life, a twenty-year-old fixed-code opener, a newer Chamberlain with encrypted rolling codes, and a neighborhood security gate all behave differently when your mirror tries to talk to them.
Once you understand what the little indicator light on the mirror is telling you, the whole job takes about five minutes in your driveway. You don’t need special scan tools, and you don’t need to pay a dealership service department an hour of labor to press three buttons for you. We’ll walk through how the transceiver inside your Subaru works, how to pair both older and newer garage openers without wiping your other saved buttons, and how to fix the stubborn edge cases that make drivers give up.
What Subaru HomeLink actually does behind the mirror glass
HomeLink is a built-in radio-frequency transceiver tucked inside the bottom edge of your auto-dimming rearview mirror or, on certain trims, up in the overhead console. Instead of clipping three plastic remotes to your sun visor where they rattle and bake in the sun, you get three programmable buttons wired right into the car’s electrical system. Most Subaru mirrors with this feature are built by Gentex, and they’re designed to read and transmit across the common radio bands used by residential garage doors, driveway gates, and RF lighting receivers.
The catch is that garage door radio systems fall into two camps. Older units use a fixed code, frequently set by a row of tiny mechanical dip switches inside the remote and the motor housing. When you press the handheld remote near your Subaru mirror, the mirror copies that single static radio signal and replays it whenever you touch the button.
Almost every residential opener built over the last couple of decades uses a rolling code system instead. Every time you press the button, an algorithm rolls to a brand-new encrypted code so a thief sitting at the curb with a radio grabber can’t record your signal and open your garage later. Because of that encryption, your Subaru has to do a two-part handshake: first it listens to your handheld remote to identify the opener’s frequency and protocol, and second it introduces itself directly to the motor unit hanging from your garage ceiling.
Why the two-step pairing process trips up so many drivers
Here is where ninety percent of driveway attempts go sideways. During step one, you hold your old clicker next to the mirror until the tiny light on the mirror flashes fast. That fast flash makes you think the job is finished, so you let go, press the mirror button, and stare at a garage door that refuses to move an inch.
On a rolling-code opener, that fast flash only means the mirror understood the type of remote you’re holding. Your ceiling motor still treats the Subaru as a stranger until you press the program or sync button up on the motor housing and then send a confirmation pulse from the car. If you stop halfway through, the mirror transmits a signal into thin air that the garage opener deliberately ignores for security reasons.
Preparing your Subaru and garage before you touch a button
A little prep work saves you from climbing up and down a ladder four times while a thirty-second timer runs out on your ceiling motor. Before you start pressing buttons on the mirror, get your tools and safety checks sorted out so you can move smoothly from inside the cabin to the garage opener head unit.
Safety checks in the driveway that people skip
Park your Subaru outside the garage in the driveway, facing the door, with the nose of the car completely clear of the door’s travel path. During setup, that heavy door is going to move unexpectedly, and I’ve seen more than one roof rack or open rear hatch get crunched because someone parked half under the tracks while testing buttons. Make sure kids, dogs, bicycles, and toolboxes are completely clear of the doorway and the optical safety sensors near the floor.
Put the transmission in Park (or Neutral with the parking brake firmly set on a manual WRX, Crosstrek, or BRZ) and turn the ignition to the ON or Accessory position without starting the engine if you’re anywhere near an enclosed space. Never run an engine inside a closed or partially closed garage, even for two minutes while messing with a mirror. You can review federal vehicle and carbon monoxide safety guidance through the NHTSA garage and vehicle safety resources if you keep vehicles and openers around kids at home.
What you need in your hand before starting
Don’t rely on memory or guesswork when you’re sitting in the driver’s seat. Grab these items first so you aren’t scrambling mid-procedure:
- Your working handheld garage remote: HomeLink needs an existing working transmitter to read the initial frequency and code format during step one.
- A fresh coin-cell or alkaline battery for that remote: A weak remote battery might still open your garage door from the driveway, yet fail to produce a clean, steady signal strong enough for the Subaru mirror’s internal antenna to record.
- Your Subaru owner’s manual: Keep it open to the HomeLink or auto-dimming mirror pages so you know which generation of transceiver your car uses.
- The garage door opener manual (or a clear photo of the motor label): Knowing whether you have a LiftMaster, Chamberlain, Genie, Overhead Door, Linear, or Sommer unit tells you how the ceiling sync button behaves.
- A sturdy stepladder and a helper: Once you push the sync button on the ceiling motor, most openers only give you 30 seconds to get back into the Subaru and press the mirror button.
Finding the HomeLink buttons in your Subaru
On almost every Subaru Outback, Forester, Crosstrek, Ascent, Legacy, Impreza, WRX, and Solterra equipped with the feature, the three HomeLink buttons sit along the bottom bezel of the interior rearview mirror. They’re usually labeled with tiny house icons or numbers I, II, and III, and there’s a small LED status light either tucked into the mirror glass above button one or molded right between the buttons. On a few older Subaru models without the upgraded mirror, the buttons were mounted in the overhead console near the map lights and moonroof switch.
Take a close look at the mirror glass with the ignition switched on. Newer Gentex mirrors used by Subaru have a subtle backlit house icon and directional arrows that glow amber or green behind the reflective surface when you press a button. Older versions use a single red or orange pinhole LED on the plastic frame below the glass.
Checking what kind of garage door opener hangs from your ceiling
Walk into the garage, climb your ladder, and look at the back or side panel of the motor unit mounted to the ceiling joists. You may have to pop open the plastic light lens cover to see the control board. If the opener was made after the mid-1990s, you’ll see a colored square or round button labeled Program, Smart, or Sync right next to a tiny status LED and a thin dangling antenna wire.
Look at the color of that button and the hanging antenna wire, because the color tells you the exact radio frequency and security generation the opener uses. A yellow round button with a yellow antenna wire on a Chamberlain or LiftMaster unit means Security+ 2.0 encrypted technology, whereas purple, orange, red, or green buttons indicate earlier rolling-code frequencies. If you pull the cover off an ancient opener from the 1980s and only see a block of 8 to 12 tiny numbered toggle switches with no colored push button at all, you have a fixed-code system that won’t need step two on the ladder.
Where HomeLink sits and what the mirror lights mean across Subaru models
Before you start holding buttons down, it helps to know how your specific mirror talks back to you. The status LED is your only diagnostic screen during programming, and misreading a slow amber flash for a rapid flash is the fastest way to get stuck.
| Mirror or Console Generation | Common Subaru Applications | Indicator Light Behavior | What the Light Tells You |
|---|---|---|---|
| Standard Red/Amber Pinhole LED Mirror | Older Outback, Forester, Legacy, Impreza, and dealer-installed accessory mirrors | Single red or orange LED on the plastic bezel blinks slowly, blinks rapidly, or stays solid | Slow blink means waiting to read remote; rapid blink means remote signal captured; solid or brief double-blink during use often means rolling-code sync is still required |
| Backlit Glass Icon Mirror (HomeLink 5 / Gentex Framingless or Thin Bezel) | Late-model Outback, Forester, Crosstrek, Ascent, WRX, Legacy, and Solterra trims | Multicolor amber and green LEDs shine through the mirror glass next to a house icon | Slow orange flash means training mode is active; fast green flash means the handheld remote code took; rapidly flashing green/orange during a button press means it expects ceiling motor pairing |
| Smart Rearview Camera Mirror with HomeLink | Touring and Limited trims with digital camera mirror toggle | Status LED on the lower left bezel or behind the glass near buttons I, II, and III | Behaves like late-model HomeLink 5 units; keep the digital camera display toggled off while training if glare makes the small status icon hard to see |
| Overhead Console HomeLink Module | Select older Legacy, Outback, and Tribeca trims without auto-dimming mirror buttons | Single amber or red LED next to the three console buttons near the map lamps | Requires holding the handheld remote aimed upward toward the headliner console rather than toward the windshield glass |
How to program your Subaru HomeLink system step by step
Let’s walk through the full setup the way we do it for customers at the shop. Read through the reset warning first so you don’t accidentally wipe out a working gate code or second garage door that’s already saved in your mirror.
When to clear the memory (and when you shouldn’t touch the reset)
Every generic instruction sheet tells you to start by holding down the two outside HomeLink buttons (buttons 1 and 3) to wipe the memory clean. That’s great advice if you just bought the Subaru, or if none of the three buttons are currently programmed to anything. Doing that full reset clears all three memory channels back to factory blank state.
However, if button 1 already opens your main garage door and you only want to add your neighborhood gate or second garage bay to button 2, do not hold the two outside buttons down. If you do, you’ll erase button 1 along with everything else. We’ll cover how to overwrite or program a single individual button in a moment without touching your other saved channels.
Phase 1: training your Subaru mirror from the handheld remote
Start here if you are setting up HomeLink for the first time on your vehicle. Make sure your ignition is in the ON or Accessory position so the mirror has full power, and close the garage door with your handheld remote before you begin so the door isn’t already sitting open.
- Clear the factory memory (first-time setup only): Press and hold the two outer HomeLink buttons (button 1 and button 3) at the exact same time. Keep holding them for about 10 to 20 seconds until the indicator light changes from a solid glow to a rapid flash, then release both buttons immediately.
- Hold your handheld remote at the sweet spot: Hold your working garage door remote 1 to 3 inches away from the HomeLink buttons on the mirror, making sure you can still see the small indicator light clearly. On many Gentex mirrors, the internal receiver antenna sits slightly toward the center or back of the housing, so aiming the nose of the remote right under the buttons works best.
- Press and hold both buttons together: Choose which HomeLink button (1, 2, or 3) you want to use. Press and hold that Subaru button and your handheld remote button simultaneously, and do not let go yet.
- Watch the indicator light change speed: At first, the HomeLink indicator light will blink slowly (orange or red depending on your mirror) while it listens to the handheld remote’s radio signal. Keep holding both buttons steady until the light switches from a slow blink to a rapid flash (or fast green flash on newer mirrors), which usually takes between 5 and 30 seconds, then release both buttons.
- Note for Canadian remotes and certain gate clickers: Some transmitters automatically stop sending a radio signal after two seconds to save battery life or meet Industry Canada rules. If your remote light shuts off while you hold it, keep holding the Subaru HomeLink button down continuously while you press and release your handheld remote button every two seconds until the mirror light flashes rapidly.
Once you get that rapid flash, step one is finished. Take a breath and test the Subaru HomeLink button once by pressing and holding it for two full seconds. If your garage door starts moving right away, you have a fixed-code opener or an auto-syncing bridge, and you’re completely done. If the garage door sits stone-still and the mirror light flashes fast for two seconds and turns solid (or blinks orange/green), your opener uses rolling codes and you must immediately do Phase 2 below.
Phase 2: syncing a rolling-code garage door motor to your Subaru
Don’t touch the handheld remote again during this part! Put the handheld remote on the passenger seat so you aren’t tempted to press it. You already taught the mirror the frequency; now you’re teaching the ceiling motor in the garage to trust the Subaru’s internal transmitter.
- Climb up to the garage door opener motor unit: Locate the Program, Smart, or Sync button on the back or side of the motor head hanging from the ceiling. Give that button one firm press and immediate release (do not hold it down for more than a second, or you will erase all existing remotes and keypads paired to your garage door!).
- Watch for the motor’s status light: A small LED next to the button on the motor housing will light up steady or start blinking. From this exact second, a 30-second countdown timer is running inside the garage opener.
- Move back to the Subaru seat within 30 seconds: Get into the driver’s seat (or signal your helper who is already sitting in the car) and press the exact same HomeLink button you trained in Phase 1. Hold that Subaru button down for 2 full seconds, then release it.
- Repeat the 2-second press up to three times: Many rolling-code openers acknowledge the signal on the first press and flash their work lights twice, then move the door on the second press. Some brands take a third 2-second press and release before the motor clicks and the door starts rolling.
The moment the garage door starts moving or the work bulbs on the ceiling motor blink twice and click, the rolling-code handshake is locked into memory. Wait for the door to finish its travel, then press the Subaru button one more time to verify that it opens and closes reliably on command.
How to reprogram a single button without wiping the other two
What if you move to a new house, replace one broken garage opener, or want to add a gate to button 2 while keeping button 1 intact? You can overwrite or program a single button directly without touching the two-button factory reset. Keep your hands off the 1-and-3 reset combo.
To program an empty button (or overwrite an old one), simply press and hold that single HomeLink button by itself. If the button is blank, the indicator light will start blinking slowly right away, and you can bring your handheld remote within 1 to 3 inches and hold the remote button until the rapid flash appears. If the button already holds an old code from a previous opener, keep holding the single HomeLink button down for about 20 seconds; after 20 seconds it will drop into slow-blink training mode, ready to accept the new handheld remote signal without disturbing the other two buttons on your mirror.
Brand-specific garage opener quirks that catch Subaru owners off guard
Not every garage door opener plays by the exact same rules during Phase 1 and Phase 2. Over the years, opener manufacturers changed frequencies (300 MHz, 310 MHz, 315 MHz, 390 MHz, and multi-frequency hopping) to get around military radio interference and code-grabbing thieves. Knowing the quirks of your specific brand saves a lot of head-scratching.
| Opener Brand / System | Sync Button Color or Style on Motor | Frequency / Protocol | Special Trick for Subaru HomeLink Pairing |
|---|---|---|---|
| Chamberlain, LiftMaster, Craftsman (Security+ 2.0) | Yellow round button with yellow antenna wire (2011 and newer) | Multi-frequency (310 / 315 / 390 MHz) encrypted rolling code | Requires HomeLink version 4.0 or 5.0 (standard on newer Subarus). Older Subarus (roughly pre-2012/2014 depending on model) require a HomeLink Compatibility Bridge repeater kit. |
| Chamberlain, LiftMaster, Craftsman (Security+) | Purple square button with purple wire (approx. 2005 to 2013) | 315 MHz rolling code | Pairs smoothly on almost all Subaru mirrors, but LED lightbulbs screwed into the opener socket frequently jam the 315 MHz signal. |
| Chamberlain, LiftMaster, Craftsman (Early Security+ / Billion Code) | Orange/red button (1997 to 2005) or green button (1993 to 1997) | 390 MHz rolling or billion code | Hold the handheld remote 3 to 5 inches away during Phase 1; holding it right against the plastic mirror bezel can overload the 390 MHz receiver. |
| Genie (Intellicode 1 and Intellicode 2) & Overhead Door (CodeDodger) | Black or purple Program/Set button under light cover or on bottom panel | 315 MHz / 390 MHz dual-frequency rolling code | On newer Genie units, hold the Program button until the round LED turns blue, release it so the long purple LED flashes, then press the Subaru button twice. |
| Wayne Dalton (Quantum / Classic Drive) | Red or black small button on rear panel | 303 MHz or 372 MHz depending on series | Some 372 MHz Wayne Dalton models are outside standard HomeLink frequency ranges unless updated or paired with a universal receiver kit. |
| Sommer Direct Drive | Red radio receiver button inside carriage or ceiling housing | 310 MHz rolling code | You must complete both Phase 1 with the handheld remote and Phase 2 at the sliding carriage receiver; pressing the Subaru button twice locks it in. |
The LiftMaster and Chamberlain yellow-button bridge problem
If you drive an older Subaru, say a 2010 Outback or a 2012 Forester, and you just had a brand-new LiftMaster or Chamberlain garage door opener installed with a yellow round button and the MyQ logo on the side, you might run into a hard wall. You’ll hold your new remote up to the mirror, the mirror light will blink slowly forever, and it will never switch to a rapid flash no matter how many batteries you swap.
That isn’t your fault, and your mirror isn’t broken. When Chamberlain introduced Security+ 2.0 (the yellow button system), they changed the radio waveform so drastically that older HomeLink modules built before that standard existed simply can’t decode it. The fix costs about $30 to $45: you buy a plug-in HomeLink Compatibility Bridge (sometimes sold as a repeater kit), plug it into an outlet inside your garage, pair your old Subaru mirror to the bridge’s special remote, and pair the bridge to the yellow button on your ceiling opener.
Genie Intellicode and Overhead Door dual-frequency remotes
Genie and Overhead Door remotes manufactured after around 2011 often ship able to transmit on either Intellicode 1 or Intellicode 2. If your Subaru mirror struggles to read a Genie remote during Phase 1, check whether the little LED on the Genie remote itself is flashing red or green when you press it. The Subaru Owners: Start Here portal on the official HomeLink website has model-specific instructions showing how to toggle a Genie remote between modes if your mirror prefers one over the other.
Troubleshooting common setup issues when HomeLink won’t cooperate
When a pairing attempt fails in the driveway, most people just repeat the exact same button press ten times and hope for a different result. Instead of guessing, look at where the process stopped and match the symptom to what the radio signal is actually doing.
Indicator light stays solid or never blinks at all
If the indicator light on your Subaru mirror stays solid or won’t enter the slow-blink training mode, start with the handheld garage remote in your hand. A solid light or a refusal to transition during training usually points to a weak or non-transmitting remote battery, or a button that already has a locked code stored in it. Even if the handheld clicker still opens your garage door from twenty feet away, its battery voltage can sag under a continuous 15-second press, causing the radio signal to drop out before the Subaru mirror finishes verifying it.
Pop open the handheld remote case with a small flathead screwdriver or coin and drop in a brand-new CR2032, CR2016, or 23A battery (depending on what your clicker takes), which costs about $3 to $6 at any hardware store. Also make sure your Subaru’s ignition is turned to ON or Accessory if your model cuts power to the mirror when the key is off. If the mirror light still stays solid when you press a single button, hold that single button for a full 20 seconds until it forces itself into slow-blink training mode.
Mirror blinks slowly forever and never switches to rapid flash
When the mirror blinks slowly for thirty or forty seconds and never rewards you with a fast flash, the mirror is listening, but it can’t get a clean read on your handheld remote’s signal. Nine times out of ten, this comes down to distance and angle. Holding a powerful brand-new remote pressed dead flush against the mirror plastic is like shouting directly into someone’s ear with a megaphone: the signal clips and distorts inside the receiver circuit.
Try moving the handheld remote back to 4 to 6 inches away from the mirror, or hold it slightly behind the mirror glass aimed at the back of the housing where the circuit board sits. If that still fails, turn the remote upside down or try holding it 2 inches below the center button. And remember the two-second rule: if the little LED on your handheld remote turns off after two seconds while you hold the button down, release and re-press the remote button every two seconds while keeping your finger glued to the Subaru HomeLink button.
Rapid flash succeeded, but the garage door still doesn’t move
This is the classic rolling-code trap we talked about at the beginning. If you got the fast blink during Phase 1, your Subaru mirror successfully captured the remote’s language, so stop holding the handheld remote next to the mirror. Re-doing Phase 1 over and over won’t make the door move.
Look at the HomeLink indicator light when you press the programmed Subaru button: if it blinks rapidly for two seconds and then turns solid, that is HomeLink’s built-in code for “I need Phase 2 rolling-code synchronization.” Go press and release the smart/sync button on the ceiling motor head unit (do not hold it down!), climb back into the Subaru within 30 seconds, and press the programmed HomeLink button for two full seconds up to three times until the door moves.
The garage opener’s memory is full of old remotes
Here is a sneaky shop problem that almost nobody thinks about on a ten-year-old house. Every garage door opener motor has a tiny memory chip that can only store a set number of remotes and vehicles, often between 6 and 8 devices on standard residential openers. If previous homeowners, lost remotes, and old cars have filled all those memory slots, your opener will either refuse to pair with your new Subaru or kick your spouse’s car off the memory list to make room.
If Phase 1 works every time and Phase 2 on the ceiling motor refuses to take despite doing the 30-second sequence properly, your ceiling opener’s memory may be jammed or full. On most openers, holding the ceiling sync button down for 6 to 10 seconds until the motor LED goes out clears every wireless remote from the garage opener’s memory. Only do this if you have all your household remotes and cars on hand, because you’ll have to re-sync each remote and vehicle to the ceiling motor right afterward.
The cheap LED lightbulb problem that kills HomeLink range
Suppose your Subaru HomeLink works, but only when your front bumper is practically touching the garage door, or it works in the morning when the garage light is off and fails at night when the opener light is on. Before you blame Subaru or Gentex, unscrew the lightbulbs inside your garage door opener housing and test the mirror button again.
Cheap household LED lightbulbs use internal switching power drivers that spit out electromagnetic noise right around 310 to 390 MHz. Because the lightbulb is screwed in three inches away from the garage opener’s dangling wire antenna, that RF static drowns out your Subaru’s radio signal until you’re right under the door. Swapping standard LED bulbs for incandescent rough-service bulbs or FCC-shielded “garage door opener LED bulbs” (around $12 a pair) fixes poor HomeLink range almost instantly.
Quick symptom-to-fix diagnostic table
| What You See in the Driveway | Most Likely Cause | How to Fix It |
|---|---|---|
| No LED light on the mirror at all when pressing buttons | Ignition is off (on switched models), blown accessory fuse, or unplugged mirror harness above overhead console | Turn ignition to ON/ACC; check the mirror/accessory fuse in the interior fuse box near the driver’s left knee; verify the plug at the back of the mirror |
| Light blinks slowly for 30+ seconds and never flashes fast | Remote held too close/far, weak remote battery, remote times out after 2 seconds, or incompatible Security+ 2.0 frequency on older Subaru | Install a fresh remote battery, vary distance between 1 and 6 inches, pulse the remote every 2 seconds, or check if your model year needs a HomeLink bridge |
| Light flashes fast for 2 seconds then goes solid when pressed, door doesn’t move | Phase 1 succeeded, but Phase 2 rolling-code ceiling sync hasn’t been completed | Press and release the sync/smart button on the garage ceiling motor, then press the Subaru HomeLink button for 2 seconds (up to 3 times) within 30 seconds |
| Programming button 2 erased button 1 | You held buttons 1 and 3 together (master reset) instead of programming button 2 individually | Never touch the 1-and-3 reset once one button is set; hold only the single button you want to add or overwrite |
| HomeLink opens the door in the morning, but won’t close it after backing out | Unshielded LED lightbulbs in the garage opener motor housing are jamming the antenna while lit | Unscrew the bulbs from the ceiling opener and test; replace with dedicated garage-opener-rated shielded LED bulbs |
Using HomeLink with multiple garage doors and community gates
Your Subaru gives you three independent memory channels on the mirror, labeled I, II, and III. You can mix and match brands and frequencies across those three buttons without any conflict. Button 1 can run a LiftMaster 315 MHz garage opener at home, button 2 can run a 390 MHz Genie door at your workshop or parents’ house, and button 3 can trigger a 300 MHz neighborhood security gate.
Linking a second or third garage door
When you’re ready to set up your second or third door, remember the golden rule: skip the two-button factory reset completely. Park in front of the second door with its handheld remote in your hand, and press only the unused HomeLink button (for example, button 2) together with the second remote held 1 to 3 inches away.
Once the mirror status light switches from a slow blink to a rapid flash, check whether the second door moves. If it’s a rolling-code opener, climb the ladder to that second ceiling motor, tap its sync button once, and return to the Subaru to press button 2 for two seconds until the second door responds. After you finish, test button 1 and button 2 one after the other to make sure each button triggers only its assigned door.
Why both garage doors sometimes move from a single button press
Every once in a while, a homeowner with a two-car garage accidentally syncs both ceiling motors to the same HomeLink button, so pressing button 1 sends one door up while the other door goes down. That happens if you accidentally pressed the sync button on both ceiling motors within the same 30-second window, or if you held down the wrong mirror button during Phase 2.
Even more common is standing too close to the first door while testing the second button, or bumping a multi-button handheld remote on the wrong button during Phase 1. Label your handheld remote buttons with a piece of painter’s tape before you start if your single handheld clicker controls multiple doors.
Programming gated community and driveway entrance gates
Neighborhood gates and heavy swing or slide driveway gates usually run on fixed codes or commercial 300 MHz / 318 MHz receivers (like Linear MegaCode, Multi-Code, or LiftMaster commercial gate operators). For most neighborhood gates where you obviously aren’t allowed to open the locked HOA control box at the curb, your gate remote uses a fixed or facility-encoded signal that only requires Phase 1.
Because gate transmitters often use a brief two-second burst to prevent battery drain, use the “cycling” method during Phase 1: keep your finger firmly holding down your chosen Subaru HomeLink button while you press and release your gate clicker every two seconds right near the mirror. Once the Subaru indicator flashes rapidly, release both and test the button at the gate entrance.
Advanced HomeLink features: lighting, security, and smart home receivers
Most people only ever use button 1 for their main garage door and leave buttons 2 and 3 sitting idle for the entire life of the car. Those extra two buttons can actually control compatible radio-frequency home lighting modules, driveway floodlights, or certain home security and gate interfaces when you pull into the driveway at night.
Controlling exterior or interior lighting from your driveway
You can’t point your Subaru mirror at a standard Wi-Fi or Bluetooth smart plug and expect it to pair directly, because HomeLink speaks radio frequency (RF), not household Wi-Fi. However, compatible HomeLink plug-in lamp modules and wall switches (or RF-to-smart-home bridge receivers supported by Gentex/HomeLink) listen on the exact same RF bands as garage openers.
When you pair an interior hallway lamp module or driveway floodlight receiver to button 3 on your Subaru mirror, you can flick the house lights on from a hundred feet down the driveway before you even step out of the car in the rain. Setup works just like a rolling-code opener: train the Subaru button with the lighting kit’s handheld transmitter, press the sync button on the plug-in light module indoors, and send a confirmation press from the car.
Integrating with compatible home security and gate locks
Some property gate controllers and RF-equipped security panels allow a dedicated radio channel to arm a perimeter gate latch, trigger an entry chime, or disarm an outbuilding alarm zone when paired with a rolling-code transceiver. Before you wire an exterior alarm function to an in-car button, think carefully about where your Subaru sleeps at night.
If your car parks inside a locked garage, having button 2 open a side yard gate or disarm a workshop shed is super convenient. If your Subaru sits outside in an unfenced driveway every night, you never want an unencrypted or always-powered button in the cabin tied to anything that unlocks your house.
Security habits every Subaru owner should take seriously
Garage door security goes way beyond radio encryption in the air. The most common way burglars use a garage opener to get into a house has nothing to do with hacking radio waves, they break a car window in the driveway at 2:00 a.m. and press the garage door opener inside the cabin.
Does your Subaru HomeLink work when the car is turned off?
Here is a detail you should test on your own Subaru today: roll down your driver’s window, shut off the engine, take the key fob thirty feet away (or lock the doors), and reach through the open window to press your programmed HomeLink button. Depending on your Subaru’s model year, trim level, and whether the auto-dimming mirror was factory-installed or added as a port/dealer accessory using a specific roof harness tap, some mirrors receive constant 12-volt battery power while others only power up when the ignition is in ACC or ON.
If your mirror only works with the ignition switched on, a thief who smashes your window in the driveway gets nothing when they press the mirror button, because the circuit is dead without the key fob inside the car. That alone makes an ignition-switched HomeLink mirror far safer than leaving a plastic clip-on garage remote sitting on your sun visor! If your specific mirror has constant power even with the car off, treat your driveway-parked car like a spare house key and lock the inner door between your garage and your kitchen every night.
Why rolling codes matter for wireless security
On the radio side, rolling-code systems protect you every time you press the mirror button in view of the street. With billions of possible code combinations, the code your Subaru transmits at 5:30 p.m. on Tuesday becomes permanently invalid the instant your garage opener receives it. Even if someone recorded that exact radio burst with an SDR receiver, replaying it five minutes later won’t trigger the relay inside your garage motor.
Wiping your Subaru HomeLink memory before selling, trading, or returning a lease
As a mechanic who inspects used trade-ins all week, I can tell you that roughly half the used cars on any dealership lot still have the previous owner’s garage door programmed into button 1. Pair that with an old registration slip or service receipt left in the glovebox with your home address on it, and you’ve practically handed a stranger the key to your garage.
Whenever you sell your Subaru, trade it in, return a lease, or even leave it at a body shop for two weeks of collision work, take twenty seconds to wipe the HomeLink memory. Turn the ignition on, press and hold the two outside buttons (buttons 1 and 3) for 20 seconds until the LED flashes rapidly, and release them. Press button 1 afterward to confirm the garage door no longer responds.
HomeLink maintenance, battery myths, and software compatibility
The original factory pamphlets sometimes leave owners confused about what maintenance a HomeLink system actually needs. Let’s clear up the biggest misconception I hear at the service counter so you never pry apart an expensive rearview mirror by mistake.
Wait, is there a replaceable battery inside the Subaru mirror?
On standard wired Subaru auto-dimming mirrors and overhead consoles, there is no replaceable coin battery inside the mirror housing. The HomeLink module in your mirror draws its power directly from your Subaru’s 12-volt electrical system through the wiring harness tucked behind the trim cover at the top of the windshield. (And no, disconnecting your Subaru’s 12-volt car battery under the hood to clean the terminals or install a new battery will not erase your saved HomeLink buttons, because the codes are stored in non-volatile flash memory.)
So why do maintenance guides talk about replacing the transmitter battery? They are talking about the battery inside your handheld garage door remote (or the battery inside rare, non-wired accessory clip/battery mirrors). When your handheld remote battery gets weak, you can’t use it to train a new HomeLink button, and if you keep that handheld remote as a backup in your kitchen drawer, a dead coin cell leaves you stuck when the power goes out. Check the official Subaru HomeLink Programming Instructions resource page whenever you swap openers or remotes to verify the exact procedure for your model year.
What to check if the entire mirror loses power
If your HomeLink buttons stop lighting up and the green auto-dimming indicator or compass on the mirror goes dark at the same time, you have a simple 12-volt power delivery issue, not a bad garage door code. Start by opening the interior fuse panel behind the small pull-out coin tray near your left knee on the dashboard. Check the low-amperage accessory or mirror fuse (usually 7.5A or 10A depending on the year) with a test light or multimeter.
If the fuse is intact, gently wiggle the plastic wire cover leading from the mirror stem up into the headliner, especially if you recently had a windshield replaced or wired a dashcam into the EyeSight/mirror overhead area. Windshield installers unplug that multi-pin Gentex connector all the time, and if the locking tab wasn’t clicked all the way home, hitting a pothole six months later can back the plug out just enough to kill power to the mirror buttons.
Checking compatibility updates and bridge requirements
Unlike your infotainment touchscreen, the HomeLink transceiver chip inside a rearview mirror doesn’t download over-the-air software updates over Wi-Fi. Instead, Subaru and HomeLink update their online compatibility database and offer hardware repeaters when garage door makers release new encryption protocols. Whenever you install a brand-new garage door opener at home and your existing Subaru won’t read the new remote during Phase 1, visit the Subaru HomeLink support portal and enter your Subaru’s model year alongside the opener brand and button color to see whether a plug-in compatibility bridge is required.
Real-world shop examples: how we solve stubborn Subaru HomeLink problems
Written step-by-step lists look neat on paper, but real cars and real garages always throw curveballs. People swap windshields, install aftermarket dashcams, buy houses with twenty-year-old openers, or try to pair three different brands of gates and doors onto one mirror. Looking at how these issues play out in the shop will save you hours of trial and error in your own driveway.
Case 1: the 2019 Outback that refused to pair after a windshield replacement
A regular customer brought her 2019 Outback in after having a cracked windshield replaced at a glass shop the week before. She told me her HomeLink buttons had lost their memory during the glass job, and when she tried to reprogram button 1 in her driveway, the little indicator light wouldn’t even turn on. She assumed the glass installer had fried her mirror electronics or forgotten to plug the mirror back in, except the green auto-dimming light on the mirror face still glowed when she started the car.
When I pulled down the overhead trim cover near the EyeSight cameras to inspect the mirror harness, I found the real culprit in about thirty seconds. The Outback’s mirror plug uses separate pins for ignition-switched power (which runs the auto-dimming glass and compass) and constant 12-volt battery power (which feeds the HomeLink buttons on that harness). While shoving the connector back in, the glass tech had bent one tiny metal terminal pin inside the plastic plug, so the mirror dimmed fine at night while the HomeLink transceiver had zero voltage.
I straightened the bent pin with a pair of needle-nose pliers, clicked the harness firmly into the socket, and pressed button 1 in the shop lot. Not only did the amber light flash right up, her original garage door code was still sitting safely in the non-volatile memory chip. She didn’t even have to reprogram the mirror when she got home.
Case 2: the 2022 Crosstrek and the mystery of the fifty-foot range drop
Another customer with a 2022 Crosstrek Limited complained that his HomeLink button worked fine from the street when he first bought the car, then suddenly lost almost all of its range over a weekend. He had to pull the nose of the Crosstrek within six inches of the closed garage door panel and hold the mirror button three or four times before the door would finally creak open. He was ready to order a $300 replacement mirror assembly because he thought the radio transmitter inside the mirror was dying.
Instead of ordering parts, I asked him one simple question: “What did you change inside your garage last weekend?” He thought about it for a second and mentioned he had put two bright 100-watt-equivalent daylight LED bulbs into the ceiling opener housing so he could see better over his workbench. Those two bargain-bin LED bulbs were acting like miniature radio jammers right next to the opener’s yellow antenna wire.
He went home, unscrewed both LED bulbs from the opener sockets, and backed his Crosstrek all the way down the driveway into the cul-de-sac. With the bulbs out, button 1 opened the garage door on the first press from well over a hundred feet away. He swapped in a pair of shielded garage-opener-specific bulbs from the hardware store, and the range problem never came back.
Case 3: the 2013 Forester meeting a brand-new yellow-button LiftMaster
We also see the opposite scenario when folks keep an older Subaru for ten or twelve years and upgrade their home garage door opener. A customer with a clean 2013 Forester had a contractor install a quiet belt-drive LiftMaster opener with built-in cameras and a yellow round program button. He tried every trick on the internet: new remote battery, holding the remote four inches behind the mirror, resetting buttons 1 and 3 five times, and standing on a ladder pressing the yellow button until his arm hurt.
Because his 2013 Forester mirror carried an earlier HomeLink revision that predated Chamberlain’s Security+ 2.0 multi-frequency encryption, the mirror could never complete Phase 1 with the new LiftMaster remote. Rather than replacing the car’s mirror or clipping a bulky plastic remote back onto the visor, he bought the LiftMaster 855LM / HomeLink Compatibility Bridge kit for around $35. He plugged the little white repeater box into the ceiling outlet next to his opener, used the bridge’s special translator remote to train button 1 on his Forester mirror, and synced the bridge to the yellow button on the motor.
Deep dive: how Subaru mirror wiring, EyeSight cameras, and accessories interact
If your Subaru came from the factory with a basic manual-flip rearview mirror and you’re thinking about upgrading to an OEM Subaru auto-dimming mirror with HomeLink, or if you’re troubleshooting an existing mirror after installing accessories, it helps to know how Subaru routes the wiring above your head. Subaru actually makes upgrading to a HomeLink mirror much easier than most carmakers because they pre-wire the roof harness on most trims.
Installing an OEM Subaru HomeLink mirror upgrade yourself
On most Forester, Outback, Crosstrek, Impreza, WRX, and Ascent models that shipped with a standard non-powered mirror, the factory wiring harness needed for an auto-dimming HomeLink mirror is already taped up inside the overhead console or behind the EyeSight camera cover. Buying the official Subaru auto-dimming mirror with HomeLink kit from a dealership parts counter typically runs between $180 and $290 depending on your model year and whether your car uses a short adapter jumper harness.
The physical swap usually takes about 20 to 30 minutes with a plastic trim pry tool, a Phillips screwdriver, or a T20 Torx bit depending on the mirror mount button style. One critical warning if your Subaru has EyeSight driver assist cameras mounted on either side of the rearview mirror: never touch the glass lenses of the EyeSight stereo cameras with your fingers, and never spray glass cleaner or drop tools near the camera housings while removing the center trim cover. Even a greasy thumbprint on an EyeSight camera lens can trigger dashboard warning lights and disable adaptive cruise control until the camera is professionally cleaned or inspected.
Watch out for aftermarket dashcam power adapters
Over the last few years, plug-and-play dashcam power dongles that tap directly into the 10-pin or 12-pin Subaru auto-dimming mirror connector have become wildly popular. They’re super clean because you don’t have to snake a long USB wire down the A-pillar to the cigarette lighter socket. However, I’ve diagnosed three different Subarus where a cheap off-brand Y-harness dashcam adapter caused the HomeLink buttons to work intermittently or quit altogether.
Here is why that happens: some bargain Y-splitters only pass through the ignition-switched power and ground pins to feed the 5-volt USB buck converter, and they either leave out the constant 12-volt pin needed by certain HomeLink mirror generations or use skinny, loose-fitting terminal pins that lose contact over bumps. Worse, a noisy 12V-to-5V USB voltage converter dangling two inches behind the mirror can radiate electromagnetic interference right next to the HomeLink receiver antenna during Phase 1 training. If your HomeLink stopped working right after you plugged in a mirror-tap dashcam adapter, unplug the dashcam splitter first and plug the factory Subaru harness straight into the mirror to test.
Window tint strips and metallic windshield films
Sometimes an owner tells me their HomeLink mirror programmed fine in the driveway with the driver’s door standing open, yet struggles to open the garage door when they’re driving up the street with the windows rolled up. If you already ruled out LED bulbs in the garage, look at the top six inches of your windshield. Most aftermarket carbon or ceramic window tint eyebrow strips don’t block radio waves at all, because they contain no metal.
However, certain reflective metallic solar tint films, heavy aftermarket windshield banners with metallic ink, or metal-case toll transponders and radar detectors suction-cupped directly behind the rearview mirror can shield or detune the tiny internal RF antenna inside the mirror bezel. Try relocating any bulky electronic device mounted within three inches of the backside of the rearview mirror if your range feels noticeably weaker than your handheld clicker.
Step-by-step walk-throughs for the four most common opener setups
Because universal instructions try to cover fifty brands in four bullet points, they leave out the little visual cues that tell you things are going right. If you know which of these four setups matches your garage, follow the specific routine for your hardware.
Routine A: modern yellow-button LiftMaster, Chamberlain, or Craftsman (Security+ 2.0)
If your opener has a round yellow button and yellow dangling antenna wire (and your Subaru is new enough to support HomeLink 4 or 5 natively), here is the cleanest way to pair it without any wasted motion:
- Prep the car and remote: Turn the Subaru ignition to ON, hold your LiftMaster or Chamberlain remote 2 inches below the mirror, and press both your chosen Subaru HomeLink button and the remote button together.
- Wait for the fast flash: Keep holding both buttons while the mirror light blinks slowly (orange or red), and release both the instant the mirror light switches to a rapid flash (or fast green flash).
- Trigger the ceiling motor: Climb the ladder in the garage and press and release the round yellow button on the opener motor housing once; the small LED next to the yellow button will glow solid.
- Lock in the handshake: Within 30 seconds, sit in the Subaru and press and hold your programmed HomeLink button for 2 full seconds, then release it. Press and hold it a second time for 2 full seconds and release; you should hear the ceiling motor click and flash its work lights, or see the garage door start moving right away.
Routine B: purple, orange, red, or green square-button openers (Security+ / Billion Code)
These earlier Chamberlain, LiftMaster, and Sears Craftsman units are rock-solid with almost every Subaru year, provided you don’t hold the remote too close during the initial read:
- Hold the remote slightly farther back: Hold your handheld clicker about 3 to 4 inches away from the Subaru mirror buttons so the older 390 MHz or 315 MHz transmitter doesn’t overload the mirror’s receiver.
- Capture the remote signal: Press and hold both the handheld remote button and your chosen Subaru HomeLink button until the slow blink turns into a rapid blink, then release both buttons.
- Press the square button on the ceiling motor: Climb up to the opener motor, press and immediately release the purple, orange/red, or green square button so its adjacent indicator light starts blinking.
- Confirm from the driver’s seat: Back inside the Subaru within 30 seconds, press and hold the HomeLink button for 2 seconds and release, repeating up to three times until the opener work lights blink twice or the door moves.
Routine C: Genie Intellicode and Overhead Door CodeDodger openers
Newer Genie and Overhead Door units use a two-stage button press on the ceiling motor instead of a single quick tap, which catches people off guard if they’re used to Chamberlain units:
- Complete Phase 1 at the mirror: Hold the Genie or Overhead Door remote 1 to 3 inches from the Subaru mirror while pressing both buttons until the mirror LED shifts from slow blinking to rapid blinking.
- Enter program mode on the Genie motor: On the ceiling motor head unit, press and hold the square Program/Set button for about 2 seconds until the round LED turns blue, then let go of the button. The blue light will go out and the long LED will begin flashing purple.
- Send two confirmation presses from the Subaru: Within 30 seconds while that purple light is flashing, press and hold your programmed Subaru HomeLink button for 2 full seconds and release it (both motor LEDs will typically glow or flash blue/purple). Press and hold the Subaru button a second time for 2 full seconds and release, then press it a third time to watch the garage door move.
Routine D: older fixed-code dip-switch openers and non-rolling neighborhood gates
If your garage opener or community gate uses internal numbered toggle switches (usually 8, 9, 10, or 12 tiny on/off switches inside the remote) rather than a rolling-code microprocessor, you never have to climb a ladder at all:
- Verify your remote switches haven’t been bumped: If you popped the battery cover off an old dip-switch remote to change the 9-volt or 12-volt battery, make sure your thumb didn’t accidently flip one of the tiny numbered switches out of position first by testing that the remote still opens the door.
- Train the mirror button: Hold the remote 1 to 3 inches from the Subaru HomeLink button and press both buttons together (cycling the remote button every 2 seconds if its transmit light times out) until the mirror indicator flashes rapidly.
- Test immediately: Let go of both buttons, wait two seconds, and press the Subaru HomeLink button for 2 full seconds. Because there is no rolling-code encryption on a dip-switch receiver, the door or gate will open right away without any ceiling motor sync step.
Mistakes that cost Subaru owners time and money
I hate seeing people spend money on parts or service calls they don’t actually need. Before you call an overhead door company out for a $125 service visit or pay a dealership to look at your car, make sure you haven’t stepped into one of these five common traps.
- Holding the ceiling motor sync button down too long: On almost every residential garage door opener, a quick 1-second press and release puts the motor into pairing mode, whereas holding that same button down for 6 to 10 seconds wipes the opener’s entire memory clean. If you hold it too long, your Subaru won’t pair AND all your existing handheld clickers and outside wall keypads will suddenly stop working until you reprogram every single one of them.
- Trying to train HomeLink from the wall button inside the garage: You cannot train Phase 1 of your Subaru mirror by having someone press the wired push-button on the garage wall by your kitchen door. That wall switch sends a low-voltage signal down a pair of bell wires stapled to the drywall; it doesn’t broadcast a radio signal for your mirror to read (and even wireless wall consoles rarely work well for close-range mirror training).
- Using a universal aftermarket remote to train the mirror: If you lost your original factory garage remote and bought a cheap $12 universal clone remote online, the Subaru mirror may struggle to identify the opener’s native protocol during Phase 1. Whenever possible, use an OEM brand-matched handheld remote for that first training step.
- Pressing the Subaru HomeLink button like a quick tap during use: Unlike a mechanical remote button that fires the instant it clicks, HomeLink buttons are designed to be pressed and held for a deliberate 1 to 2 seconds so brushing your hand against the mirror while adjusting it doesn’t accidentally open your garage door. A super quick half-second jab often won’t transmit a complete code packet.
- Forgetting that the optical safety beams block the door from closing: Sometimes a driver finishes Phase 2, sees the open garage door twitch for half a second and reverse, and assumes the HomeLink programming failed. In reality, the programming worked fine, and the stepladder or a broom handle is sitting in front of the safety photo-eyes at the bottom of the garage door tracks!
A mechanic’s verdict: what to do next and when to get help
Built-in HomeLink is one of those small daily upgrades that spoils you once it’s set up right. You don’t have a plastic clicker rattling on your sun visor, you don’t have to dig through the center console in the dark when it’s pouring rain, and you can control up to three doors, gates, or RF light modules from the buttons already sitting on your Subaru’s mirror.
If your mirror isn’t cooperating today, don’t start by assuming the car is broken. Put a fresh battery in your handheld remote, park safely outside the door track, train the single button you want from 1 to 3 inches away until the light flashes fast, and then finish the 30-second rolling-code sync at the ceiling motor with a quick tap of the program button. If range is terrible, unscrew the LED bulbs in the garage opener before you spend a dime on parts.
This is a 100% DIY job for almost every driver, provided you’re comfortable stepping onto a sturdy ladder to reach the button on your garage opener motor. The only times you should hand the job to a mechanic or garage door technician are when the mirror has zero electrical power due to a wiring fault behind the EyeSight trim cover, when you aren’t safe climbing a ladder to a high garage ceiling, or when a heavy commercial gate receiver requires locked control-board access. Take five minutes in your driveway, follow the indicator light on the mirror, and enjoy having one less plastic remote cluttering up your cabin.