You are driving home after sunset. The headlights are doing their job, throwing a clean beam onto the dark road ahead. You glance down at the instrument cluster to check your speed and your eyes meet a black void where the dashboard numbers should be glowing. The entire gauge cluster is dark. You tap the dimmer switch. Nothing. You cycle the headlights off, and suddenly the dashboard comes alive again. Turn the headlights back on, and the dashboard goes dark once more.
This is a genuinely unsettling experience for any driver. Without dashboard illumination, you cannot read your speedometer, your fuel gauge, your engine temperature, or any warning lights that might be trying to alert you to a problem you cannot see. It is not just an inconvenience. It is a safety concern, especially when the rest of the road is dark and your focus should be outside the windshield, not straining to guess how fast you are going. The good news is that this problem has a small list of known causes, and most of them are things you can diagnose and fix yourself without a deep understanding of automotive electronics.
Table of Contents
Before you start worrying that your car has developed an expensive electrical fault, let us walk through exactly what causes dashboard lights to stop working when the headlights are turned on, how the lighting circuit is designed, and what you can do right now to bring those gauges back to life. The solution might be as simple as turning a dial, and if it is not, the path to finding the real culprit is straightforward once you understand how the system is supposed to function.
Why the Dashboard Lights Matter So Much After Dark
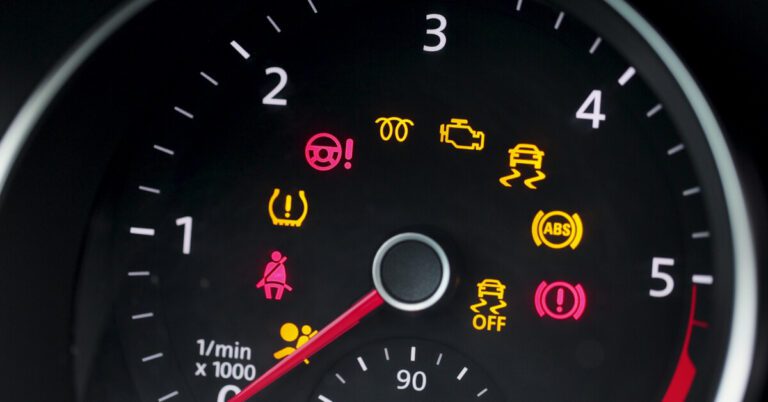
The dashboard is the driver’s primary information interface. It displays vehicle speed, engine RPM, fuel level, coolant temperature, and the status of critical warning lights for the charging system, oil pressure, check engine condition, and more. During daylight hours, the gauges are readable by ambient light. At night, every one of those gauges depends on a backlighting system that illuminates the markings and numbers so they can be read at a glance. When that backlighting fails, you lose contact with the vehicle’s real-time status. You might not realize the engine is overheating until steam pours from under the hood. You might not see the low fuel warning until the engine sputters to a stop. You might not know the alternator has stopped charging until the battery goes flat and the car dies on the highway.
Dashboard illumination is not a luxury feature. It is a fundamental requirement for operating a vehicle safely at night. The lighting circuit is designed to be reliable, but like every electrical circuit in a car, it contains several components that can fail over time. The most common failures are simple and cheap to fix. The trick is knowing where to start looking.
How the Dashboard Lighting Circuit Is Wired
Understanding the basic layout of the dashboard lighting circuit makes diagnosing the problem much clearer. On most vehicles, the dashboard lights share a circuit with the parking lights and tail lights. The headlight switch controls several circuits simultaneously, and when you turn the switch to the parking light or headlight position, it sends power to the exterior running lights and also to the dashboard dimmer rheostat. The dimmer is a variable resistor that allows you to adjust the brightness of the dashboard lights to suit your preference, from nearly off to full bright. From the dimmer, power flows to the individual light bulbs or LEDs inside the instrument cluster that backlight the gauges.
This shared circuitry means that a problem anywhere along that path can cause the dashboard lights to fail. A blown fuse in the parking light circuit can take out the tail lights and the dashboard lights at the same time. A failed dimmer switch can interrupt the power flow to the cluster even when the headlights are on. Corroded or loose connections can create resistance that reduces voltage to the bulbs, making them dim or flicker. And on many modern vehicles, the instrument cluster is not just a set of light bulbs. It is a computer module that communicates with the rest of the vehicle through data networks, and its illumination can be controlled by software settings that the driver may not even know exist.
On some newer cars, the dashboard backlighting is managed by a light sensor and an automatic control module. When the ambient light drops, the system automatically illuminates the dashboard and may dim the headlights or adjust the brightness of the infotainment screen. If that system has a fault, the dashboard may stay dark regardless of the headlight switch position. But the most common failure modes are still the basic electrical culprits: battery and alternator health, fuse condition, bulb condition, and the dimmer setting.
The Most Common Reasons the Dashboard Goes Dark When the Headlights Come On
Several specific failures can produce the exact symptom you are experiencing. Working through them in order from simplest to most complex is the fastest way to find the solution without replacing parts that are still working fine.
A Dying Alternator or Weak Battery That Cannot Supply Enough Voltage
Your vehicle’s alternator generates electricity whenever the engine is running and maintains the battery at a fully charged state. The battery acts as a reservoir of electrical energy that smooths out the voltage supplied to every electrical component. When the alternator starts to fail, or the battery is old and weak, the system voltage can sag, especially under load. Turning on the headlights is a significant electrical load. A pair of halogen headlight bulbs can draw 10 to 15 amps of current. When that load hits a weakened electrical system, the voltage can drop below the level needed to power all the auxiliary circuits simultaneously. The dashboard lights, being lower priority than the headlights and engine management systems, are often the first to go out when voltage drops too low.
A failing alternator often gives warning signs before it quits entirely. You might notice the headlights dimming slightly at idle and brightening when you rev the engine. You might see the battery warning light flicker on the dashboard when electrical loads are high. You might hear a whining or grinding noise from the alternator bearings. The battery might struggle to start the engine on cold mornings, needing a jump more often than it should. If the dashboard lights go out only when the headlights are on and come back immediately when the headlights are switched off, the electrical system is struggling to maintain voltage under load and the alternator and battery should be the first things tested.
Testing the charging system is straightforward with a multimeter. With the engine off, a healthy battery should read between 12.4 and 12.7 volts across its terminals. Start the engine and measure again with all accessories off. The voltage should rise to between 13.8 and 14.4 volts, indicating the alternator is charging. Turn on the headlights, the heater fan, and the rear defroster, and check the voltage one more time. It should remain above 13 volts. If it drops below 13 volts under load, the alternator is struggling to keep up and needs further testing. If the battery reads below 12 volts with the engine off, it is deeply discharged or failing and may need replacement. A battery that cannot hold a charge will not be able to support the electrical system even if the alternator is healthy.
The Dimmer Switch Turned All the Way Down
This is the one that catches drivers off guard more often than you would believe. The dashboard dimmer switch is a small rotary dial or thumbwheel usually located near the headlight switch, often on the left side of the dashboard. On some vehicles, it is a separate control. On others, it is integrated into the headlight switch knob itself. It is very easy to brush against it while cleaning the interior, getting in and out of the car, or even while driving. If the dimmer is rolled all the way down, the dashboard lights will go completely dark when the headlights are on, especially during the daytime when they are set to a lower brightness level.
Modern vehicles often have automatic dimming features that adjust the brightness of the dashboard based on ambient light. When the headlights are turned on, the system assumes it is dark outside and the driver’s eyes are adjusted to the darkness. The dashboard illumination is automatically reduced to a lower brightness to prevent glare that would affect night vision. In some cars, this automatic dimming can be adjusted through the vehicle’s settings menu, and if someone accidentally set it to its lowest level, the dashboard can appear completely dark at night. Always check the dimmer position first and cycle it through its full range before moving on to more complex diagnostics. This check costs nothing and takes three seconds.
A Blown Fuse in the Dashboard or Parking Light Circuit
Fuses are the sacrificial components that protect electrical circuits from overcurrent damage. When too much current flows through a circuit, the fuse element inside melts and breaks the connection, preventing the wiring from overheating and possibly starting a fire. If the fuse that protects the dashboard lighting circuit or the parking light circuit blows, the dashboard lights will not work. The headlights may still function because they are often on a separate circuit, but the tail lights, parking lights, and dashboard illumination typically share one fuse.
Finding and checking the relevant fuse is simple. Locate the fuse box, which is usually under the driver’s side dashboard or in the engine bay. Consult the fuse diagram printed on the fuse box cover or in the owner’s manual. Look for fuses labeled something like “INST” or “METER” or “TAIL” or “ILLUM.” Pull the suspect fuse with a fuse puller or needle-nose pliers and hold it up to the light. If the thin metal strip inside is broken, the fuse is blown. Replace it with a fuse of the exact same amperage rating. Never use a higher-rated fuse, because that defeats the protection and allows too much current to flow, which can melt wiring.
If a new fuse blows immediately after replacement, there is a short circuit somewhere in the dashboard wiring or one of the light bulb sockets. That will require a more detailed diagnosis to locate the fault before another fuse can be installed.
Burnt-Out Dashboard Light Bulbs or LEDs
On older vehicles, the dashboard gauges are illuminated by small incandescent bulbs that screw into the back of the instrument cluster. Like any light bulb, these have a finite lifespan. When multiple bulbs burn out, the cluster can become so dim that it appears completely dark, especially at night when the background is black. On many vehicles, the dashboard bulbs are not easily accessible. The instrument cluster must be partially removed to access the bulb sockets. This is a more involved job, but it is not technically complex. It involves removing trim panels, unbolting the cluster, and turning the bulb sockets free from their mounting holes.
Newer vehicles use light-emitting diodes, or LEDs, which are soldered directly to the instrument cluster circuit board. LEDs last far longer than incandescent bulbs, but they can still fail from heat cycling or manufacturing defects. When an LED fails, replacing it requires soldering skills and the correct replacement component, which is often a surface-mount LED. Many owners choose to send the cluster to a specialist for LED repair rather than attempt it themselves, because damaging the circuit board during soldering can ruin the entire cluster, a costly mistake.
If only some areas of the dashboard are dark while others are lit, the problem is definitely individual bulbs or LEDs rather than a system-wide power or fuse issue. If the entire cluster is uniformly dark, the bulbs are less likely to be the cause, and you should focus on the power supply, fuse, and dimmer first.
Automatic Dimming Settings That Confuse the Driver
Many modern vehicles have a light sensor on the dashboard that detects ambient brightness. When the sensor detects daylight, it illuminates the dashboard at full brightness and may dim the headlights or keep them off. When the sensor detects darkness, it lowers the dashboard brightness to a preset level to reduce glare. Some vehicles allow the driver to adjust this preset brightness through the infotainment system or instrument cluster menu. If the preset is accidentally set to zero or its minimum value, the dashboard will appear dark at night even though the system is functioning normally. Checking the vehicle settings menu and adjusting the instrument cluster brightness upward can restore illumination instantly.
This feature exists because a brightly lit dashboard at night can create reflections in the windshield and reduce the driver’s ability to see the road clearly. Automotive engineers calibrate the default setting to balance readability with glare reduction, but the adjustable range is wide enough to produce a near-black cluster if set to the lowest extreme. If someone else drove the vehicle recently, or if the battery was disconnected and reconnected, the settings may have reset to a default that is not what you remember. Spend a moment exploring the settings before you assume something is broken.
Wiring Faults and Loose Connections
Behind the dashboard, a bundle of wires connects the instrument cluster to the vehicle’s electrical system. These wires pass through connectors that can loosen over time due to vibration and thermal expansion. A connector that has partially backed out of its socket will cause intermittent or complete loss of function for the circuits it carries. This is more likely if the dashboard has been removed for any repair work, such as heater core replacement, stereo installation, or airbag recall work. A connector that was not fully seated during reassembly can cause dashboard lighting problems that appear random and frustrating.
Wiring damage can also occur from rodent chewing, water intrusion from a windshield leak, or chafing where the harness rubs against a metal bracket. Diagnosing a wiring fault often requires removing the instrument cluster and using a multimeter to test continuity through each wire in the harness. This is time-consuming and is usually the last step after all simpler causes have been eliminated. A professional mechanic with access to factory wiring diagrams can trace the circuit efficiently, but a careful DIY owner with a multimeter and patience can often find the break as well.
A Step-by-Step Diagnostic Plan You Can Follow Tonight
The following sequence moves from the simplest check to the most involved, so you do not waste time and energy on complex steps when a dial twist would have solved the problem.
- Check the dimmer switch. With the headlights on, rotate the dimmer from its lowest setting to its highest. If the dashboard lights appear at any point in the rotation, the problem was simply the dimmer setting. Leave it at the desired brightness.
- Inspect the tail lights. Turn the headlights on and walk to the back of the car. Are the tail lights illuminated? If the tail lights are also dark, the problem is almost certainly a blown fuse in the shared parking light circuit. If the tail lights are working but the dashboard is dark, the problem is downstream of the fuse, likely the dimmer itself, the cluster bulbs, or a wiring issue between the dimmer and the cluster.
- Check the interior fuse box. Pull the fuse labeled for the instrument cluster or tail lights using the fuse diagram. Inspect it for a broken filament. Replace if blown. If the new fuse blows again immediately, you have a short circuit that needs professional diagnosis.
- Test the battery and alternator. With a multimeter, measure battery voltage at rest and with the engine running under load. Low voltage readings point to a charging system problem that can explain the dashboard lights flickering or going out.
- Explore the vehicle settings menu. On vehicles with a digital display, navigate to the instrument cluster brightness or dashboard illumination settings. Ensure the brightness is set to a visible level for nighttime operation.
- Remove and inspect the instrument cluster for burnt bulbs. If all other checks pass, the cluster may need to come out for a bulb check. This requires careful trim removal and fastener organization. Check each bulb with a multimeter or by applying 12 volts directly to confirm it is functional.
How to Replace Burnt Dashboard Bulbs Without Damaging the Cluster
Replacing dashboard bulbs is a satisfying repair that returns the cluster to its original brightness. The process varies depending on the vehicle, but the general approach is consistent. Park the vehicle on a flat surface, disconnect the negative battery terminal to prevent any electrical shorts while working, and gather the necessary tools, usually a set of plastic trim removal tools, a Phillips screwdriver, and a socket set.
Remove the trim bezel surrounding the instrument cluster. This is often held in by spring clips that require a gentle prying motion with a plastic tool to release. Metal tools will scratch the dashboard plastic, so use plastic. Once the trim is off, remove the screws that secure the cluster to the dashboard frame. Carefully tilt the cluster forward to access the wiring connectors at the back. Depress the locking tab on each connector and pull it free. With the cluster out, locate the bulb sockets, which are small plastic holders twisted into the back of the cluster. Turn each socket a quarter turn counterclockwise to remove it, then pull the old bulb straight out. Insert a new bulb of the same type and wattage, reinstall the socket, and repeat for all burnt bulbs.
Before reassembling, reconnect the battery and test the cluster by turning on the headlights. Confirm that all replaced bulbs illuminate. Then disconnect the battery again and reassemble the dashboard in reverse order. The entire job on most vehicles takes between one and two hours for a first-timer, and the bulbs themselves cost a few dollars each. A dealership would charge labor rates that make this repair seem expensive, but the parts cost is minimal, making it one of the more rewarding DIY fixes available to a determined owner.
When the Dashboard Lighting Problem Points to a Deeper Electrical Issue
Sometimes the dashboard lights are part of a broader electrical problem that affects multiple vehicle systems. If the dashboard lights are dark and the tail lights are also out, the parking light fuse is the common link. If the dashboard lights flicker or pulse in brightness while driving, the alternator may be on its last legs. If the dashboard lights are dark and the battery keeps going dead overnight, there may be a parasitic electrical draw draining the battery, which then cannot support the dashboard lights when the headlights are turned on. A voltage drop test across the charging system and ground points can reveal hidden resistance that reduces the voltage reaching the instrument cluster.
On vehicles with a Body Control Module, or BCM, the dashboard illumination may be controlled electronically rather than through a traditional dimmer switch. A BCM fault can cause a wide range of symptoms, including dashboard lights that stay off, stay on when the key is removed, or behave erratically. Diagnosing a BCM issue requires a professional scan tool that can communicate with the module and read fault codes. If basic checks have not located the problem, a diagnostic visit to a qualified shop is the most efficient next step.
Is This a Temporary Glitch or a Permanent Failure?
A dashboard that goes dark only when the headlights are on is not a temporary glitch. It indicates a specific problem that will persist until it is addressed. The only exception is if the battery voltage is momentarily low after sitting for an extended period and the dashboard returns after the alternator has recharged the battery during a drive. But if the behavior repeats on every night drive, the underlying cause is still present and needs to be found. A fuse that blows intermittently due to a loose wire shorting against metal will not fix itself, and it may eventually damage other components if the short overheats the wiring. Even the simple dimmer setting, which is not a failure at all, requires the driver to make an adjustment to restore proper function.
The good news is that the problem is rarely catastrophic. Most vehicles leave the factory with reliable instrument cluster lighting, and when it fails, the fix is usually a single component, often the fuse, a bulb, or the dimmer rheostat. Starting with the simple and working toward the complex solves the problem the vast majority of the time without requiring a professional.
Keeping Your Dashboard Lights Working for the Long Haul
Preventive maintenance for dashboard lighting is mostly about keeping the electrical system in good health. Have the battery and alternator tested annually, especially before winter when cold temperatures stress aging components. Replace the battery preemptively when it reaches four or five years old, rather than waiting for it to fail. Keep the battery terminals clean and tight. When performing any work behind the dashboard, take care to seat every electrical connector fully and confirm that all bulb sockets are locked in place.
Avoid aftermarket modifications that tap into the dashboard lighting circuit without understanding the current load they add. Adding extra gauge illumination, footwell lighting, or other accent lights to the same circuit that powers the instrument cluster can overload the fuse and cause unpredictable behavior. If you want to add lighting, use a separate fused circuit relay-triggered by the parking light circuit instead of directly drawing power from it.
If your vehicle uses incandescent bulbs and you frequently drive at night, the bulbs will eventually need replacement. This is normal maintenance, similar to replacing a burned-out tail light. Keeping a set of spare bulbs in the glove box and knowing how to access the cluster makes the replacement less stressful when it eventually comes due.
Your dashboard is your window into the health of your engine and the status of your vehicle. When the lights that make that window readable at night go dark, the car is telling you something. Listen to it, work through the diagnostic steps in order, and you will almost always find a simple, inexpensive fix. The next time you twist the headlight switch and see the dashboard glow warmly in response, you will appreciate just how much that light means for safety and peace of mind. Do not wait until you are guessing your speed through a speed trap to take care of it.