
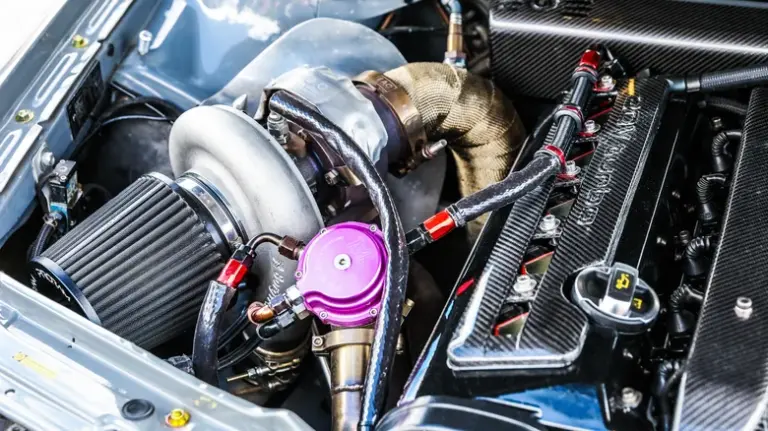
If you drive a turbocharged car or diesel truck long enough, you’ll probably experience the highway passing scare at least once. You pull out into the left lane to pass a semi-truck going up a long grade, mat the gas pedal in fourth or fifth gear, feel the turbo pull strong for four seconds, and then bam: it feels like somebody threw an anchor out the back window. The engine goes completely flat, refuses to rev past 2,800 or 3,000 RPM, and barely holds 55 mph up the hill while traffic piles up behind you.
Then comes the part that confuses every driver who pulls into our shop lot: you pull over on the shoulder, turn the ignition key off, wait five seconds, start the engine back up, and all your power is magically restored! Your turbo isn’t haunted, and it didn’t blow up and heal itself on the side of the road. Your Engine Control Unit (ECU) saw the turbocharger build dangerously high boost pressure, stepped in to save your head gasket and pistons from melting, and locked the fuel and boost maps into protective “limp mode” (safe mode) until the next key cycle.
Before you let a repair shop talk you into bolting on a brand-new $1,800 turbocharger assembly, take a breath. In my ten-plus years under the hood, more than half of the turbo overboost limp-mode complaints I diagnose come down to rotted $15 vacuum hoses, a $65 boost control solenoid valve, or sticky carbon buildup on the turbo’s exhaust vanes that can be cleaned without replacing the whole turbo. Let’s walk through what those boost deviation fault codes actually mean, how to test your vacuum lines, solenoid, and actuator in your own garage, and how to fix sticky turbo vanes for good.
Why turbo overboost triggers limp mode (and why restarting the car resets it)
Every modern turbocharged engine (whether it’s a Volkswagen TDI, a Ford EcoBoost, a BMW diesel, a Mercedes CDI, a Chevy Cruze, or a Cummins/Duramax pickup) constantly compares two numbers inside the engine computer: Specified Boost Pressure (what the ECU’s map wants to see based on RPM and throttle position) and Actual Boost Pressure (what the Manifold Absolute Pressure, or MAP, sensor in the charge pipe is actually reading).
When you floor the accelerator climbing a steep hill at 2,500 RPM, exhaust gas pours into the turbine housing and spins the turbocharger wheelpast 120,000 RPM. As soon as actual boost reaches the target limit (say, 18 psi gauge pressure, or roughly 2,250 millibars absolute), the ECU commands the turbo actuator to open the wastegate or pivot the Variable Nozzle Turbine (VNT / VGT) vanes to bleed off excess exhaust drive pressure. If those vanes or the wastegate fail to move, boost keeps climbing to 22, 25, or 28 psi.
If actual boost stays above the ECU’s safety ceiling for more than about 3 to 5 continuous seconds under load, the computer trips an overboost fault and enters limp-home mode. It instantly slashes fuel injection quantity and drops the boost control solenoid to zero duty cycle so the engine can’t hurt itself. Because this specific fault is load-dependent, cycling the ignition key OFF and ON resets the active limp-mode latch in volatile memory, letting the car drive normally around town until the next time you hold the throttle down long enough to cross that 5-second overboost threshold.
The three boost deviation fault codes you’ll see on a scan tool
When you plug an OBD-II scanner into a car that has dropped into turbo limp mode, you’ll almost always find one of three boost control messages stored in the Engine Control Module. Understanding which of the three you have points you straight toward the right side of the engine bay.
1. Flashing boost deviation warning (intermittent control fault)
When the dashboard flashes a warning light while driving (such as a flashing glow-plug coil icon on a diesel or a check engine light accompanied by an intermittent boost pressure control deviation code), the ECU is telling you that boost pressure is swinging wildly outside its target window or losing control momentarily. In the shop, an intermittent or flashing boost deviation most often points to a split rubber vacuum hose that opens up under engine movement, a cracked plastic charge pipe or intercooler fitting, or a frayed wire at the boost pressure sensor plug. Check all your plastic charge pipes, rubber intercooler couplers, actuator nipples, and vacuum T-fittings before buying parts.
2. Negative boost deviation (underboost: P0299 / VAG 17964)
Negative boost deviation (generic OBD-II code P0299: Turbocharger/Supercharger “A” Underboost Condition) means the turbo is producing less boost pressure than the ECU requested for several seconds under load. Instead of hitting an 18 psi target, the MAP sensor might only see 9 or 10 psi, causing sluggish acceleration and eventually triggering limp mode.
Negative boost deviation usually comes from one of four things: a leak in the thin rubber vacuum hoses that pull the VNT turbo actuator into the high-boost position, a torn rubber diaphragm inside the turbo vacuum actuator can, a split pressurized boost hose between the turbo and intake manifold (you’ll often hear a loud whooshing air leak under load and see black oily mist around the split hose), or a clogged intake / turbo vane ring that is stuck in the wide-open low-boost position.
3. Positive boost deviation (overboost: P0234 / VAG 17965)
Positive boost deviation (generic OBD-II code P0234: Turbocharger/Supercharger “A” Overboost Condition) is the classic highway limp-mode culprit. It means actual boost pressure stayed dangerously higher than the ECU’s target map because the system couldn’t dump or regulate boost fast enough when you stepped on the gas.
Increasing positive deviation almost always traces back to four suspects: a faulty or sticking boost control solenoid valve (often called the N75 valve on VW/Audi/European engines), a rusted or seized turbo actuator rod, a pinched or leaking pressure/vacuum control hose (especially on pressure-actuated wastegates where a split hose stops boost pressure from pushing the wastegate open!), or sticky carbon-choked vanes inside a variable-geometry turbocharger that are jammed in the closed, maximum-boost position.
| Fault Type & Common Codes | What the ECU Sees | How It Feels on the Road | Top Culprits to Check First |
|---|---|---|---|
| Positive Boost Deviation / Overboost (P0234, 17965, P0238) | Actual boost spikes 4 to 8+ psi ABOVE target map for 3 to 5 seconds under heavy load | Pulls hard at first, then suddenly hits a brick wall climbing hills or passing in 4th/5th gear; resets on key restart | Sticky VNT turbo vanes, bad N75 boost solenoid valve, rusted actuator rod, or split wastegate pressure hose |
| Negative Boost Deviation / Underboost (P0299, 17964) | Actual boost stays 4+ psi BELOW target map under acceleration | Sluggish from low RPM, lacks punch even before limp mode kicks in, possible whistling/whooshing boost leak sound | Split vacuum hose to VNT actuator, leaking actuator diaphragm, split intercooler charge hose, or clogged intake |
| Flashing / Intermittent Boost Control Fault (P0243, P2563) | Boost pressure fluctuates erratically or actuator position sensor disagrees with command | Surging power, on-and-off limp mode, flashing glow plug or engine light over bumps or throttle changes | Cracked vacuum T-fitting, chafed wiring to N75 solenoid or actuator position sensor, or sticking actuator linkage |
Overview: how to diagnose and fix turbo overboost limp mode
When a car rolls into our shop with an overboost code, we never start by unbolting the turbocharger from the exhaust manifold. Testing from the outside in takes less than an hour and keeps you from wasting money. Most turbo overboost and limp-mode failures are caused by one of these five items:
- A defective or contaminated Mass Airflow (MAF) sensor or MAP boost sensor
- Leaks or blockages in the small vacuum / pressure control hoses
- A bad or sticking boost control solenoid valve (N75 / TCV)
- A seized, rusted, or leaking turbocharger actuator capsule
- Carbon-fouled, sticking Variable Nozzle Turbine (VNT / VGT) vanes inside the turbo housing
Why do these parts fail so often on commuter cars? Two reasons: deferred maintenance (like running old, soot-loaded oil or dusty air filters) and spending months driving exclusively on crowded city roads at low speeds under 2,000 RPM. When a variable-geometry diesel turbo never gets exercised through its full vane travel under warm highway load, sticky exhaust soot bakes onto the unison ring inside the turbine housing like oven grease until the vanes can’t move past the halfway mark.
If your car only drops into limp mode occasionally, take a helper and an OBD-II scan tool (one that can graph live data) out onto a safe, clear highway with a long uphill grade. Watch Specified Boost vs. Actual Boost in fourth gear at 2,200 to 3,200 RPM so you can see the exact RPM and pressure where the spike happens, and use that exact same hill later to confirm your repair actually worked. You can read more about how federal onboard diagnostic monitors log boost and emissions fault codes on the EPA On-Board Diagnostics (OBD) technical resource page.
Step 1: checking a bad or failing airflow meter (MAF) and boost sensor (MAP)
Let’s start with the easiest electrical checks under the hood before getting your hands dirty down by the exhaust manifold. Your engine computer relies on the Mass Airflow (MAF) sensor in the air filter outlet pipe and the Manifold Absolute Pressure (MAP) / Boost sensor in the intercooler pipe to calculate fuel and boost limits.
When a MAF sensor gets coated in oil mist or fails internally, it often under-reports how much air is entering the engine, which causes flat, lifeless acceleration that feels very similar to limp mode (though a bad MAF usually feels sluggish all the time from the moment you start the car, rather than pulling hard and then suddenly cutting out at 3,000 RPM). A quick field test on many older diesel and turbo cars when you don’t have a scan tool handy is to unplug the electrical connector on the MAF sensor and take a short test drive around the block. Unplugging the MAF will immediately turn on the Check Engine Light, but it forces the ECU to substitute a fixed default airflow map; if the car suddenly drives much better with the MAF unplugged, the MAF sensor is faulty or dirty.
Even more important for true overboost (P0234) is checking your MAP / Boost Pressure Sensor with key ON, engine OFF! Before you start the engine in the morning, compare the barometric pressure sensor reading (BARO) to the MAP boost sensor reading on your scan tool. With the engine off, both sensors are simply reading outside atmospheric air pressure, so they should match within 15 millibars (0.2 psi), which is roughly 1,000 mbar (14.5 psi) near sea level. If your MAP sensor reads 1,450 mbar (21 psi) while the engine is sitting stone-cold and switched off, the MAP sensor is lying to the computer and tricking the ECU into thinking the turbo is overboosting when it isn’t!
Step 2: hunting down vacuum leaks and bad control hoses
On turbos that use vacuum to move the boost actuator (including millions of VW/Audi TDI, BMW, Mercedes, Ford, Peugeot, and Volvo engines), simple leaks or restrictions in the small rubber vacuum hoses cause an enormous percentage of boost deviation headaches. And on gasoline turbos that use positive boost pressure to push open a traditional spring wastegate, a split rubber hose between the compressor housing and the wastegate actuator is the #1 cause of sudden, violent overboost!
Why are vacuum hose leaks so easy to miss during a quick visual look? Many European and Asian carmakers use rubber vacuum hose wrapped in a woven cloth braid. After five or six years of under-hood heat, the rubber hose underneath the cloth rots and splits wide open, while the outer cloth braid still looks intact to your eyes! Instead of playing whack-a-mole patching one brittle hose at a time, the smartest, cheapest fix in the shop is to replace the entire vacuum control hose run at once.
- Buy the right hose lengths and inside diameters before you start: Most turbo/EGR vacuum systems use roughly 5 to 7 meters (16 to 23 feet) total of thick-wall vacuum tubing across two standard inner diameters: a smaller 3.5 mm (about 1/8 inch) ID hose and a slightly larger 5.0 mm (about 3/16 inch) ID hose. Stick with thick-wall automotive silicone vacuum hose or genuine OEM braided rubber tubing; cheap thin-wall windshield-washer tubing will collapse flat like a pinched straw as soon as vacuum pulls on it and gets hot!
- Swap one single hose at a time: Never yank all the old vacuum hoses off the solenoids in a big pile! Pull off one hose, cut your new hose to the exact same length, and push it onto the exact same two nipples before touching the next hose. Mixing up the supply and output ports on a boost solenoid will guarantee instant limp mode.
- Check the main brake booster vacuum pipe and tandem pump nipple: On diesel engines (and many direct-injected gas engines), a mechanical vacuum pump supplies vacuum for both the power brake booster and the turbo/EGR solenoids. If your brake pedal has felt hard or wooden lately when stopping, inspect the thick plastic vacuum pipe running to the brake booster and the brass outlet nipple on the vacuum pump for cracks or loose swaged fittings.
- Don’t overlook the atmospheric vent hose at the bottom of the air filter box: One 5 mm hose runs from the boost solenoid’s vent port over to the clean side of the air filter box so the solenoid can breathe filtered air when releasing vacuum. If that hose gets pinched, clogged with mud, or left off, the solenoid can’t release vacuum fast enough and the turbo overboosts!
Understanding the 3 ports on your boost control solenoid (N75 valve)
If you look closely at a standard 3-port vacuum boost control solenoid (like the classic Pierburg N75 valve), you’ll see why every single hose matters. Each port has a specific job:
- The VAC port (Vacuum Supply): Connects to the vacuum pump and vacuum reservoir ball. It supplies a constant, strong vacuum source (typically 22 to 27 inches of mercury, or -0.75 to -0.9 bar) to the valve whenever the engine is running.
- The OUT port (Regulated Output to Turbo Actuator): Runs directly down to the vacuum capsule on the turbocharger. The solenoid pulses rapidly (using Pulse Width Modulation from the ECU) to blend supply vacuum with atmospheric air on this port, positioning the turbo vanes at the exact angle needed.
- The ATM port (Atmospheric Vent, usually the larger 5 mm nipple): Sits opposite the other ports (often on the same side as the electrical connector) and connects to the airbox. When you floor the throttle and boost climbs to the target limit, the N75 valve opens this atmospheric vent port to let air into the actuator line, allowing the turbo actuator spring to push the vanes open and reduce boost! If this vent line is plugged, vacuum stays trapped in the actuator, the vanes stay locked in the maximum-boost position, and you get instant overboost limp mode.
Two quick garage tests for your vacuum supply
- The Vacuum Gauge Supply Test: Pull the vacuum supply hose (“VAC”) off the boost solenoid valve and plug a handheld mechanical vacuum gauge into that supply hose. Start the engine and let it idle: you should see a strong, steady reading of at least 22 to 25+ inHg (-0.75 to -0.85 bar) within two seconds. If it only pulls 10 or 12 inHg, you have a leak in the supply lines, vacuum reservoir ball, EGR line, or main brake-booster check valve before the solenoid even gets a chance to work.
- The Direct Vacuum Bypass Test (Diagnostic Only): If you want to know whether your turbo actuator and vacuum pump can pull full low-RPM boost when the solenoid is bypassed, you can temporarily connect a test vacuum hose directly from the main vacuum supply tee straight to the turbo VNT actuator nipple for a brief driveway/low-speed check. With full vacuum locked directly onto a VNT actuator, the turbo will build immediate low-RPM boost (confirming the vacuum pump and actuator diaphragm work), though do not floor it at high RPM with the solenoid bypassed because without the N75 venting vacuum at high speed, it will immediately overboost!
Step 3: testing a bad or failing boost control solenoid valve (N75 / TCV)
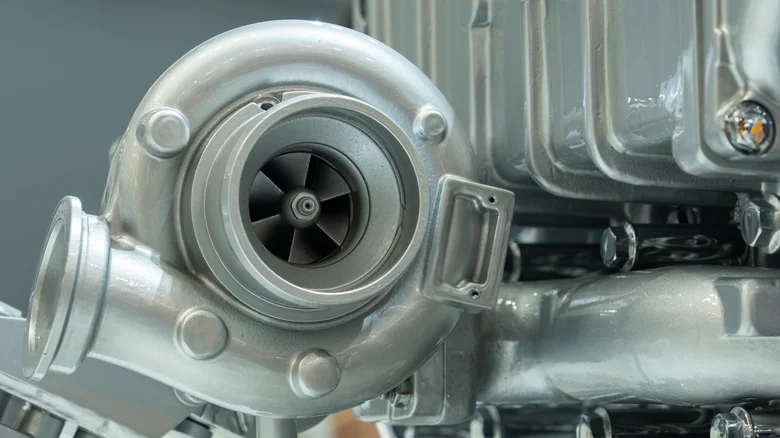
On most cars, the boost control solenoid valve is bolted high up on the firewall (bulkhead) or near the intake manifold, often recognizable by a gray or white plastic cap, a two-pin electrical plug, and three vacuum hose nipples. Its entire job is to act as the ECU’s fast-acting electronic dimmer switch for turbo boost.
Over time, fine dust and moisture get sucked through the atmospheric vent line, or oil vapor creeps up from the vacuum pump, gumming up the tiny internal plunger inside the solenoid. When that plunger sticks or the internal return spring weakens, the valve reacts a second too slowly when boost spikes on a hill, triggering P0234 overboost limp mode. You can test the solenoid and actuator action together without taking anything apart:
- The Startup Watch Test (with a helper, mirror, and flashlight): Pop off the top plastic engine cover and position a small inspection mirror and bright flashlight so you can see the thin steel rod connecting the round actuator canister to the lever on the side of the turbocharger. On a vacuum-operated VNT turbo, watch that rod closely while a helper starts the engine: the instant the engine fires up and builds vacuum, the actuator rod should pull smoothly and briskly all the way to its stop (about 10 to 12 mm of travel). When your helper shuts the engine off, the rod should release smoothly back to its rest position.
- The OBD-II Output / Basic Settings Cycling Test: If you have a capable diagnostic tool (such as VCDS / VAG-COM on VW/Audi models running Engine Group 011 in Basic Settings, or a bi-directional scan tool on Ford, BMW, or GM models), you can command the ECU to cycle the boost solenoid ON and OFF every 10 seconds at idle. Shine your flashlight on the turbo actuator rod while the computer cycles the solenoid from 0% to 100%: the rod should travel smoothly through its full stroke without jerking, hanging up halfway, or moving at a snail’s pace.
- The Ohmmeter Coil Check: Unplug the two-pin electrical connector on the boost solenoid and touch your multimeter probes across the two metal pins inside the solenoid (set to Ohms Ω). A healthy N75 boost control solenoid typically measures between 14 and 25 ohms (or 25 to 45 ohms on certain newer pierburg variants); an open circuit (“OL”) or dead short near 0 ohms means the coil is dead.
Step 4: diagnosing a failing, rusted, or leaking turbo actuator
Suppose your vacuum hoses are brand new, your supply vacuum is a rock-solid 25 inHg, and your N75 solenoid clicks and tests fine, yet the actuator rod on the turbo still barely moves when you watch it. At that point, the problem is sitting right on the turbocharger itself: either the round actuator capsule has failed, or the internal vanes inside the turbo are jammed solid.
Here is how to separate a bad actuator from a jammed turbo in five minutes using a $25 handheld Mityvac vacuum/pressure hand pump:
- Pull the rubber hose off the turbo actuator nipple and connect your hand pump: Slip the hose from your Mityvac gauge directly onto the metal nipple on the turbocharger’s actuator canister.
- Pump up 18 to 22 inHg of vacuum (or 10 to 15 psi of pressure on a positive-pressure wastegate) and watch the gauge needle: First, look at the gauge needle on your hand pump when you stop pumping. The actuator diaphragm must hold that vacuum steady for at least 30 to 60 seconds without dropping! If the needle immediately falls back to zero with a hissing sound, the rubber diaphragm inside the actuator can is torn or the metal housing has rusted through with pinholes (super common on actuators mounted low near road salt spray).
- Watch how the actuator rod moves as you slowly pump and release: As vacuum climbs from roughly 3 inHg to 18 inHg, the steel actuator rod should glide smoothly through about 10 to 12 millimeters (just under half an inch) of travel, and snap right back to its rest stop when you release the pump trigger.
If the actuator holds vacuum fine on your hand pump, yet the rod refuses to budge or moves in choppy, sticky jumps, try popping the little E-clip off the actuator pin (don’t drop that tiny clip down into the belly pan!) to unhook the actuator rod from the turbo’s vane lever arm. That lets you test the actuator and the turbo lever separately.
Important mechanic pro tip on replacing a turbo actuator: If you find that your actuator capsule is leaking or its internal position sensor is dead, you can buy a replacement actuator without buying a whole turbo, but you must match the exact rod length and stop-screw calibration. On a VNT turbo (and especially on modern electronic servo actuators from Hella or Continental), changing the threaded rod length by even two turns throws off boost spool-up and overboost protection. Always count the exact threads, mark the locknut with paint before removal, or have a turbo rebuild shop calibrate the new actuator on a test bench.
Step 5: freeing and cleaning sticky turbocharger vanes (VNT / VGT)
When you unhook the actuator rod from the little lever arm on the side of the turbocharger and try to wiggle that turbo lever back and forth with your fingers, it should swing effortlessly from stop to stop with zero gritty resistance, just like flipping a light switch. If that lever feels stiff, crunchy, or completely frozen halfway through its arc, you’ve found the real cause of your P0234 overboost limp mode: sticky, carbon-choked turbo vanes.
How carbon buildup locks the turbo vanes in high boost
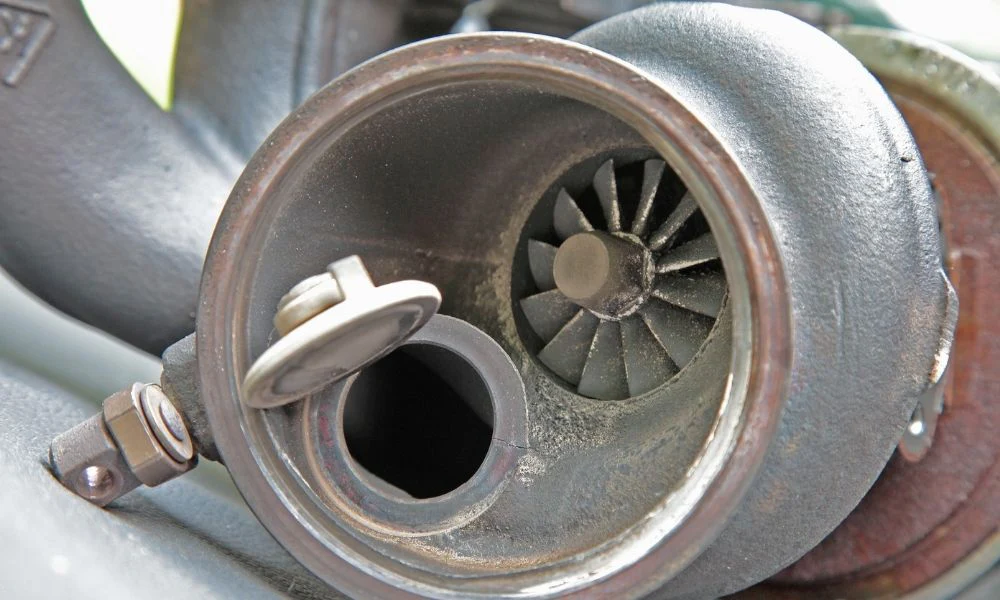
Inside the cast-iron exhaust housing of a variable-geometry turbocharger sits a ring of nine to eleven movable steel vanes attached to a rotating “unison ring.” At low engine RPM, the actuator pulls those vanes nearly closed to narrow the exhaust passage and spin the turbine fast; at high RPM and heavy load, the actuator opens the vanes wide so excess exhaust gas can pass through without over-spinning the turbo.
When a car is driven gently around town at 1,500 RPM, or when a leaking boost hose, bad injector, or stuck EGR valve creates smoky rich combustion, sticky black carbon soot packs into the 0.1-millimeter clearance gap behind the unison ring and vanes. Eventually, the soot bakes into hard carbon rocks that prevent the vanes from opening all the way when you climb a hill on the highway. Because the vanes get stuck in the partially closed (high-boost) position, exhaust pressure has nowhere to go, boost skyrockets past 25 psi, and the ECU slams the car into limp mode.
Do you have to replace the whole turbo, or can it be cleaned?
You do not automatically need a brand-new turbocharger just because the VNT vanes are sticking! Before you condemn the turbo, check the turbine shaft for bearing wear by pulling off the rubber intake boot on the cold side and gently feeling the center compressor wheel nut with your fingertips. A tiny hair of side-to-side oil-clearance play is normal on a journal-bearing turbo, as long as the blades aren’t touching the housing and there is zero in-and-out axial play. If the shaft bearings are tight and dry, cleaning the hot side saves you a fortune:
- For mild sticking (lever still moves ~75% of its travel): While the engine is warm (watch out for hot exhaust parts!), you can work the turbo vane lever back and forth fifty to a hundred times by hand or with a Mityvac pump to break up light flaky soot along the unison ring slots, then take the car out for a spirited highway drive in 3rd and 4th gear to keep the exhaust hot and sweep the vanes through their full range.
- For heavy carbon binding (the permanent shop fix): Remove the turbocharger from the manifold and split the cast-iron hot exhaust housing away from the center bearing cartridge (marking the orientation first and soaking the rusted housing bolts overnight in penetrating oil so they don’t snap!). Once the hot housing is open on the workbench, scrape and wire-brush all the baked carbon off the unison ring, rollers, and individual nozzle vanes using carburetor/brake cleaner and fine Scotch-Brite until every vane pivots like silk with zero oil or grease left behind. (Never put grease or anti-seize inside the vane ring, because exhaust heat turns grease into hard carbon cement!)
Real-world shop cases: three turbo limp-mode fixes from our bays
To show you how different P0234 and P0299 limp-mode complaints look when we actually pop the hood, here are three real customer cars that came in after other shops quoted them $1,800 to $2,600 for complete turbo replacements.
Case 1: the VW Jetta TDI that lost power on every highway on-ramp
A commuter brought in his Volkswagen Jetta TDI complaining that it drove great around town all week, then dropped into hard limp mode every single Friday afternoon when he merged onto the interstate up a long incline. Cycling the key at the top of the hill always brought the power right back, and the ECM had stored 17965 / P0234 (Charge Pressure Control: Positive Deviation).
When I hooked my Mityvac hand pump directly to the VNT turbo actuator can, the diaphragm held 20 inHg of vacuum like a champ, but the actuator rod hit a brick wall halfway down its stroke and refused to return cleanly when I released the vacuum. We pulled the turbo, split the cast-iron exhaust housing on the bench, and found a thick ridge of baked carbon soot jamming three of the eleven VNT vanes. After an ultrasonic and wire-brush cleaning of the unison ring and a fresh set of 3.5 mm silicone vacuum hoses, actual boost tracked within 0.5 psi of specified boost all the way up our steepest test hill, saving him over $1,200 compared to a new turbo.
Case 2: the Ford EcoBoost that overboosted from a $6 rubber hose
Not every overboost limp mode happens on a diesel! A customer brought in his turbocharged Ford EcoBoost crossover with a wrench light on the dash, a stored P0234 overboost code, and a violent stumble followed by limp mode whenever he passed someone at half throttle. Unlike a vacuum-pulled diesel VNT turbo, his gasoline turbo used positive compressor boost pressure routed through a small solenoid to push the wastegate open once target boost was reached.
When I inspected the short three-inch rubber reference hose running from the turbo compressor outlet to the wastegate control solenoid, I found a half-inch split on the underside of the bend where it rubbed against a metal bracket. Every time the turbo spooled up, the pressure meant to push the wastegate open simply blew out into the engine bay through that split hose! With no pressure reaching the wastegate canister, the wastegate stayed clamped shut, boost spiked past 24 psi in two seconds, and the PCM cut the throttle to save the engine. Six inches of high-temp reinforced silicone hose and two small clamps fixed the car for less than $15.
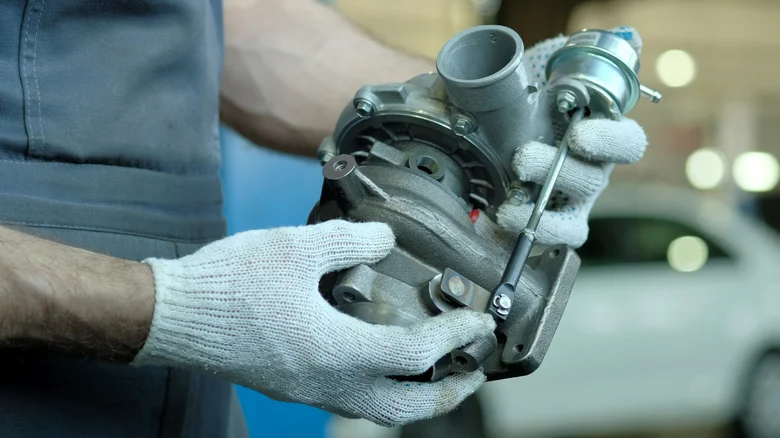
Case 3: the Volvo D5 with the mushy brake pedal and P0299 underboost
Another owner brought in a diesel wagon that threw a flashing engine service light and a P0299 negative boost deviation (underboost) code whenever he tried to climb a hill, accompanied by a brake pedal that felt hard the second time he tapped it in a parking lot. Remember earlier when we talked about how the vacuum system ties the turbo and the brakes together?
Instead of a bad turbo, we connected a vacuum gauge to the supply line feeding the turbo boost solenoid and saw only 8 inHg of vacuum at idle instead of 25 inHg. Tracing the vacuum tree back to the engine’s vacuum system revealed a ruptured vacuum hose and a leaking vacuum-controlled front engine mount that was dumping all the system vacuum into the outside air! Once we capped/replaced the leaking vacuum line so the boost solenoid got its full 25 inHg supply again, both the turbo boost and the power brake assist came right back to 100%.
Typical repair costs: DIY vs. professional shop
Because “turbo limp mode” sounds so expensive, unscrupulous or hurried shops sometimes quote a complete turbocharger replacement without spending thirty minutes testing the hoses and solenoid first. Here is what each fix realistically costs so you can budget smartly and ask the right questions at the service counter.
| What Actually Caused the Limp Mode | DIY Parts Cost | Professional Shop Cost (Parts & Labor) | Difficulty & Time Needed |
|---|---|---|---|
| Rotted or split vacuum / wastegate control hoses (5 to 7 meters) | $15 to $35 | $90 to $200 | Easy DIY (30 to 60 minutes, replacing one hose at a time) |
| Bad boost control solenoid valve (N75 / Pierburg / TCV) | $45 to $110 | $140 to $280 | Easy DIY (15 to 30 minutes with basic hand tools) |
| Faulty or oil-fouled MAP boost pressure sensor or MAF sensor | $35 to $150 | $120 to $300 | Easy DIY (10 to 20 minutes; always use OEM Bosch/Pierburg/Denso) |
| Leaking or rusted vacuum/electronic turbo actuator capsule | $80 to $260 | $280 to $550 (including rod calibration) | Moderate to Hard (tight access; requires exact rod stop calibration) |
| Removing turbocharger and cleaning sticky VNT / VGT carbon vanes | $30 to $75 (gaskets, studs & cleaner) | $450 to $850 | Advanced DIY / Pro Shop (3 to 5 hours; watch for rusted exhaust bolts) |
| Full turbocharger replacement (only if bearings/wheel are damaged) | $550 to $1,200 (reman/OEM unit) | $1,200 to $2,600+ | Pro Shop / Advanced DIY (must prime oil feed line before first start!) |
Note that if your vehicle is a newer model experiencing recurring turbo actuator or wastegate linkage rattling and P0234/P0299 limp-mode faults, several manufacturers have issued Technical Service Bulletins (TSBs) and extended warranty campaigns for updated actuators and ECU software calibrations. Always punch your 17-digit VIN into the NHTSA recall and manufacturer communications lookup page before paying out of pocket, and follow SAE-grade synthetic oil specifications so high-temperature turbo bearings and piston rings don’t cook cheap oil into carbon deposits.
A mechanic’s verdict: what to do next and when to visit a shop
Hitting turbo overboost limp mode in the middle of a highway pass is a wake-up call, but the fact that your engine regains full power as soon as you turn the key off and restart it is actually great news. It tells you that the turbocharger wheel hasn’t shattered and your engine isn’t mechanically blown: the ECU simply stepped in because boost pressure stayed a few psi too high for more than three to five seconds under load.
Start with the cheap, systematic checks in your own garage this weekend before spending big money. First, scan the car to confirm whether you have P0234 (Positive Boost Deviation / Overboost) or P0299 (Negative Boost Deviation / Underboost), and check that your MAP boost sensor reads normal atmospheric pressure (~1,000 mbar / 14.5 psi) with the key ON and engine OFF. Second, inspect or replace all the small 3.5 mm and 5 mm vacuum hoses (one hose at a time!) including the atmospheric vent line to the airbox, and test that your vacuum supply line pulls a strong 22 to 25+ inHg on a gauge. Third, attach a $25 Mityvac hand pump directly to the turbo actuator nipple to verify that the diaphragm holds vacuum without leaking and that the actuator rod glides smoothly through its full half-inch stroke.
Swapping rotted vacuum lines, replacing a sticking N75 boost control solenoid on the firewall, and cleaning or replacing a skewed MAP/MAF sensor are easy DIY jobs that solve the problem for under $100 on a huge number of cars. However, if your hand pump test shows that the actuator diaphragm is torn, or if unhooking the actuator rod reveals that the internal VNT turbo vanes are rusted or jammed solid with baked exhaust carbon, hand the job over to an experienced mechanic or turbo specialist. Having a shop properly clean the turbine vane ring on the bench and calibrate the actuator stop is still half the price of a brand-new turbocharger, and it’ll give you back full, reliable passing power on every hill.