
You walk out to your Dodge Journey, get in, press your foot on the brake, and something feels immediately wrong. The pedal is stiff as a board. You press harder, try to start the engine, and nothing happens. No crank, no start, just a rock-hard brake pedal and a whole lot of frustration.
This combination, a hard brake pedal and a no-start condition, is not random. These two symptoms showing up together is actually a clue. They are often connected, and understanding why they happen at the same time can help you zero in on the fix much faster than chasing each problem separately.
Table of Contents
In this guide, we are going to break down every likely cause for both symptoms, explain how they relate to each other, and walk you through practical fixes that you can either handle yourself or bring to a mechanic with a clear understanding of what needs to be done.
Why a Hard Brake Pedal and a No-Start Often Happen Together
Before diving into individual causes, it helps to understand the relationship between these two symptoms. On most modern vehicles, including the Dodge Journey, the brake system and the starting system are more connected than people realize.
For example, on vehicles with push-button start or automatic transmission, you are required to press the brake pedal before the engine will crank. The brake pedal sends a signal through the brake light switch, which tells the starting system that the brake is depressed and it is safe to start. If that signal never gets sent, or if the brake pedal itself cannot be pressed due to stiffness, the engine will not start.
On top of that, the brake booster, which is what makes the pedal feel light and easy to press, uses engine vacuum to do its job. No running engine means no vacuum. So if the engine has not been started in a while, or if the engine stalled, the vacuum reserve in the booster depletes and the pedal goes stiff. Try pressing a stiff pedal hard enough to activate the brake light switch, and you might not generate enough pressure to trigger the signal the starting system needs.
See how they feed into each other? That is why diagnosing this issue correctly from the start matters so much.
What Causes a Hard Brake Pedal on the Dodge Journey
1. A Failing or Failed Brake Booster
This is the most common cause of a suddenly stiff brake pedal, and it is worth spending some time here because it surprises a lot of people when they learn how the system actually works.
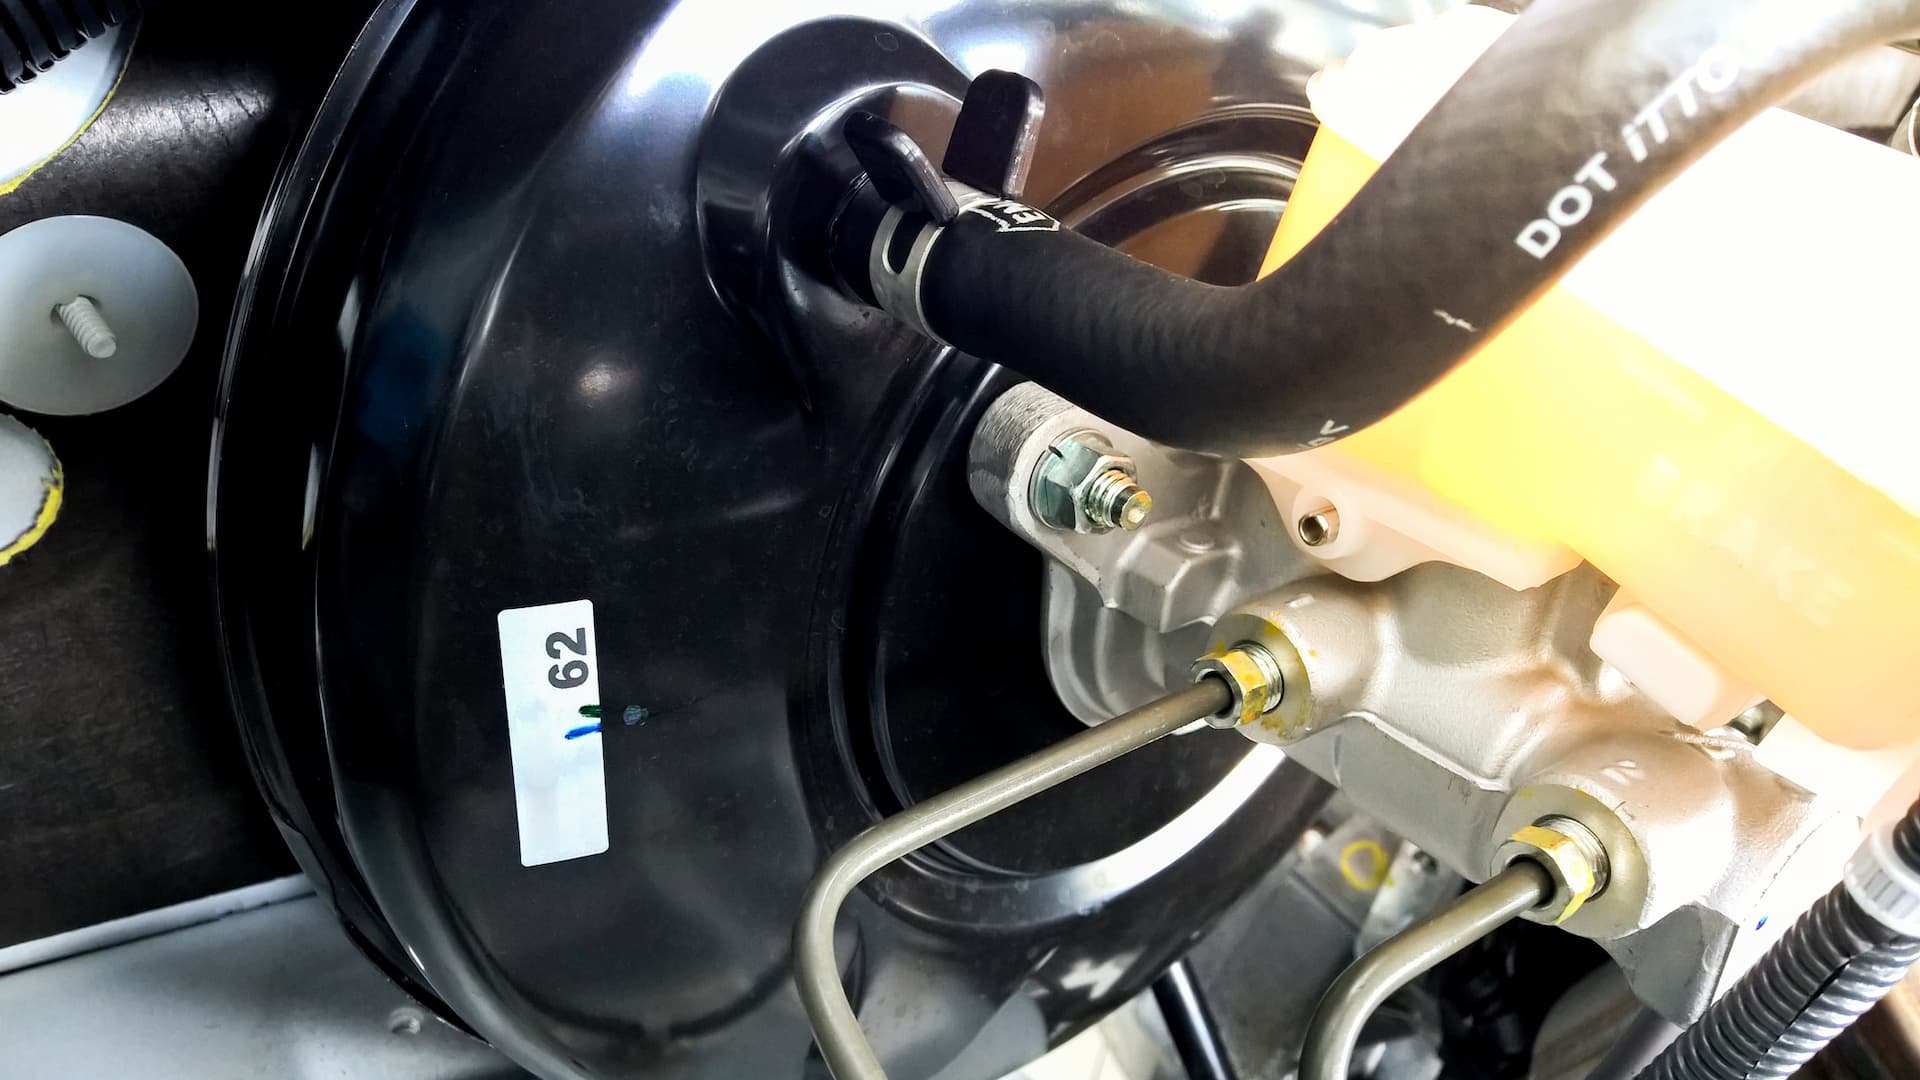
The brake booster is a large round canister typically located in the engine bay, directly behind the brake master cylinder and in front of the firewall on the driver’s side. Its job is to multiply the force you apply to the brake pedal so that you do not have to push with all your strength to stop a two-ton vehicle. It does this using engine vacuum, specifically the low-pressure vacuum created by the engine’s intake manifold.
When everything is working correctly, pressing the brake pedal feels smooth and responsive. But when the brake booster fails, or when it loses its vacuum supply, all of that assistance disappears. Suddenly you are pressing a pedal with no power assistance, and it feels like pushing against a wall.
There are a few ways the brake booster can fail:
- Internal diaphragm failure: The booster contains a rubber diaphragm that separates two pressure chambers. If this diaphragm cracks or tears, the booster loses its ability to create the pressure differential that provides braking assistance. You cannot repair this. The booster needs to be replaced.
- Vacuum leak at the booster housing: If the booster housing itself develops a crack or a leak at the seal where it connects to the master cylinder, vacuum is lost and assistance drops. You might hear a hissing sound when pressing the brake pedal if this is happening.
- Failed or cracked vacuum hose: The vacuum hose connects the booster to the engine’s intake manifold. If this hose cracks, collapses, or comes loose, the booster is starved of vacuum and becomes ineffective. This is one of the cheaper and easier fixes if it turns out to be the cause.
- Failed check valve: The check valve sits between the vacuum hose and the booster, and its job is to maintain the vacuum in the booster even when engine vacuum momentarily drops. If the check valve fails, the booster loses vacuum faster than it should, and the pedal goes hard sooner. A check valve is an inexpensive part and worth checking early in the diagnostic process.
Here is a simple test you can do yourself. With the engine off, pump the brake pedal several times to deplete any stored vacuum in the booster. Then press the pedal firmly and hold it down while you start the engine. If the booster is working correctly, you should feel the pedal drop slightly as the engine starts and vacuum builds. If the pedal stays stiff and does not move at all when the engine fires up, the booster is not functioning.
2. A Faulty Brake Light Switch

The brake light switch is a small but critically important component. It is located at the top of the brake pedal assembly, right where the pedal arm meets the bracket under the dashboard. When you press the brake pedal, the pedal arm releases the switch, which sends a signal to activate the brake lights and, on vehicles with certain starting requirements, to permit the engine to start.
If the brake light switch is stuck, misadjusted, or failed, two things can happen. First, the brake lights might not work, which is a safety hazard and something other drivers behind you will notice before you do. Second, and more relevant here, the signal to the starting system never gets sent, so even if you are pressing the brake pedal, the vehicle does not register it and will not start.
This is a relatively inexpensive fix. The switch itself is usually under thirty dollars, and replacing it does not require advanced mechanical skills. The tricky part is getting your body into position to access the area under the dashboard, but once you are there, it is a matter of disconnecting the old switch and installing the new one. Some brake light switches also need to be adjusted after installation so that they engage at the correct point in the pedal’s travel.
Before replacing it, check whether your brake lights are working. Turn the ignition to the on position without starting the engine, press the brake pedal, and have someone stand behind the vehicle and look. No brake lights when the pedal is pressed is a strong indicator the switch is the problem.
3. A Vacuum Leak Somewhere in the System
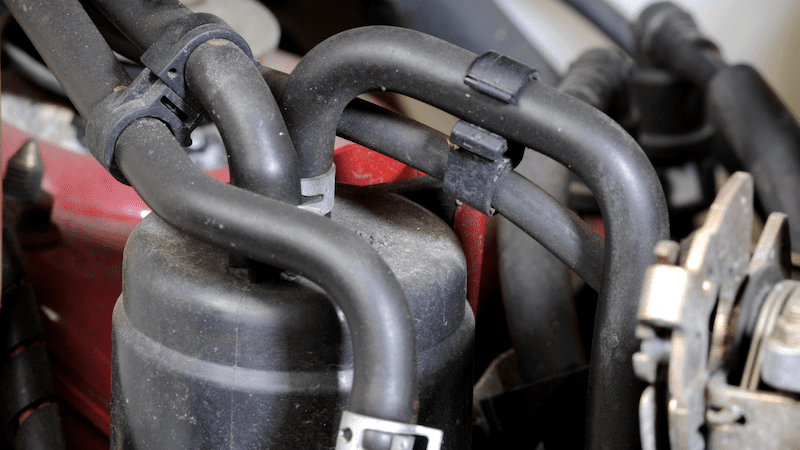
Beyond the brake booster itself, a vacuum leak anywhere in the engine can reduce the amount of vacuum available to the booster. The booster draws from the same vacuum source the engine uses for other components, and if there is a significant leak elsewhere, the booster does not get enough vacuum to function properly.
Signs that a vacuum leak might be contributing to the problem:
- The engine idles roughly or unevenly
- You hear a hissing sound from the engine bay
- The brake pedal is hard immediately after starting but not after the engine has been running for a minute
- The engine feels sluggish under acceleration
Vacuum leaks can come from cracked intake hoses, loose clamps, a failed intake manifold gasket, or any number of vacuum-operated components with aging hoses. A mechanic can use a smoke machine to pressurize the intake system and find leaks quickly. If you are diagnosing it yourself, a careful visual inspection of all vacuum lines and a listen for hissing sounds is the starting point.
What Causes the Dodge Journey to Not Start
1. A Dead or Weak Battery

This is the most straightforward no-start cause, and it is the first thing to check. A battery that does not have enough charge cannot power the starter motor, and the engine will not crank. Simple as that.
But here is where people get confused. A weak battery does not always mean the vehicle goes completely dead. Sometimes the battery has just enough power to run the interior lights and dashboard but not enough to spin the starter. You turn the key or press the start button and hear a single click, or a rapid series of clicks, but the engine does not turn over. That clicking sound is the starter solenoid trying and failing to engage because the voltage is too low.
Here is how to check it:
- Use a multimeter to test the battery voltage. A healthy battery at rest should read 12.6 volts or higher. Anything below 12.0 volts means the battery is significantly discharged. Below 11.8 volts and it may not be recoverable.
- Check the battery terminals for corrosion. Green or white powdery buildup on the terminals restricts current flow even if the battery itself is fully charged. Clean the terminals with a baking soda and water mixture, a terminal brush, and rinse clean.
- If the battery is discharged, try jump-starting the vehicle. If it starts with a jump, the battery is likely the culprit. Drive it for 20 to 30 minutes to allow the alternator to recharge it.
- If the battery keeps dying, have the alternator tested. A failing alternator cannot charge the battery while the engine runs, which means you are constantly draining it.
Dodge Journey batteries typically last three to five years. If yours is older than that and you are having starting issues, replacement is probably overdue.
2. A Faulty Starter Motor
The starter motor is what physically cranks the engine. It is an electric motor that engages with the engine’s flywheel and spins it fast enough to initiate combustion. When the starter fails, the engine simply does not turn over.
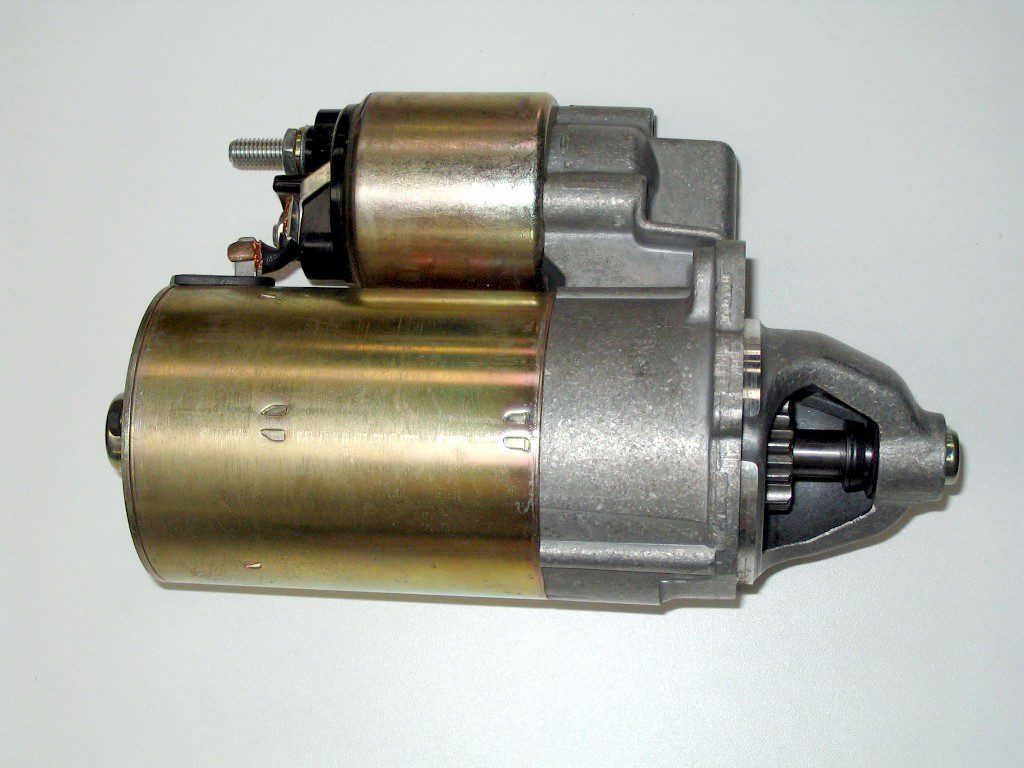
Starter motor failures can happen in a few ways. The motor itself can burn out from wear or heat exposure. The solenoid, which is the relay that sends power to the starter, can fail. Or the gear that meshes with the flywheel can become worn and fail to engage properly.
How do you know it is the starter and not the battery? The key difference is what you hear. A dead battery typically produces multiple rapid clicks when you try to start. A failed starter often produces a single loud click, or sometimes complete silence, even when the battery is fully charged. You might also hear a grinding noise if the starter gear is not meshing with the flywheel properly.
Before replacing the starter, check these things first:
- Are the starter’s electrical connections clean and tight? A loose or corroded connection to the starter can mimic a failed starter.
- Are there any blown fuses in the starter circuit? Check your fuse box diagram for any fuses related to the ignition or starter circuit and inspect them.
- Is the battery fully charged? Always rule out the battery before condemning the starter.
Replacing a starter on a Dodge Journey is something a mechanically experienced DIYer can handle, but access can be awkward depending on the engine configuration. If you are not confident, a shop can typically replace a starter in under two hours.
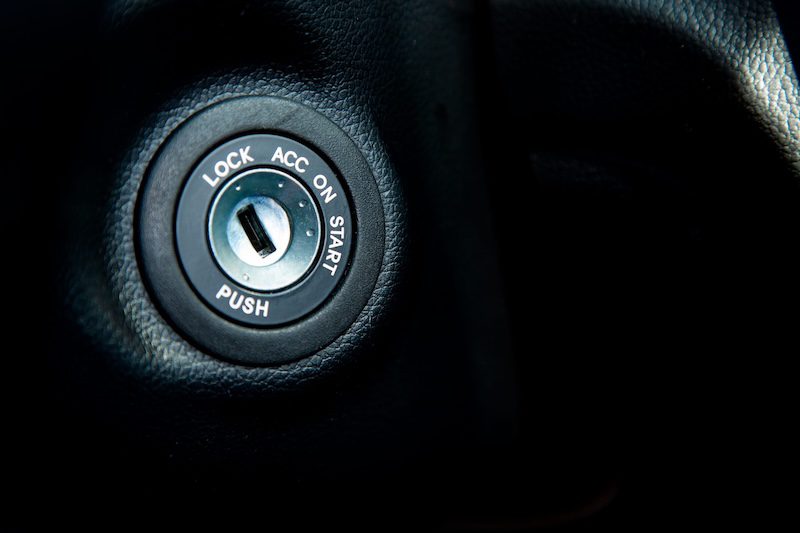
3. A Failed Ignition Switch
The ignition switch is what starts the chain of events that leads to the engine running. When you turn the key or press the start button, the ignition switch routes power to the starter circuit and other essential systems. If the ignition switch fails, that power routing does not happen, and the engine will not start no matter how good the battery and starter are.
Signs that the ignition switch might be the problem:
- The dashboard lights and accessories work fine, but there is no response at all when you try to start the engine
- The vehicle starts sometimes and not others, with no obvious pattern
- You notice the key feels loose or the ignition cylinder feels sloppy when you turn it
- The vehicle stalls shortly after starting and then does not restart
Ignition switch replacement varies in complexity depending on the model year of your Dodge Journey. On models with a traditional key, it usually involves removing the steering column covers and accessing the switch behind the ignition cylinder. On models with push-button start, the ignition switch is more of an electronic component that controls the starting circuit. Either way, if you suspect the ignition switch, a professional diagnosis is worth having before you start pulling things apart.
4. Key Fob or Keyless Ignition Problems

If your Dodge Journey has a push-button start, the vehicle will not start if it cannot detect the key fob. The key fob communicates with the vehicle’s receiver module via a low-frequency signal. If that communication fails for any reason, the starting system will not allow the engine to crank.
Common reasons the key fob might fail to communicate:
- Dead key fob battery: This is by far the most common cause. The fob uses a small coin cell battery, usually a CR2032, that typically lasts two to four years. When it dies, the signal gets too weak for the receiver to pick up.
- Signal interference: Strong radio frequency interference from nearby electronics can temporarily block the key fob’s signal. If the issue happens only in one specific location, try starting the vehicle somewhere else to see if it is interference-related.
- Damaged key fob: Water damage, physical damage from being dropped, or general wear can compromise the fob’s internal components.
- Unprogrammed or incorrectly paired fob: If the key fob was recently replaced or the vehicle battery was disconnected, the fob may have lost its pairing with the vehicle.
If you suspect the key fob battery is dead and you need to start the vehicle right now, try holding the fob directly against the start button while pressing it. Some Dodge Journey models have a backup reading antenna at the push button that can detect the fob’s signal at very close range even with a nearly depleted battery. This is a temporary workaround, not a fix. Replace the battery as soon as possible.
For traditional key ignition models, a worn or damaged key can cause the ignition cylinder to not turn properly or fail to make the electrical contacts inside the switch. If the key feels like it is not turning as smoothly as it used to, have a locksmith evaluate the key and cylinder before the situation gets worse.
How to Work Through the Diagnosis Systematically
When you are dealing with two symptoms at once, a hard pedal and a no-start, it is easy to start throwing parts at the problem hoping something sticks. That approach gets expensive fast. Instead, work through the diagnosis in this order:
- Check the battery first. Test the voltage with a multimeter. If the battery is weak or dead, recharge or replace it and see if both symptoms resolve. A dead battery can cause the brake booster to lose vacuum (since there is no running engine to generate it) and prevent the engine from cranking, so it can produce both symptoms simultaneously.
- Check the brake lights. Press the brake pedal with the ignition on and have someone check if the brake lights activate. No brake lights points to the brake light switch, which can also prevent the vehicle from starting if it is not signaling to the starting system.
- Perform the brake booster vacuum test. With the engine off, pump the brake pedal five to ten times to release stored vacuum. Then hold light pressure on the pedal and start the engine. If the pedal sinks slightly when the engine fires, the booster is working. If it stays stiff, the booster or its vacuum supply is the issue.
- Inspect the vacuum hose to the brake booster. Look for cracks, collapsed sections, or disconnected ends. This is a cheap and easy fix if it is the problem.
- Check the check valve. Remove the check valve from the booster and test it by blowing through it in both directions. It should allow air to pass one way but not the other. If it allows air through in both directions, it is failed and needs to be replaced.
- Check the key fob or ignition. If the battery is good and the brake system is functional but the vehicle still will not start, shift focus to the key fob or ignition switch.
Quick Reference: Symptoms, Causes, and Fixes
| Symptom | Likely Cause | Fix |
|---|---|---|
| Hard brake pedal, engine not running | Normal (no vacuum when engine is off) | Start engine, vacuum builds and pedal softens |
| Hard brake pedal with engine running | Failed brake booster or vacuum leak | Inspect and replace booster, hose, or check valve |
| No brake lights when pedal pressed | Faulty brake light switch | Replace brake light switch |
| Engine will not crank, rapid clicking | Dead or weak battery | Charge or replace battery, clean terminals |
| Single click, no crank | Failed starter motor or solenoid | Test and replace starter |
| No response at all when starting | Ignition switch failure | Inspect and replace ignition switch |
| Push-button start not responding | Dead key fob battery or failed fob | Replace key fob battery or reprogram fob |
| Intermittent starting issues | Brake light switch or ignition switch | Inspect both switches, replace as needed |
Watch This: A Helpful Walkthrough
If you want to see some of these diagnostics done visually, this video covers the process in a hands-on way that complements everything explained above.
What Will This Cost to Fix?
Repair costs vary depending on what is actually causing the problem. Here is a realistic estimate for each potential fix:
| Repair | Estimated Cost (Parts + Labor) |
|---|---|
| Battery replacement | $100 to $200 |
| Battery terminal cleaning | Free to $30 (DIY) |
| Brake light switch replacement | $30 to $80 |
| Vacuum hose replacement | $20 to $80 |
| Check valve replacement | $15 to $40 |
| Brake booster replacement | $200 to $600 |
| Starter motor replacement | $200 to $500 |
| Ignition switch replacement | $150 to $400 |
| Key fob battery replacement | $2 to $10 |
| Key fob replacement and programming | $150 to $400 |
As you can see, diagnosing before replacing is always the right move. The difference between a two-dollar battery for the key fob and a six-hundred-dollar brake booster replacement is significant. Take the time to work through the symptoms before committing to any repair.
When to Stop Diagnosing and Just Call a Mechanic
Some of these fixes are genuinely DIY-friendly. Replacing a key fob battery, cleaning battery terminals, or swapping a brake light switch are all things a careful non-mechanic can handle with basic tools and a bit of patience.
But other repairs, like replacing the brake booster, diagnosing a vacuum system issue, or addressing an ignition switch problem, involve systems where a mistake can create safety issues or cause additional damage. Brakes in particular are not an area where you want to guess. If you are not completely confident in your diagnosis or your ability to do the repair correctly, getting a professional involved is the right call.
If you do take it to a shop, go in armed with the information from this guide. Tell the mechanic both symptoms, the hard pedal and the no-start, and let them know what you have already checked. That saves diagnostic time and helps ensure you do not get sold a repair that does not address the actual cause.
A Dodge Journey that will not start and has a stiff brake pedal is telling you something specific. The answer is almost always found in the brake booster, the battery, the brake light switch, or the starting circuit. Work through those four areas in order, and you will find your answer.