You pull into a steep driveway, shift into park, and yank the parking brake handle with confidence. For a split second, everything feels normal. Then you feel it. A slow, stomach-churning roll backward. The parking brake that was supposed to hold your vehicle rock solid on that hill just gave up. Your heart jumps into your throat as you stamp the regular brake pedal and stop the car inches from a fence, a garage door, or worse, another vehicle. That moment of panic is something no driver should ever have to repeat. Yet for many, it happens more than they would like to admit.
A parking brake that does not hold on a hill is not just annoying. It is a safety hazard that puts you, your passengers, and everyone around the vehicle at risk. Most people never think about their parking brake until it fails them, and by then, the damage is already underway. The brake shoes are worn thin, the cable has stretched beyond its adjustment range, or rust has eaten away at the internal mechanism inside the rear drum. The good news is that almost every cause behind a weak parking brake is fixable with some basic tools, a little patience, and the right guidance.
Table of Contents
This is not one of those textbook explanations that makes you feel like you need an engineering degree. I am going to walk you through exactly what makes your parking brake tick, why it sometimes fails to hold your car on an incline, and how you can bring it back to life without a tow truck. We will cover the simple adjustments you can do in your driveway, the red flags that mean it is time to replace the brake shoes, and the safety tricks that keep your car planted even when the steepest hills are testing every component.
How Your Parking Brake Keeps Thousands of Pounds From Rolling Away
Most drivers treat the parking brake like a magic lever. Pull it up, and the car stays put. Push it down, and you are free to drive. But behind that simple motion, there is a mechanical ballet playing out inside your rear wheels. Understanding that ballet is the first step toward knowing why it sometimes stumbles on a hill.
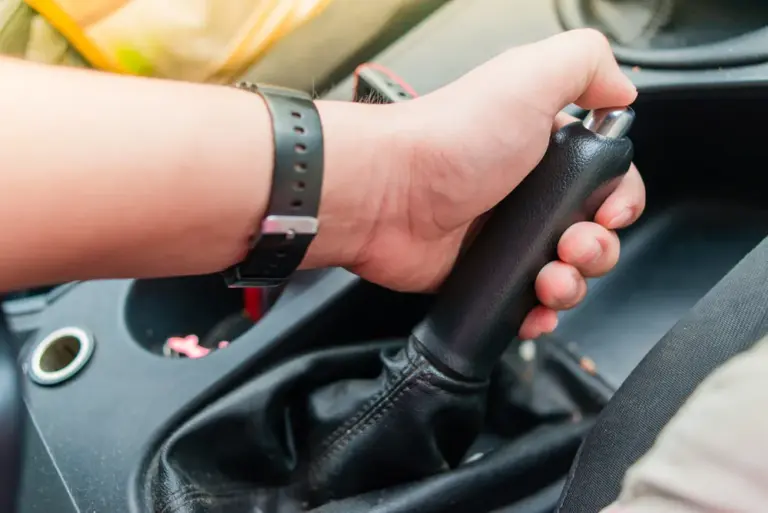
The parking brake system is entirely separate from your main hydraulic brakes. It does not rely on brake fluid, a master cylinder, or the brake booster. That separation is deliberate. If your hydraulic system springs a leak, the parking brake still provides a purely mechanical way to stop or hold the vehicle. It is the backup plan, and a good one at that. The core of the system is a set of cables that run from your parking brake pedal or hand lever all the way back to the rear brakes. When you pull the lever or press the pedal, those cables tighten. They yank on a lever or an actuator inside the rear brake assembly, forcing the brake shoes or pads against a drum or rotor surface. Friction takes over, and your vehicle stays exactly where you left it.
On vehicles with drum brakes in the rear, the parking brake cable pulls the brake shoes outward against the inside of the drum. The same shoes that handle your regular braking are also used for parking. On vehicles with rear disc brakes, the parking brake uses a different trick. Inside the rotor hat, there is often a small drum that houses a dedicated set of miniature brake shoes. These shoes engage only for the parking brake. Some systems use a mechanical mechanism that presses the disc brake pads against the rotor without hydraulic pressure. No matter the design, the principle is identical: metal pushes friction material against a spinning part and stops it cold.
Several components have to work in harmony for this all to hold firm on a hill. The brake shoes or pads provide the friction material. Over time, that material wears away, leaving less and less surface to bite. The cable transfers your lever pull to the rear brakes. It can stretch, fray, or snap, robbing the system of motion. The equalizer splits the pulling force evenly between the left and right rear brakes. If it is out of whack, one side might grab while the other slips. The adjuster mechanism inside the drum maintains the correct shoe-to-drum clearance as the shoes wear. When the adjuster seizes or stops doing its job, the gap grows too wide and the parking brake cannot clamp hard enough.
And then there is the parking brake pedal or lever itself. If the ratchet mechanism is worn, it may not hold the cable tension. You could pull the lever to the sky and still watch your car roll. All of these pieces must mesh perfectly for the system to handle a steep grade. When even one of them falters, the parking brake becomes a suggestion rather than a command.
The Early Warning Signs That Your Parking Brake Is Losing Its Grip
A failed parking brake rarely surprises you without dropping a few hints first. Most drivers just do not know what to look for. They pull the lever, feel some resistance, and assume the brake is working. But resistance alone is not a guarantee. You need to learn to read the clues your vehicle is giving you before a hill turns into a runaway ramp.
One of the most obvious signs is the parking brake handle or pedal traveling much higher than it used to. If you could previously lock the brake with just a few clicks of the ratchet and now you are pulling the handle almost to the roof, the cables have stretched or the brake shoes are excessively worn. This extra travel is your system begging for an adjustment. Ignore it, and the day will come when even the very last click will not be enough.
Another red flag is when the parking brake holds just fine on flat ground but lets the car creep the moment you park on a slope. This is the classic symptom of a parking brake that has enough friction to fight gravity on level pavement but lacks the extra clamping force needed for an incline. Many people mistakenly think their brake is working perfectly because they only test it in their flat driveway. Then they park on a steep city street and learn the hard truth.
You might also notice that the parking brake holds on one wheel but not the other. The car will pull to one side when you try to drive away with the brake still engaged. If one rear brake is locking while the other spins freely, the equalizer or one of the cables is unevenly tensioned, or one side has a seized mechanism. Either way, the car will pivot on the locked wheel and could slide sideways on a hill, a situation that is even more dangerous than rolling straight back.
A dragging parking brake that never fully releases can also warn of trouble. If the vehicle feels sluggish or the rear wheels get hot after driving a short distance, the parking brake shoes or pads are not retracting fully. This constant drag overheats the friction material and glazes it over, making the brake even less effective on a hill when you actually need it. Sometimes the culprit is a rusty cable that does not return properly. Other times it is the brake shoes themselves stuck to the drum due to corrosion.
Finally, any strange sounds when you pull the parking brake deserve attention. A grinding noise can indicate that the friction material has worn down to the metal backing plate, which does not grip well and will score the drum or rotor, adding a costly machining bill to an otherwise simple shoe replacement. A snapping or popping sound could be the cable strands breaking one by one. A single broken strand might not cause immediate failure, but it is a ticking clock.
The Real Reasons Your Parking Brake Cannot Handle a Hill
When a vehicle rolls on a hill with the parking brake fully engaged, drivers usually point to one thing. But the reality is that a weak parking brake often has multiple overlapping causes. Let us unpack them one at a time, starting with the most common and working toward the less obvious.
The Brake Shoes Are Simply Worn Out
Friction material does not last forever. Every time you pull the parking brake, a tiny layer of the shoe surface is sacrificed to create grip. Over years of use, that material can wear down to a sliver. When the shoes become too thin, the parking brake mechanism can no longer push them hard enough against the drum. The geometry is off. The lever inside the brake assembly runs out of travel before the shoes even make firm contact. You pull the handle, the cable moves, but the shoes barely kiss the drum. On a hill, a kiss is not enough. You need a bear hug.
Rear drum brakes, which rely on the same shoes for both service and parking brake functions, wear faster because they are used every time you slow down. The parking brake portion of disc brakes, housed in that tiny drum inside the rotor hat, often wears more slowly because it is used only when parked. But those miniature shoes are thinner and have very little tolerance for wear. Once they are gone, they are gone.
The Adjustment Is Off, and Nobody Noticed
Most parking brake systems are designed to be self-adjusting. In a drum brake setup, a star wheel adjuster spins automatically when you brake in reverse, tightening the shoes to compensate for wear. In theory, this keeps the clearance perfect without any intervention. In practice, the adjuster can seize from rust, dirt, or simple neglect. When it stops working, the gap between the shoe and the drum widens with every thousand miles. The parking brake cable has to pull farther and farther to take up that gap, and eventually it cannot pull far enough.
Even when the self-adjuster is functional, a manual adjustment of the cable tension may still be needed over time. The cables themselves stretch. The equalizer can slip. The parking brake pedal mechanism can develop slack. A car that rolled off the showroom floor with a tight parking brake at three clicks can end up needing seven or eight clicks after 60,000 miles. That is not a worn-out brake. That is a brake that needs ten minutes of adjustment.
The Cables Are Stretched, Seized, or Broken
The steel cables that connect your parking brake lever to the rear brakes live in a hostile environment. They are exposed to road salt, water, mud, and extreme temperature swings. Over time, the inner cable can rust inside its housing, creating friction that prevents it from pulling smoothly. You might feel a stiff, gritty resistance when you apply the parking brake. That is the cable fighting you. The outer jacket can crack and let moisture in, accelerating the corrosion.
Stretched cables are another result of years of tension. Steel is elastic up to a point, but after thousands of cycles, the cable permanently elongates. The parking brake lever then has to travel further to achieve the same pull force. At the extreme, the cable may have stretched so much that you run out of threads on the adjuster. No amount of tightening will compensate. The cable must be replaced.
A broken cable is game over. If you pull the parking brake handle and it offers zero resistance, flopping around like a loose lever, one of the cables has snapped. This can happen at a fray point inside the housing, at the connection to the equalizer, or at the lever inside the brake drum. On a hill, a broken cable means you have zero mechanical braking on that wheel. The remaining cable might hold one side, but one brake on a steep grade is not enough to prevent a roll.
Rust Has Crippled the Internal Components
Inside a brake drum, the shoes, springs, adjuster, and backing plate are all bare metal. They rust. In regions where winter road salt is common, this rust can become severe. The adjuster star wheel can freeze solid. The parking brake lever that attaches to the shoe can seize on its pivot. The shoes themselves can rust-weld to the backing plate, preventing them from moving outward when the cable pulls. Even if the cable and lever are healthy, the shoes simply will not budge.
Vehicles that sit undriven for long periods are especially vulnerable. Moisture collects inside the drums and initiates rust, which then locks everything in place. When the owner finally drives the car and pulls the parking brake, nothing gives. The handle feels spongy because the cable is stretching against frozen hardware. This type of failure is often misdiagnosed as a simple cable stretch when the real problem is deep inside the drum.
Hydraulic Handbrake Quirks and Electronic Parking Brake Gremlins
Some vehicles, particularly older European models, use a hydraulic parking brake that taps into the rear brake calipers. Instead of a cable pulling shoes, the handbrake lever pushes brake fluid through a separate circuit to squeeze the pads. This system works well when new, but it introduces the same failure points as any hydraulic system. Leaking seals, air in the lines, or contaminated brake fluid can weaken the parking brake’s hold. The lever may still feel firm, but the calipers are not applying enough force to lock the wheels on an incline.
Modern cars increasingly rely on electronic parking brakes. A push of a button engages a small motor on each rear caliper, which clamps the pads. These systems are generally reliable, but they are not immune to problems. A low battery voltage can prevent the motors from fully engaging. A software glitch in the control module can leave the parking brake partially applied or not applied at all. Diagnostic trouble codes are often stored when these issues occur, requiring a scan tool to pinpoint the fault.
How to Diagnose a Parking Brake That Slips on Hills
Before you start buying parts or scheduling a mechanic, you can narrow down the cause right in your parking spot. A systematic approach saves time, money, and the frustration of replacing components that were never broken.
Start with the simplest test. Park on a flat, hard surface and fully engage the parking brake. Try to drive forward gently. The car should stumble and refuse to move. If the engine can easily pull against the parking brake, you have a serious lack of holding force. Now release the brake and try again. If the car was previously stuck and is now free, the cables are not seized, and the release mechanism works. If the car still drags, something is sticking.
Next, on a safe, very gentle slope with no traffic, deliberately test the parking brake. With the regular brake pedal held, engage the parking brake fully and then slowly release the foot brake. If the car rolls immediately, even with the parking brake pulled to its maximum, you have a clamping force problem. If it holds for a moment and then begins to creep, the shoes may have enough friction to hold briefly but not enough to sustain the load. Do not test this on a steep hill. The goal is to diagnose, not to chase a runaway vehicle.
Check the parking brake lever travel. With the brake released, count how many clicks until the lever becomes firm. Most vehicles should be fully engaged within four to seven clicks. If you can pull the lever beyond eight or ten clicks without a hard stop, the cables need tightening or the shoes are excessively worn. If the lever travels normally but the car still rolls, the problem is likely inside the drums, not in the cables.
Inspect the visible sections of the parking brake cables. Crawl under the vehicle and look for any cables hanging loose, broken, or covered in rust. Trace them from the equalizer bracket to the rear wheels. Any sign of cracked outer casing, exposed inner wire, or excessive corrosion means that cable is on borrowed time. A simple tug test can reveal a broken strand; a cable that stretches like a rubber band instead of pulling firmly is no longer providing solid motion.
If the external cables look fine, the drum or rotor must come off for an internal inspection. This is where you check the condition of the brake shoes, the adjuster, the springs, and the parking brake lever mechanism. Look for uneven wear, contamination from leaking axle seals or wheel cylinders, rust, and broken springs. Turn the adjuster by hand (if accessible) to see if it moves freely or is seized. Any frozen part inside the drum will compromise the parking brake’s grip.
How to Adjust Your Parking Brake Cable in Less Than an Hour
Many parking brake complaints can be resolved with a simple cable adjustment. If your lever pulls too high but the shoes still have life left, this is likely your fix. You do not need a lift. A jack, jack stands, and a wrench are often enough.
Begin by parking on level ground and chocking the front wheels so the vehicle cannot roll while you work. Jack up the rear of the car and place it securely on jack stands. Never trust a jack alone. Locate the parking brake equalizer, a bracket where the single cable from the lever splits into two cables going to each rear wheel. There is usually an adjustment nut on a threaded rod at this point. Tightening that nut pulls the cables tighter, reducing lever travel.
Before you crank the adjuster, make sure the brake shoes are properly adjusted first. On drum brakes, the star wheel adjuster inside each drum should be adjusted so that the shoes just lightly contact the drum. You can usually access the star wheel through a small slot on the backing plate or from the front with the drum removed. If the shoes are far from the drum, tightening the cable alone will not solve the problem. The system works best when the shoes are near the drum and the cable takes up the remaining slack.
Now tighten the equalizer nut in small increments, checking the lever travel after each adjustment. You are aiming for a parking brake that fully engages within four to seven clicks, with a firm, immovable feel at the top. Too tight, and the brakes will drag even when the lever is released, overheating the shoes and destroying fuel economy. Too loose, and you will be right back where you started, pulling the handle through the roof on a hill.
Spin each rear wheel by hand after the adjustment. With the parking brake released, the wheels should rotate freely without any scraping or binding. With the brake engaged, the wheels should lock solid. If one wheel locks and the other still spins, the equalizer is not evenly distributing the pull, or one cable is sticking. Fix that before you drive.
When a Cable Adjustment Is Not Enough and You Need New Brake Shoes
Sometimes you can tighten the adjuster until the nut runs out of threads and the parking brake still will not hold. That is a clear sign the brake shoes are worn beyond their service limit. Replacing the shoes is a more involved job, but it is still within reach of a weekend mechanic willing to get their hands dirty.
Disassembly starts with safely raising the vehicle and removing the rear wheels. The brake drum must come off. Often it is rusted in place and needs some persuasion with a mallet or the gentle use of a drum puller. Once the drum is off, take a photo of the spring arrangement before removing anything. Brake shoe assemblies are a puzzle of springs, pins, and clips, and reassembling them from memory is a fast track to frustration. Note which shoe has the longer friction material. Usually the longer shoe goes toward the rear of the vehicle because the parking brake lever acts on that shoe.
Remove the old shoes carefully. Pliers made for brake springs save knuckles and sanity. Pay attention to the adjuster mechanism and the parking brake lever attached to the shoe. If these components are rusty, clean them with a wire brush and lubricate the pivot points with high-temperature brake grease. Do not get grease on the friction material or the drum friction surface.
Install the new shoes exactly as the old ones came off, following your reference photo. The adjuster should be threaded all the way in to make drum installation easier. Once the drum is back on, use the star wheel adjuster to expand the shoes until they just lightly drag against the drum. This sets the foundation for a tight parking brake. Reinstall the drum and wheel, and then go through the cable adjustment procedure from the previous section to dial everything in.
After a shoe replacement, always perform a series of low-speed stops in reverse to activate the self-adjuster, if your vehicle uses that design. This helps the adjuster find its final position. Test the parking brake on a gentle hill. It should hold the vehicle firmly with the lever pulling no more than two-thirds of its full travel. If it still slips, recheck the cable tension and shoe adjustment.
Simple Safety Precautions That Work Even When the Parking Brake Fails
No matter how well your parking brake is maintained, a steep hill can test the limits of any mechanical system. Building good parking habits adds layers of protection that stop your car from rolling even if the parking brake decides to take the day off. These precautions are not complicated. They take seconds. And they have saved countless vehicles and lives.
When you park facing uphill, turn your front wheels away from the curb. If the vehicle rolls, it will roll backward and into the curb, which can stop it before it picks up speed. Facing downhill, turn your wheels toward the curb for the same reason. If there is no curb, like on a country road or a soft shoulder, turn the wheels toward the edge of the road, so the car rolls away from traffic. These habits are taught in driver education for good reason. They work.
For manual transmission vehicles, always leave the car in gear when parked. First gear or reverse provides the most resistance because these are the lowest gears. The engine’s compression will fight the car’s movement, acting as a backup to the parking brake. In an automatic, shift firmly into park before releasing the foot brake. The parking pawl inside the transmission will engage, locking the output shaft. Do not rely on the parking pawl alone, especially on a hill. It is a small metal pin that can snap under heavy load, leaving you with zero protection. Use the parking brake first, then shift into park.
Carrying a set of wheel chocks in your trunk costs less than twenty dollars and can be a lifesaver in an emergency. If your parking brake suddenly fails or you must park on a very steep grade, chock the wheels before you release the foot brake. A chock placed snugly against the downhill side of a tire physically blocks the vehicle from moving. This is the same technique commercial trucks use, and for good reason.
If you are driving an unfamiliar vehicle, do not assume the parking brake works. Test it gently on a flat surface before you encounter a hill. Rental cars, borrowed trucks, and older vehicles that have led hard lives are notorious for having parking brakes that are either out of adjustment or completely non-functional. A five-second test can save you a thousand-dollar body shop bill.
When You Should Hand the Wrench to a Professional
There is no shame in calling a mechanic for a parking brake that refuses to cooperate. Certain failures require specialized tools and the experience that comes from having done the job dozens of times. Hydraulic parking brake systems, for instance, involve brake fluid, bleeding procedures, and seals that can be easy to damage if you do not have the touch. Seized cables that are buried inside the body of the vehicle can be a nightmare to route without a lift. And electronic parking brakes need a scan tool to retract the caliper motors before the pads can even be changed. Attempting to force an electronic caliper without the retraction procedure can destroy the actuator, turning a simple brake job into a four-figure repair.
If you have gone through the adjustments, replaced the shoes, and the parking brake still slips on a hill, there may be a deeper issue. The backing plate that holds the shoes could be worn or bent. The anchor pin that the shoes rest against might be grooved, misaligning the shoes. The equalizer bracket could be bent, causing uneven pull. A professional inspection will catch these less common causes.
A mechanic can also perform a parking brake force test using calibrated gauges. Instead of just pulling the lever and hoping, they measure the actual clamping force at each wheel. This removes guesswork and ensures the system meets the manufacturer’s specifications. If your vehicle undergoes a safety inspection, this test is often part of the checklist.
Building a Parking Brake Maintenance Routine That Lasts
The parking brake suffers from an out-of-sight, out-of-mind problem. Because it is used so briefly and often engaged while the vehicle is stationary and silent, its gradual decline goes unnoticed until the hill incident forces attention. Building a quick parking brake check into your routine maintenance prevents those moments.
Every oil change, take sixty seconds to test the parking brake. Pull it fully and note how many clicks it takes. If that number is creeping up, schedule an adjustment. Every time you rotate your tires, pull the rear drums or visually inspect the visible parking brake components. Look for rust, dust, cracked rubber boots on cables, and signs of fluid leaks. A leaking wheel cylinder or axle seal contaminates the brake shoes with fluid, and no amount of adjustment will make an oil-soaked shoe hold. Catching that leak early saves the shoes and the drum.
Use the parking brake every time you park, even on flat ground. This might sound counterintuitive, but regular use keeps the self-adjusters cycling and prevents the cables from seizing in their housings through sheer movement. A parking brake that is never used becomes a parking brake that will fail when it is finally needed. That little extra motion of the lever or press of the pedal is the cheapest insurance policy you can buy for your brake system.
On vehicles with electronic parking brakes, listen for the whir of the motors when you engage and release the brake. A change in pitch, a slower operation, or a grinding noise is an early warning that the actuators are struggling. Water intrusion into the motor housing is a common issue that only gets worse. Addressing it at the first sign can save the actuator.
The Difference a Properly Adjusted Parking Brake Makes
Imagine pulling into a steep driveway, pulling the parking brake with three crisp clicks, and feeling the car lock solidly into place. No slow creep. No anxious hesitation. You step out, walk away, and do not give it a second thought. That is the peace of mind a properly functioning parking brake provides. It is not a luxury. It is a basic safety function, one that is fully within your power to maintain.
You do not need to be a master technician to adjust a cable or recognize worn shoes. You just need to care enough to look, to listen, and to act before the hill catches you off guard. The tools are simple. The knowledge is here. The only missing ingredient is your willingness to crawl under the car and make it right.
The next time you park, pay attention to that handle or pedal. How many clicks? How firm is the hold? The answer could be the difference between a secure vehicle and a slow roll toward disaster. Do you trust your parking brake to hold on the steepest hill in your town? If the answer is anything less than an absolute yes, you have work to do.