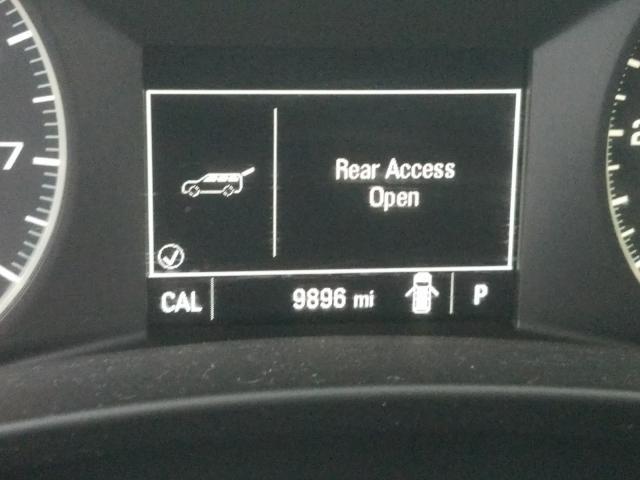
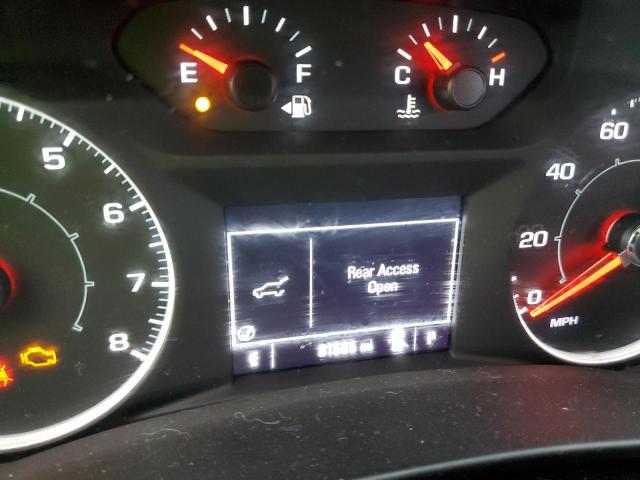
You are sitting in your car, glance down at the dashboard, and there it is: “Rear Access Open.” You get out, check the back of the vehicle, push the hatch closed again, get back in, and the message is still there. You restart the car. Still there. Now you are wondering what is actually going on and whether you need to be worried about it.
Take a breath. This is a fairly common issue that a lot of vehicle owners run into, and in many cases, it is not as complicated to fix as it might seem. That said, it does need your attention rather than being ignored indefinitely. Let us walk through exactly what this warning means, what causes it, and what you need to do to clear it for good.
Table of Contents
What Does “Rear Access Open” Actually Mean?
Your vehicle’s computer is constantly monitoring a network of sensors throughout the car. Among those sensors are ones specifically designed to detect whether the rear hatch door and rear hatch window are properly closed and latched. When the system detects that one of them is open or not fully secured, it sends the “Rear Access Open” message to your dashboard display.
The message is telling you one of two things. Either something is genuinely not closed properly, or a sensor or component is malfunctioning and sending a false signal to the vehicle’s computer. Both scenarios are worth investigating, but they have very different fixes.
On most vehicles that display this message, you will also notice the interior lights behaving differently, sometimes staying on longer than usual or flickering. That is the system responding to the same “open access” signal from the sensors.
How Your Rear Hatch Latch System Works
Before we get into the causes and fixes, it helps to understand the setup you are working with. Most vehicles that show this warning have either a single-latch or a dual-latch system securing the rear hatch.
In a single-latch setup, there are typically two sensors: one for the rear hatch window and one for the main rear hatch door. The window and the door can open independently of each other in many SUVs and crossovers, so they each have their own sensor reporting back to the computer.
Some vehicles, particularly larger SUVs, use a two-latch system with three sensors in total to provide a more secure closure of the hatch. More latches and sensors mean more potential points of failure, but also a more robust locking mechanism when everything is working correctly.
Each latch contains a small sensor that signals to the Body Control Module (BCM) whether the latch is in its closed and locked position. When the latch closes properly, the sensor sends a closed signal. When it is open, ajar, or malfunctioning, the sensor sends an open signal, and the BCM puts the warning on your dash.
Common Causes of the “Rear Access Open” Warning
There is more than one reason this message appears, and knowing which one applies to your situation is what determines the right fix. Here is a breakdown of the most common culprits.
1. The Rear Hatch Is Not Fully Closed
Start with the obvious before going any further. Sometimes the hatch just did not close completely on the last slam. Maybe you were loading groceries and pushed it down without fully engaging the latch. Maybe something inside the cargo area is slightly in the way, preventing the hatch from closing all the way down.
Open the hatch fully and close it again with a firm push until you feel and hear the latch click into place. Do the same for the rear window if your vehicle has one that opens independently. Check whether anything in the cargo area, a bag handle, a box corner, or a floor mat edge, is sitting right at the hatch seal line and preventing full closure.
If the hatch was the issue and it was simply not fully latched, closing it properly should clear the warning immediately or within a few seconds of driving.
2. A Faulty or Worn Rear Latch
This is the most common cause of a persistent “Rear Access Open” message when the hatch appears visually closed. The latch mechanism itself can wear out, become misaligned, or develop an internal fault that prevents it from registering as fully closed even when the hatch door is physically shut.
Latches have moving parts inside them. A small spring can weaken or break. The mechanism can become stiff or sticky from years of use and weather exposure. The sensor built into the latch can fail electrically, sending a permanent “open” signal to the BCM regardless of the actual position of the hatch.
A quick way to check whether the latch is the issue is to listen carefully when you close the hatch. A properly functioning latch makes a solid, definitive click when it engages. If the sound is soft, hollow, or absent, the latch is not catching correctly. You can also manually try to wiggle the hatch after closing it. If there is movement, the latch is not engaging properly.
3. Debris, Rust, or Dirt Obstructing the Latch
The latch on your rear hatch is exposed to everything the road throws at it. Mud, road salt, dust, moisture, and general grime can all work their way into the latch mechanism over time. When enough debris accumulates, it can prevent the latch from fully engaging, leaving the sensor in an open or intermediate state that triggers the warning.
Rust is a particular problem in areas that use road salt during winter. The striker plate (the metal pin or loop that the latch hooks onto when the hatch closes) can rust and become rough or misshapen, preventing a clean engagement of the latch mechanism.
This is often a fixable issue with a good cleaning and some lubrication before any parts replacement is needed.
4. A Damaged or Worn Hatch Seal
Around the perimeter of the rear hatch opening is a rubber seal that keeps water, air, and noise from getting inside the vehicle when the hatch is closed. Over time, this seal can harden, crack, compress permanently, or tear. When it deteriorates, it changes the geometry of how the hatch closes.
A failed seal means the hatch no longer sits in quite the same position when closed. Even a small change in the hatch’s resting position can be enough to prevent the latch from fully engaging or can alter the gap between the latch and striker enough to affect sensor readings. Beyond triggering the warning message, a deteriorated seal also lets water, wind noise, and cold air into the cargo area, which is a comfort and corrosion concern on its own.
5. A Malfunctioning Body Control Module (BCM)
The BCM is the electronic hub that manages and monitors a wide range of electrical functions throughout your vehicle, including door and hatch sensors. If the BCM develops a fault, whether from corrosion, water intrusion, wiring issues, or internal component failure, it can begin sending incorrect signals or misinterpreting sensor data.
A BCM problem often shows up as intermittent warnings rather than a constant message. You might notice the “Rear Access Open” message appearing and disappearing randomly, sometimes when the hatch has not even been touched. Other warning messages may appear alongside it at seemingly unrelated times. These are signs pointing toward the BCM rather than the latch or sensors themselves.
BCM issues can also stem from wiring problems in the connectors feeding into the module. A single loose or corroded pin in a BCM connector can cause all kinds of seemingly unrelated electrical warnings to appear across the dashboard.
How to Fix the “Rear Access Open” Warning
Now let us get into the actual fixes. Work through these in order from simplest to most involved. There is no point in diving into BCM diagnostics when the latch just needs a cleaning.
Fix 1: Close the Hatch Properly and Reset the Computer
Always start here. Open the rear hatch fully, make sure nothing is obstructing the closure path, and close it with a firm, deliberate push until you hear a solid click. Check the rear window separately if your vehicle has one that opens independently.
If the warning clears after properly closing the hatch, great. You are done. But if it remains even though the hatch is now properly closed, the next step is to reset the vehicle’s computer. Here is how to do it:
- Turn the vehicle off completely.
- Open the hood and locate the negative battery cable (the black one).
- Using the appropriate wrench, loosen the clamp and disconnect the negative cable from the battery terminal.
- Hold the two disconnected battery cables together briefly to discharge any residual electrical charge stored in the system capacitors.
- Leave the battery disconnected for at least 2 minutes. For a more thorough reset, leaving it disconnected for 12 hours allows the vehicle’s computer to fully power down and lose its stored memory, forcing it to relearn from scratch when reconnected.
- Reconnect the negative cable, tighten the clamp securely, and start the vehicle.
After the reset, check whether the warning message has cleared. Keep in mind that resetting the computer clears stored fault information but does not fix an underlying hardware problem. If the latch sensor is genuinely faulty, the warning will return fairly quickly after the reset because the fault will be re-detected as soon as the computer runs its checks again.
Fix 2: Clean the Latch Mechanism and Striker
If the reset does not hold, inspect the latch area before assuming anything needs to be replaced. Here is how to clean and inspect the latch properly:
- Open the rear hatch and look at the latch mechanism on the hatch itself and the striker plate on the vehicle’s body that the latch hooks onto.
- Use a dry cloth to wipe away any visible dirt, mud, or debris around both the latch and the striker.
- Spray a small amount of white lithium grease or a purpose-made door latch lubricant into the latch mechanism. Avoid WD-40 for this purpose as it is a solvent rather than a long-term lubricant and can actually attract more dirt over time.
- Work the latch manually a few times by hand to distribute the lubricant through the mechanism.
- Check the striker plate for rust or rough spots. Light surface rust can be cleaned off with fine steel wool or a wire brush. If the striker itself is bent or heavily corroded, it may need replacement.
- Close the hatch and check whether it now clicks solidly into place.
In many cases, particularly on vehicles driven in humid or salty environments, a good cleaning and lubrication of the latch and striker is all that is needed to restore proper function and clear the warning.
Fix 3: Inspect and Replace the Latch Assembly
If cleaning does not solve the problem and the latch still does not engage with a solid click, the latch assembly likely needs replacement. Here is how to assess and address this:
- With the hatch open, look closely at the latch mechanism. Check for any visibly broken components, cracks in the housing, or signs that the internal mechanism is not moving freely.
- If your vehicle has both a main hatch latch and a separate window latch, check both. The warning could be triggered by either one.
- Use a scan tool if available to check for stored fault codes related to the rear hatch sensors. The code will often specify which sensor or latch circuit is reporting the fault, which tells you exactly which latch to replace rather than guessing.
- Replacement latch assemblies are available from dealerships and aftermarket suppliers. On most vehicles, the latch is held in by a few screws and connected by one or two electrical connectors. Replacing it is typically a straightforward job that does not require specialized tools.
- After installing the new latch, close the hatch several times to confirm a solid engagement, then clear the fault codes with a scan tool and verify the warning does not return.
Latch assemblies for most vehicles range from $30 to $150 for the part itself, depending on the vehicle make and model. If you have a shop do the work, labor is typically minimal since it is not a time-intensive job on most vehicles.
Fix 4: Inspect and Replace the Hatch Seal
Run your fingers around the rubber seal that lines the perimeter of the rear hatch opening. You are looking for sections that are hard, cracked, compressed flat, or visibly torn. Pay particular attention to the bottom corners and any area where the seal makes a sharp bend, as those spots tend to deteriorate faster than the rest.
If the seal is significantly deteriorated, replacement is the right move. A new seal costs anywhere from $30 to $120 depending on the vehicle, and it comes as either a continuous loop or in sections. Installation is a peel-and-press process on most vehicles, though some use a channel-mount system that requires working the seal into a groove around the opening.
Beyond fixing the warning message, replacing a failed seal also stops water from getting into your cargo area, which over time causes rust, mold, and water damage to anything you store back there. It is a repair that pays for itself in multiple ways.
Fix 5: Inspect the BCM and Wiring
If you have gone through all of the above steps and the warning persists, or if the warning is intermittent and appears even when the hatch has not been touched, the BCM or its wiring is likely involved. This is the most complex part of the diagnosis and the area where professional help is most valuable.
Here is what a technician will typically look at:
- BCM connectors: Each connector feeding into the BCM will be inspected for corrosion, bent pins, or loose connections. Even a single corroded pin in a connector can cause erratic sensor readings and false warning messages.
- Wiring from the latch sensors to the BCM: The wire harness running from the rear latch sensors through the vehicle’s body to the BCM can develop breaks or shorts, particularly at points where the harness passes through grommets or flexes repeatedly. A damaged section of wiring can send corrupted signals that the BCM interprets as an open hatch sensor.
- BCM internal function: Using manufacturer-level diagnostic software, a technician can interrogate the BCM directly to determine whether it is processing sensor data correctly or whether the module itself has developed an internal fault.
Do not attempt to open or probe the BCM yourself unless you have proper training and equipment. BCMs are sensitive electronic modules, and improper handling can cause additional faults or damage that significantly increases your repair cost. If the diagnosis points to a BCM issue, let a qualified technician handle the repair or replacement.
Diagnosing the Problem: A Step-by-Step Decision Guide
Not sure where to start? Use this quick reference to narrow down the likely cause based on what you are experiencing.
| What You Are Experiencing | Most Likely Cause | Where to Start |
|---|---|---|
| Warning clears when hatch is slammed harder | Hatch not fully latching | Clean and lubricate the latch and striker |
| Warning stays on even after firmly closing hatch | Faulty latch sensor or latch mechanism | Scan for fault codes, inspect latch assembly |
| Warning appears and disappears randomly | Wiring issue or BCM fault | Inspect wiring harness and BCM connectors |
| Warning accompanied by water in cargo area | Failed hatch seal | Inspect and replace the perimeter seal |
| Warning appeared after battery was replaced or died | Computer glitch | Perform a battery disconnect reset |
| Multiple unrelated warning messages appearing together | BCM fault or failing battery | Test battery and inspect BCM connectors |
Frequently Asked Questions
What does “Rear Access Open” mean exactly?
It means your vehicle’s computer has detected that the rear hatch door, rear hatch window, or both are not in the fully closed and latched position. The signal comes from sensors built into the latch mechanisms at the rear of the vehicle. The warning can reflect an actual open hatch or a malfunctioning sensor sending a false open signal.
Can I still drive my vehicle with this warning showing?
In most cases, yes. The warning does not disable the vehicle or limit its operation. However, driving with an unresolved rear hatch issue is not without risk. If the hatch is genuinely not properly latched, it could swing open while you are moving, which is dangerous and potentially damaging. Even if it is a sensor false alarm, you want to confirm that before driving long distances. Address the issue promptly rather than driving around with it unresolved.
Why does the warning appear when my hatch is definitely closed?
This is where a lot of people get confused. The hatch being physically closed does not always mean the latch sensor registered it as closed. A worn or faulty latch can close the hatch mechanically while still sending an open signal electrically. It could also be a BCM wiring fault rather than any problem with the hatch itself. A scan tool will pull the specific fault code and tell you exactly where in the system the signal is coming from.
Which latch is causing the problem if my vehicle has multiple latches?
This is where a scan tool earns its value. The diagnostic trouble code stored by your vehicle’s computer will identify which specific sensor circuit is reporting the fault, which tells you exactly which latch or sensor to focus on. Without that code, you are guessing, which wastes both time and money.
How much does it typically cost to fix this?
That depends on the root cause. Here is a rough estimate:
- Latch cleaning and lubrication: Free to $20 in supplies
- Latch assembly replacement: $30 to $150 for parts, plus $50 to $150 in labor at a shop
- Hatch seal replacement: $30 to $120 for parts, plus $50 to $100 in labor
- Wiring repair: $100 to $400 depending on location and complexity of the damage
- BCM repair or replacement: $300 to $800 or more, depending on whether it needs programming
Keeping the “Rear Access Open” Warning From Coming Back
Once you have resolved the issue, a few simple habits will help you keep it from recurring.
Lubricate the Latch Mechanism Annually
Add the rear hatch latch to your annual maintenance checklist. A quick spray of white lithium grease into the latch mechanism once a year keeps the moving parts operating smoothly and prevents the stiffening and sticking that leads to incomplete closure. This takes about two minutes and can prevent a repair that takes two hours.
Inspect the Seal During Car Washes
Every time you wash the vehicle, take a quick look at the rubber seal around the rear hatch opening. Catching a small crack or compressed section early means a cheap seal replacement now rather than a more expensive fix later when water has been getting into the cargo area for months.
Close the Hatch Properly Every Time
This sounds obvious, but repeated incomplete closures accelerate wear on the latch mechanism. Make a habit of closing the hatch with a deliberate push until you hear that solid click. Do not rely on it just falling shut under its own weight. On many vehicles, particularly powered hatch systems, letting the motorized system do the closing fully is the correct approach rather than manually pushing it down partway.
Keep the Cargo Area Clear of the Hatch Line
Bags, boxes, or items sitting right at the edge of the cargo floor where the hatch closes can prevent full closure without you realizing it. Before closing the hatch, make sure nothing is sitting close to the seal line at the bottom of the opening.
Final Thought
The “Rear Access Open” warning is your vehicle’s way of flagging something that needs checking, and in most cases, the fix is simpler than the warning makes it sound. Start with the basics: close the hatch properly, clean and lubricate the latch, check the seal. If those steps do not resolve it, scan for fault codes before spending money on parts. And if the diagnosis points toward the BCM or complex wiring, leave that work to someone with the right tools and experience. A message on your dashboard is just information. What you do with that information determines whether a small issue stays small or turns into something bigger.