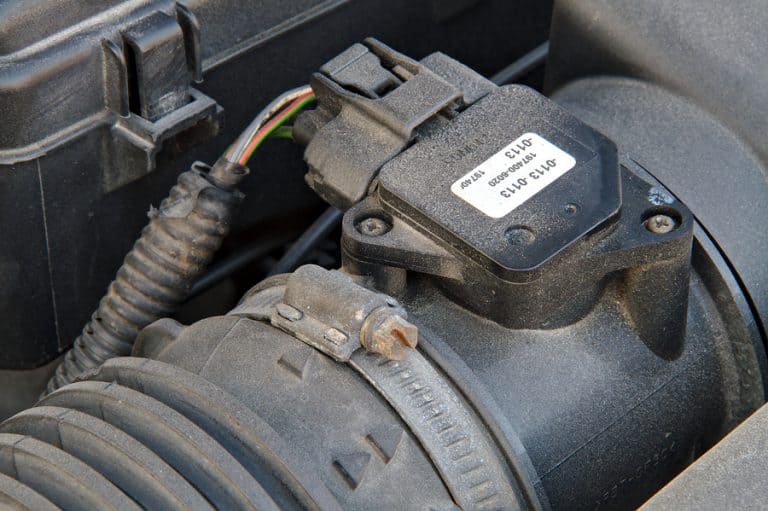
A check engine light caused by a faulty mass airflow sensor is one of the most common complaints mechanics hear from car owners. What makes it especially frustrating is that the light sometimes stays on even after you have already replaced the MAF sensor. And if your car has been dealing with a string of electrical issues lately, that little amber light can feel like it has taken up permanent residence on your dashboard.
Here is something a lot of people do not realize: a check engine light does not always mean the MAF sensor is the only problem. Your car could have other underlying issues running quietly in the background that you have not discovered yet. The check engine light is basically your car’s way of saying, “Hey, something is wrong — figure it out.”
Table of Contents
So whether you are dealing with a check engine light before or after a MAF sensor replacement, this guide breaks down exactly why it happens and what you need to do about it.
Why Is the Check Engine Light Still On After Replacing the MAF Sensor?
You replaced the MAF sensor. You were sure that was going to fix everything. And yet, there it is — that check engine light, still glowing on your dashboard like nothing happened. This is more common than you think, and there are specific reasons why it happens.
Most car manufacturers and experienced technicians will tell you that replacing a sensor alone is rarely the complete fix. There are steps that need to follow the replacement, and skipping them is exactly how you end up back where you started.
1. The Replacement Was Not Done Correctly
This one stings a little, but it has to be said. One of the most common reasons the check engine light comes back on after a MAF sensor swap is that the replacement itself was not done properly. This happens a lot with DIY repairs done at home without the right tools or experience.
If the sensor is not seated correctly, if the wiring harness connection is even slightly loose, or if the wrong sensor was installed for the specific vehicle, the ECU will still throw a fault code. The car does not know you tried your best — it only knows whether the sensor is reporting correct data or not.
If you replaced the sensor yourself and the light came back on, the first thing to do is double-check the installation. Make sure the sensor is fully seated, the connector is firmly plugged in, and the part number matches your vehicle’s specifications.
2. You Forgot to Reset the Car’s Computer (ECU)
This is the big one. Replacing the MAF sensor without resetting the vehicle’s computer afterward is probably the most common reason the check engine light stays on. And honestly, it catches a lot of people off guard because it seems like swapping the part should be enough.
Here is what is actually happening: when your MAF sensor triggers a fault, the ECU stores diagnostic trouble codes related to that fault. These codes do not automatically disappear when you replace the sensor. They stay logged in the computer until someone clears them. If you do not clear those codes after the replacement, the check engine light stays on because the stored fault codes are still sitting there in memory.
Think of it like a notification on your phone that you never swiped away — the issue might be resolved, but the alert is still there until you manually dismiss it.
Resetting the ECU after a MAF sensor replacement is a straightforward process if you have the right tools. You will need an OBD-II scanner that is compatible with your specific vehicle. Connect the scanner to your car’s OBD-II port (usually located under the dashboard near the driver’s side), read the stored codes, and then clear them. After clearing, take the car for a short drive to allow the system to run its readiness monitors and confirm everything is functioning correctly.
Do not have a scanner? Many auto parts stores — including AutoZone, O’Reilly, and Advance Auto Parts — will read and clear codes for free. It is worth the trip before assuming something else is wrong with the car.
3. There Are Other Problems Connected to the MAF Sensor System
Sometimes the MAF sensor itself is perfectly fine, but the system around it is not. Two of the most common culprits here are a dirty or clogged air intake passage and a faulty air filter.
The MAF sensor measures the volume and density of air entering the engine. If the air intake passages are restricted or dirty, the sensor picks up irregular airflow readings and sends inaccurate data to the ECU. The computer interprets that bad data as a sensor fault — and triggers the check engine light, even though the sensor itself is brand new.
A clogged or damaged air filter has the same effect. Restricted airflow into the engine disrupts what the MAF sensor is supposed to measure, causing the system to behave erratically. The fix in this case is not another sensor replacement — it is cleaning or replacing the air filter and ensuring the intake passages are clear and unobstructed.
When a qualified technician runs a proper diagnosis, they look at the entire air intake system, not just the sensor. That thorough approach is what separates a real fix from a temporary patch.
Do You Need to Disconnect the Battery When Replacing a MAF Sensor?
Short answer: yes, absolutely. Disconnecting the battery before replacing a MAF sensor is not optional — it is a basic safety step that protects both you and the vehicle’s electrical system.
Here is why this matters. The MAF sensor is part of your car’s electrical system, and live current runs through the wiring at all times when the battery is connected. Working on any electrical component without disconnecting the battery first risks creating a short circuit. A short circuit in the wiring harness near the MAF sensor can cause significantly more damage than the original problem you were trying to fix — and that kind of repair gets expensive fast.
Always start by disconnecting the negative (ground) cable from the battery. This cuts the flow of current through the vehicle’s electrical circuits and gives you a safe environment to work in.
The correct removal sequence when replacing a MAF sensor is:
- Disconnect the negative battery cable first
- Unplug the wiring harness connector from the MAF sensor
- Disconnect the IAT (Intake Air Temperature) sensor if it is part of the assembly
- Disconnect the air cleaner tubes from the engine
- Remove the MAF sensor from its mounting location
Skipping step one and trying to swap the sensor with the battery connected can trigger engine error codes like P0101 and P0102, which relate to MAF sensor circuit range and performance issues. In other words, you could create new fault codes in the process of trying to fix the original one. Not a situation you want to be in.
What Happens If You Leave the MAF Sensor Unplugged While Driving?
This is a question that comes up often, and it deserves a direct answer. Yes, most vehicles will still run with the MAF sensor unplugged. The ECU has a failsafe mode — sometimes called “limp mode” — that uses preset default values to keep the engine running when sensor data is missing.
But running without the MAF sensor plugged in is not something you should do intentionally or for any length of time. Here is why:
- The check engine light will come on immediately
- Fuel economy will drop because the ECU is running on default fueling maps rather than real-time air measurement data
- Engine performance will be noticeably reduced
- You risk running the engine too rich or too lean, which stresses other components over time
One more thing worth emphasizing: never plug in or unplug the MAF sensor while the engine is running. Always do it with the ignition off and the battery disconnected. Plugging in a sensor with the engine running can send voltage spikes through the sensor circuit and damage the sensor — or worse, damage the ECU itself. ECU replacement is not cheap.
How Long Does a MAF Sensor Take to Recalibrate After Replacement?
Once you have installed the new MAF sensor correctly, reconnected everything, and cleared the fault codes from the ECU, the sensor typically takes only a few seconds to begin operating. In most cases, it starts reporting data to the computer almost immediately after the engine starts.
That said, the full calibration and synchronization process between the sensor and the ECU can take a short drive to complete. The ECU runs through a series of readiness monitors — essentially self-tests — that confirm all systems are functioning within normal parameters. Until those monitors complete their cycle, you might notice the check engine light flickering or the vehicle’s performance feeling slightly off.
The fix? Drive the car normally for 10 to 20 minutes. A mix of city driving and highway speeds gives the ECU the best opportunity to run all its monitors. In most cases, the system will settle, the sensor will sync, and everything will return to normal operation.
If the check engine light is still on after that drive and the car is not performing normally, it is time to look deeper. Check the engine air intake pipes and cold air intake system for any damage, disconnected hoses, or air leaks. Even a small air leak between the MAF sensor and the throttle body can throw off the sensor readings and keep that check engine light alive.
Common MAF Sensor Fault Codes and What They Mean
When the check engine light comes on related to the MAF sensor, your OBD-II scanner will pull specific diagnostic trouble codes. Knowing what these codes mean helps you understand what part of the system the problem is coming from.
| Fault Code | Description | Common Cause |
|---|---|---|
| P0100 | MAF sensor circuit malfunction | Wiring issue or faulty sensor |
| P0101 | MAF sensor circuit range/performance | Dirty sensor, air filter, or intake leak |
| P0102 | MAF sensor circuit low input | Wiring short, clogged filter, or bad sensor |
| P0103 | MAF sensor circuit high input | Open circuit, wiring fault, or failed sensor |
| P0104 | MAF sensor circuit intermittent | Loose connector or damaged wiring harness |
P0101 and P0102 are the codes most often triggered when the battery is left connected during a sensor swap. P0101 in particular shows up frequently when the air intake system has restrictions — a clogged air filter being the most common cause. If you see this code after a MAF sensor replacement, check the air filter and intake tubes before assuming the new sensor is defective.
Can a Dirty MAF Sensor Trigger a Check Engine Light Without Failing Completely?
Yes, and this is something a lot of car owners do not know. A MAF sensor does not have to fail entirely to cause problems. A sensor that is simply dirty — coated with dust, oil residue from an aftermarket air filter, or debris from a deteriorating air filter element — can send inaccurate readings to the ECU without triggering a complete failure code.
In some cases, cleaning the MAF sensor is all that is needed to resolve the check engine light and restore normal engine performance. Before spending money on a brand new sensor, it is worth trying a cleaning first.
Here is how to clean a MAF sensor properly:
- Disconnect the battery negative cable
- Remove the MAF sensor from the air intake housing
- Use dedicated MAF sensor cleaner spray only — do not use brake cleaner, carburetor cleaner, or any other solvent, as these will destroy the delicate sensor wires
- Hold the can about 6 inches away and spray the sensor wires gently — do not touch the wires with the straw or your fingers
- Allow the sensor to dry completely for at least 10 minutes before reinstalling
- Reinstall the sensor, reconnect all connections, then reconnect the battery
- Clear any stored fault codes and take the car for a drive
MAF sensor cleaner is inexpensive and available at any auto parts store. If the sensor is just dirty rather than damaged, this process often resolves the issue completely and saves you the cost of an unnecessary replacement.
How to Properly Diagnose a MAF Sensor Problem Before Replacing Anything
Replacing a part without proper diagnosis first is how people end up spending money on parts they did not need. Before you pull the MAF sensor out and order a new one, run through a proper diagnostic process. Here is the approach a good mechanic would take:
- Connect an OBD-II scanner and read the fault codes. Write down every code present. Do not just note the MAF-related code — check for others that might indicate a broader electrical or sensor issue.
- Inspect the air filter. Pull it out and look at it. A filter so dirty that it restricts airflow can mimic a failing MAF sensor to the ECU. If it is clogged, replace it before doing anything else.
- Check the air intake tubes and hoses for cracks or leaks. A cracked intake tube between the MAF sensor and the throttle body creates an unmeasured air leak — unmetered air that the MAF sensor cannot account for. This directly affects the air-to-fuel ratio and triggers fault codes.
- Inspect the MAF sensor wiring harness. Look for damaged insulation, frayed wires, corrosion at the connector, or any sign of rodent damage. Electrical faults in the wiring harness can produce the exact same fault codes as a failing sensor.
- Clean the sensor before replacing it. As described above, a cleaning might be all that is needed.
- If all else looks good, test the sensor with a multimeter or live data from a scanner. A functioning MAF sensor on a typical small to mid-size engine at idle should read between 2 and 7 grams per second of airflow. At highway speed, that number climbs significantly. Readings outside the expected range confirm sensor failure.
Only after going through this process should you be ordering a replacement sensor. This approach saves time, money, and the frustration of replacing a part that turns out not to be the actual problem.
Should You Go to a Mechanic or Fix a MAF Sensor Issue Yourself?
This comes down to your confidence level, the tools you have available, and the nature of the problem itself.
Cleaning a MAF sensor or even replacing one is well within the ability of a reasonably mechanically inclined person working at home. The tools required are minimal — a screwdriver, a socket set, an OBD-II scanner, and a can of MAF sensor cleaner. If you are comfortable working around your car’s engine bay and you follow the correct steps, this is a manageable DIY job.
But here is where it gets complicated. If the check engine light is caused by an electrical fault — damaged wiring, a failed ECU, a corroded harness connector — that is a different level of repair entirely. Electrical diagnostics require specialized equipment and experience. Chasing an electrical fault without the right tools often leads to misdiagnosis, wasted money on unnecessary parts, and sometimes making the problem worse.
The same goes for EVAP system issues or fuel trim problems that are sometimes mistaken for MAF sensor failures. These require live data analysis from a professional-grade scanner to diagnose accurately.
The honest recommendation: do the basics yourself — read codes, inspect the air filter, check the intake for leaks, clean the sensor. If the problem persists after those steps, take it to a qualified mechanic with the proper diagnostic equipment. Spending $100 on a professional diagnosis is far better than spending $300 on parts that turn out not to be the issue.
What Happens If You Ignore a MAF Sensor Check Engine Light?
Some drivers see the check engine light and decide to live with it, especially if the car seems to be running fine. That is a risky approach, and here is why.
A MAF sensor problem affects the air-to-fuel mixture in your engine. When the ratio is off — either too rich (too much fuel) or too lean (not enough fuel) — it creates a chain reaction of issues over time:
- Fuel economy drops. An engine running a bad air-to-fuel ratio burns more fuel than necessary to maintain power output.
- Catalytic converter damage. Running rich — too much unburned fuel — sends excess hydrocarbons through the exhaust, which can overheat and destroy the catalytic converter. A replacement catalytic converter can cost anywhere from $500 to well over $2,000 depending on the vehicle.
- Oxygen sensor damage. The oxygen sensors work in close relationship with the MAF sensor. An extended MAF fault can cause the oxygen sensors to compensate excessively, shortening their lifespan.
- Engine performance issues. Rough idling, hesitation, stalling, and poor acceleration are all symptoms that can develop when an MAF fault goes unaddressed for too long.
- You cannot see other warning lights clearly. With the check engine light already on from the MAF issue, a new problem that triggers the same light will go unnoticed. You could develop a serious new fault and have no additional warning because the light was already on.
Ignoring a check engine light is never a smart financial move. Address it early, and you are dealing with a sensor or a wiring connection. Ignore it long enough, and you could be looking at a catalytic converter, oxygen sensors, or fuel system damage on top of the original problem.
Quick Reference: MAF Sensor Check Engine Light Troubleshooting Steps
If you want a fast reference for working through this problem, here is the straightforward approach:
- Connect an OBD-II scanner and read all stored fault codes
- Inspect the air filter — replace it if it is dirty
- Check the intake tubes and hoses for cracks, holes, or loose connections
- Inspect the MAF sensor wiring harness for damage or corrosion
- Clean the MAF sensor with dedicated MAF sensor cleaner
- Clear the fault codes with the scanner
- Drive the vehicle for 10 to 20 minutes and check if the light returns
- If the light returns, run a live data test on the sensor readings
- If readings are out of range, replace the MAF sensor
- After replacement: reset the ECU, clear codes, and drive to allow readiness monitors to complete
- If the light still returns after replacement, take the vehicle to a qualified mechanic for full electrical diagnosis
A check engine light related to the MAF sensor is a problem you can work through systematically. Take it one step at a time, do not skip the diagnosis, and do not replace parts blindly. The sensor is almost never the only thing worth looking at — the whole air intake system and the ECU’s stored data tell the complete story. Get the full picture before you spend a dollar on parts.