
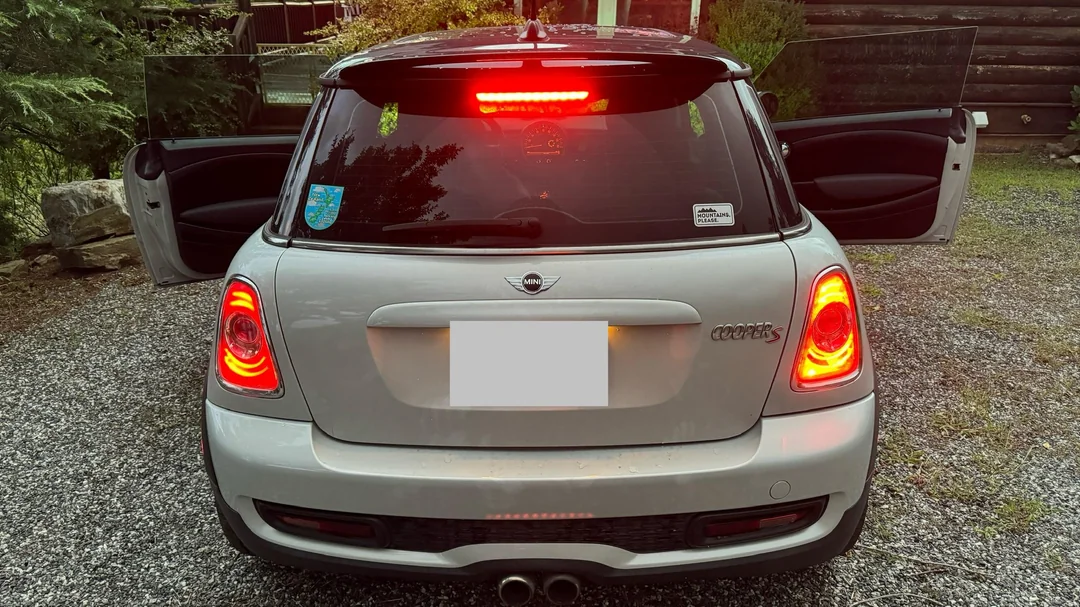
You walk up to your Mini Cooper in a parking lot, and a stranger waves you down to let you know your brake lights are on, even though the car has been sitting there for twenty minutes with the engine off. Or maybe you are driving and a friend following behind you calls to say your brake lights never seem to go off, making it impossible to know when you are actually slowing down. Either scenario is a safety problem that demands immediate attention. Brake lights that stay on all the time make it harder for drivers behind you to read your intentions, and they can drain your battery if the car is parked for long enough with the lights burning away.
The good news is that a brake light stuck in the on position almost always points to one of a small number of known causes. This is not a mysterious, intermittent electrical ghost that requires a two-week stay at the dealership. Most of these causes can be diagnosed by a careful owner in an afternoon, and many can be fixed with basic hand tools and inexpensive parts. Let us go through the full picture so you understand what is happening, why it happens, and exactly how to get your Mini Cooper back to normal.
Table of Contents
Understanding the Difference Between the Brake Warning Light and the Brake Lights
Before anything else, it is worth clarifying what we are talking about, because Mini Cooper owners sometimes confuse two entirely different things. The brake lights are the red lights at the rear of the car that illuminate when you press the brake pedal. They signal to drivers behind you that you are slowing down. The brake warning light is the amber or red indicator on the dashboard, usually displaying an exclamation mark inside a circle or the letter P. These two systems are independent of each other, and the cause of one staying on is usually different from the other staying on.
If you can see in a window reflection or a parking lot camera that your actual rear red lights are staying on, you are dealing with a brake light switch or wiring problem. If instead you see a persistent warning symbol on your dashboard, you may be looking at a brake fluid level issue, a parking brake sensor fault, or an ABS problem. Both situations need attention, but they have different diagnostic paths. This guide covers both, because in practice many Mini Cooper owners see the dashboard warning and assume the rear lights must also be on, or vice versa. Knowing which system is actually misbehaving saves diagnostic time.
The Brake Light Switch Is the Number One Suspect
The brake light switch is a small electrical component mounted on the brake pedal bracket, positioned so that the switch plunger rests against the pedal arm when the pedal is in its released position. In this resting state, the switch breaks the brake light circuit and the rear lights stay off. When you press the pedal, the plunger lifts off the pedal arm, the circuit closes, and the rear brake lights illuminate.
This design means that if the switch fails in the closed position, or if the switch or its mounting has shifted so the plunger never makes contact with the pedal arm even at rest, the brake lights stay on permanently. On a Mini Cooper, this switch is also connected to the cruise control cancel function, the push-button start system, and in some models the stability control. A failing switch can cause more problems than just lights that will not go off. Erratic cruise control behavior, a push-button start that does not respond, or an ABS warning appearing alongside the brake light all trace back to this one small component when it fails.
Finding the brake light switch on a Mini Cooper is straightforward. Sit in the driver’s seat, look under the dashboard near the top of the brake pedal arm, and you will see it. It is a cylindrical or rectangular plastic switch body with a wire connector plugged into one end and a spring-loaded plunger that contacts the pedal bracket on the other. To quickly test whether the switch is your problem, press the brake pedal down slightly and release it slowly while watching the brake lights in a mirror or having a helper observe the rear of the car. If the lights go off at some pedal position and then come back on as the pedal returns to rest, the switch or its adjustment is the definite cause.
Some Mini Cooper brake light switches are adjustable. A threaded collar allows you to screw the switch body closer to or farther from the pedal bracket, setting the correct engagement point. With the correct adjustment, the plunger contacts the pedal arm at the exact moment the pedal reaches its fully released position. If the switch has come loose from its mounting or was never correctly adjusted after a pedal bracket repair, this adjustment is all that is needed. Tighten the switch body until the plunger is firmly depressed by the pedal arm when the pedal is at rest, check that the brake lights go off immediately when the pedal is released, and the problem may be solved in five minutes with no new parts required.
If adjustment does not resolve it, the switch has failed internally and needs replacement. Mini Cooper brake light switches are not expensive. Genuine or OEM-equivalent replacements are widely available. Always disconnect the negative battery terminal before working near the pedal cluster and its wiring to prevent any accidental short circuit during the swap. The connector pulls off the old switch, the new switch threads into the mounting bracket, and you reconnect the battery and test. This is genuinely a beginner-level repair if you are comfortable crawling under the dashboard with a flashlight.
Low Brake Fluid Triggers the Dashboard Warning, Not the Rear Lights
Low brake fluid will not cause your rear brake lights to stay on. What it will do is illuminate the brake warning indicator on your dashboard. That distinction matters because many drivers conflate the two when they see a warning related to brakes and assume both systems are affected.
The brake fluid reservoir sits under the hood, usually on the driver’s side near the firewall. It is a translucent plastic container with minimum and maximum markings on the side. With the engine cold and the car on level ground, you can check the fluid level simply by looking at the outside of the reservoir. No need to open it just to look. If the level is at or below the minimum line, the float-type sensor inside the reservoir closes a circuit that illuminates the brake warning symbol on the dashboard.
Brake fluid level dropping over time means one of two things. Either the brake pads have worn down enough that the caliper pistons have extended farther out, consuming more fluid from the reservoir to fill the expanded caliper volume. This is normal and actually expected as pads wear. Or there is a leak somewhere in the hydraulic system: a brake line, a hose, a caliper bleeder screw, or a wheel cylinder. A brake system that is losing fluid to a leak is a genuine safety emergency and must be diagnosed immediately. Do not just top off the fluid and drive on without finding out why the level dropped. If the pads are the reason, you will know because the pads will also be thin and due for replacement. If there is a leak, you may see a wet, discolored spot under the car or feel the brake pedal sinking toward the floor under steady pressure.
Topping up the fluid with the correct type for your Mini Cooper, usually DOT 4 as specified in the owner’s manual, will extinguish the warning light if the level was simply low from normal pad wear. If the light returns within days or weeks without significant driving, a leak is almost certainly present and a brake system inspection by a mechanic is not optional.
Parking Brake Problems That Confuse the System
Most Mini Coopers use a traditional cable-operated parking brake connected to a simple switch at the handle or lever. When the parking brake is fully released, the switch opens and the dashboard parking brake indicator goes off. When the parking brake is engaged, the switch closes and the red P symbol appears on the dashboard.
If the parking brake indicator stays illuminated even after the parking brake lever has been fully released, the switch at the lever or handle has failed in the closed position, or the parking brake cable has not fully released and the lever has not actually returned to its resting position. A stretched or seized parking brake cable can hold slight tension on the mechanism even when the lever feels loose, keeping the switch closed and the light on.
Try engaging the parking brake firmly and then releasing it with deliberate force, pulling the lever slightly upward before pressing the release button and guiding it all the way down. If the light goes off after this, the lever was not fully returning due to a slightly stiff cable. If the light stays on regardless, the switch itself is faulty. The parking brake switch is a simple two-wire component. With a multimeter set to continuity mode, you can test whether it opens when the lever is released. If it reads continuity (closed circuit) with the lever fully down, the switch has failed. Replacement is cheap and the job is simple.
On newer Mini Cooper models with an electronic parking brake, the system is controlled by an actuator motor and a dedicated control module. A stuck-on parking brake warning in these vehicles often requires a scan tool to read the fault codes from the parking brake module before a clear diagnosis can be made. The actuator can fail to fully retract, a position sensor can give a false reading, or the module can lose calibration after a battery replacement. These are not difficult faults to fix, but they do require electronic diagnosis before throwing parts at the problem.
Wiring Faults and Short Circuits That Hold the Circuit Closed
A short circuit in the brake light wiring can cause the rear lights to stay on even when the brake light switch is functioning correctly. In a normal brake light circuit, the switch completes the path between the fuse and the brake light bulbs when the pedal is pressed. A short circuit creates a direct path that bypasses the switch, keeping the lights illuminated regardless of pedal position.
Short circuits in this circuit most commonly occur where the wiring passes through grommets in the bodywork. Over years of vibration, the grommet can wear, allowing the wire insulation to rub against metal until it wears through. The bare wire then contacts the body and creates a short. Other common locations include the wiring near the brake light assemblies in the rear of the car, where water intrusion from a failing gasket or seal can corrode and bridge contacts, and any area where a previous owner or installer has worked and left wiring pinched or rubbing.
Tracing a wiring fault requires patience and ideally a wiring diagram for your specific Mini Cooper generation. A multimeter in continuity mode can help identify where a wire has shorted to ground by testing resistance between the wire and the body. A short will show low resistance or a continuity beep. The repair typically involves locating the damaged section of insulation, cleaning up any corrosion, and re-insulating the wire with heat-shrink tubing and proper electrical tape before securing it away from any metal edges.
How ABS and Hydraulic System Faults Generate Brake Warnings
The ABS (anti-lock braking system) in a Mini Cooper has its own control module that monitors wheel speed sensors and manages brake pressure distribution during emergency stops. When this module detects a fault, whether in a wheel speed sensor, the hydraulic pump, the accumulator, or the module itself, it illuminates the ABS warning light on the dashboard. In many cases, it also illuminates the general brake warning light as a precautionary measure, because ABS faults can affect overall braking behavior.
An ABS warning alongside a brake warning should not be ignored or assumed to be a minor issue. The ABS module faults often appear alongside P-type fault codes that can be read with a scan tool. Common causes include a wheel speed sensor that has been damaged by road debris, a corroded sensor connector, or a failed ABS pump motor. Without ABS function confirmed as working, the vehicle’s emergency stopping distance in wet or slippery conditions is significantly increased, and traction control and stability control, which also use the ABS hardware, will not function correctly either.
If your dashboard shows both an ABS light and a brake warning simultaneously, connect a diagnostic scan tool to the OBD-II port and read the stored fault codes from the ABS module. The codes will identify exactly which component has failed or which sensor circuit has lost continuity. Many independent shops and parts stores with professional scanners can retrieve these codes for free or a modest fee. Address the identified component rather than guessing. ABS wheel speed sensors are relatively affordable replacements, while an ABS pump or module failure is a more significant repair that warrants a professional shop assessment.
Brake Pad Wear Indicators and Why They Trigger the Warning Light
Many Mini Coopers are equipped with electronic brake pad wear sensors. These are thin wires embedded in a bracket that presses against the brake pad. When the pad wears down to the minimum thickness, the sensor wire makes contact with the rotor, completing a circuit that triggers a brake warning on the dashboard. The light that appears is often accompanied by a message in the instrument cluster saying “Brake Pads Worn” or similar wording.
Unlike the brake light switch issue, this warning is telling you something accurately. The pads are genuinely worn and need replacement. Driving on pads that have triggered the sensor means the metal backing plate of the pad is close to contacting the rotor directly. Once that happens, the rotor gets scored and what was a pad replacement job becomes a pad and rotor replacement job, costing considerably more. The warning light in this case is doing exactly what it was designed to do. Respond to it promptly.
Even after new pads are installed, the brake warning light may stay on if the wear sensor was damaged during the replacement. The sensor is a single-use item. Once it has contacted the rotor, its wire is broken and it must be replaced along with the pads. If a previous technician replaced the pads but not the sensor, or if the new sensor was not properly installed in its mounting slot, the light will persist. Installing a new sensor in the correct position on the new pad is a five-minute addition to any brake pad replacement job and should always be included.
The Battery Drain That Comes From Ignoring This Problem
Here is a practical consequence of a brake light that will not go off that many drivers do not immediately consider. The rear brake lights draw a meaningful amount of current. Three bulbs running constantly while the car is parked can drain a 12-volt battery in a matter of hours. If you park your Mini Cooper for the night with the brake lights staying on due to a faulty switch, you may come back in the morning to a vehicle that will not start. The battery has been slowly discharged by the lights running all night.
If this has already happened, you will need to jump-start or charge the battery before you can drive to make the repair. But after the repair is complete and the brake lights no longer stay on, monitor the battery closely for a few days. A battery that has been deeply discharged, especially one that is already several years old, may have suffered a permanent reduction in capacity from the event. If the battery struggles to start the car in cold weather or if electronics behave unusually after the fix, have the battery health tested. A replacement may be needed alongside the switch repair if the discharge was severe enough.
Checking and Replacing the Brake Light Bulb When It Is the Problem
In the specific situation where a brake light bulb has short-circuited internally, it is possible for the failed filament to create a continuous path that keeps the light faintly lit even without a brake signal. This is more common with incandescent bulbs than with LED units. The symptom is a very dim brake light that never goes fully off rather than a bright brake light appearing permanently. If your brake lights look dimly glowing rather than fully illuminated, a failed bulb with an internal short is worth checking before you start pulling the switch.
Replacing a brake light bulb on a Mini Cooper requires accessing the rear light assembly. On most generations, there is access through the trunk interior, behind a plastic liner that clips or screws into place. Once the liner is moved aside, the bulb sockets are accessible from behind the light cluster. Twist the socket counterclockwise to remove it, pull the bulb straight out of the socket, and insert the replacement. Wear clean gloves or use a cloth to avoid touching the glass envelope of a halogen bulb with bare fingers. Skin oils on a halogen bulb create hot spots that cause premature failure.
Before completing the reassembly, have a helper press the brake pedal while you confirm the new bulb illuminates correctly and extinguishes when the pedal is released. This quick test confirms both the bulb replacement and the switch operation in one step.
A Practical Diagnostic Sequence to Follow
Rather than guessing, work through the diagnosis in order from simplest to most complex. Each step takes only a few minutes, and working methodically means you spend money only on the part that actually needs replacing.
- Confirm which lights are actually staying on. Are the rear brake lights physically illuminated, or is the issue a dashboard warning indicator? This single distinction changes the entire diagnostic direction.
- Check the parking brake first. Make sure the parking brake is fully released. If the dashboard warning disappears, the parking brake was not fully released or its switch was sticky.
- Check the brake fluid level. Look through the reservoir without opening it. If the level is low, top it up with the correct fluid and note whether the warning clears. Then investigate why the level was low.
- Inspect the brake light switch. Look under the dashboard at the pedal bracket. Check whether the switch plunger is making firm contact with the pedal arm when the pedal is fully released. Try adjusting the switch position before replacing it.
- Pull diagnostic codes with a scan tool. Connect an OBD-II scanner and check for ABS module codes, brake system codes, and any pending faults. The codes narrow the focus considerably.
- Inspect the brake pad wear sensors. If the dashboard warning references brake pad condition, inspect the pads and sensors at each wheel. Replace pads and sensors as a set.
- Trace the wiring. If the switch tests correctly but the lights still stay on, the fault is in the wiring circuit. Inspect harness routing for damage, and use a multimeter to test for shorts to ground.
- Consult a professional if needed. ABS hydraulic faults, electronic parking brake module faults, and complex wiring shorts benefit from a proper workshop diagnosis with factory or professional diagnostic software.
When to Stop DIY and Call a Professional
Most brake light switch replacements, fluid top-ups, and parking brake adjustments are comfortably within the reach of a careful owner with basic tools and a willingness to look things up. But there are clear boundaries where professional help is the better choice. Any time the brake pedal feels soft, spongy, or sinks toward the floor under sustained pressure, the car should not be driven. This indicates a hydraulic fault that requires immediate professional inspection. Any time both the ABS and brake warning lights are illuminated simultaneously, the stability of the braking system under emergency conditions is compromised and the codes need to be read by someone with the right tools. Any time you discover a wet, discolored patch under the car near a wheel or under the engine bay that smells like brake fluid, a hydraulic leak exists that is not a DIY fix without proper tools and safety awareness.
If your Mini Cooper is still within its warranty period or if you purchased an extended service plan, a persistent brake warning is exactly the kind of electrical fault that the warranty should cover. Bring it to an authorized Mini service center with the symptom documented before attempting any repairs yourself, as some warranty agreements specify that unauthorized repairs can affect coverage.
A brake light that stays on is never something to drive around and hope resolves itself. It is either telling the drivers behind you something false, wearing down your battery, or warning you about a genuine system fault. The underlying cause is almost always identifiable with a methodical approach, and most repairs are faster and cheaper than drivers fear when they first see that warning. Find the cause, fix the right component, and your Mini Cooper will be signaling correctly and honestly to everyone sharing the road with you. That is not just about your car working properly. It is about everyone around you being able to trust what your brake lights are telling them.