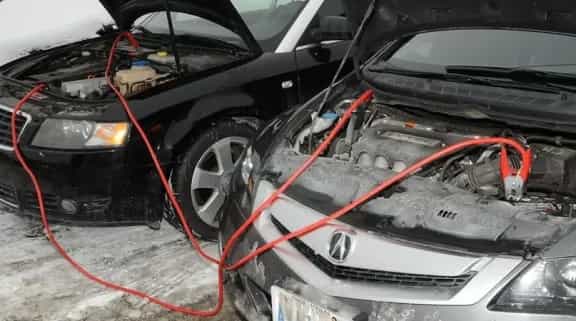
You are standing in a parking lot on a cold morning, the hood of your car propped open, a set of jumper cables stretched between your dead battery and a stranger’s running engine. Everything seems fine for a few seconds. Then you smell something sharp and acrid. You look down and see the insulation on your jumper cables starting to bubble, smoke, and soften right before your eyes. The cables are melting. Your heart jumps into your throat because melting wires mean something has gone seriously wrong. You yank the clamps off as fast as you can, but the damage is already done. The cables are ruined, and you are left wondering what just happened and whether your car is okay.
Jumper cables melting is not just an inconvenience. It is a warning sign that the jump-start attempt created a dangerous electrical situation. Understanding why cables melt helps you avoid that situation the next time you need a jump, and it could save you from expensive damage to both vehicles involved. The good news is that every cause of melting jumper cables is preventable once you know what to look for.
Table of Contents
Why Do Jumper Cables Melt in the First Place?
The basic answer is excessive heat. Jumper cables are just wires. When too much electrical current flows through them, or when the current meets too much resistance along the way, the wire heats up. Every wire has a certain amount of natural resistance. Under normal jump-start conditions, that resistance is low enough that the wire stays cool, or at most gets slightly warm to the touch. But when something creates a much higher current than expected, or when the connections are poor enough to add significant resistance, the cable can heat up to the point where the insulation melts and the copper strands themselves can fuse or break apart.
The most common mistakes that cause jumper cables to melt include connecting the clamps to the wrong battery terminals, using cables that are too thin for the job, having loose or corroded clamp connections, and using cables made from cheap, high-resistance materials. Each of these creates a slightly different path to the same result: too much heat in too small a wire.
The Number One Culprit: Reversing the Cable Connections
If you take away nothing else from this article, remember this: connecting jumper cables backwards is the single most common and most dangerous reason they melt. When you attach the red clamp to the positive terminal on one battery and the black clamp to the negative terminal on the other battery, you complete a circuit that allows the donor vehicle to charge the dead battery and crank the engine. That is how a jump-start is supposed to work. But if you accidentally reverse the polarity by connecting a positive clamp to a negative terminal or vice versa, the electrical current will flow in the wrong direction.
Instead of flowing from the donor battery through the cables to the starter motor, the current meets a dead short. The two batteries are now fighting each other. The donor battery pushes current through the cables into the dead battery’s positive terminal, which is connected to ground through the reversed clamps. The resistance is extremely low, so the current spikes to dangerous levels. The cables heat up almost instantly. The insulation starts to smoke and melt. If the cables are thin or the batteries are large, the copper strands can glow red hot and fuse together.
The damage is not limited to the cables. Reversing polarity can destroy the donor vehicle’s alternator diodes, fry the dead vehicle’s main fuses, damage the engine control module, and even cause a battery to explode if hydrogen gas around the terminals ignites. A battery explosion sprays sulfuric acid everywhere, which is as dangerous as it sounds. When you see melting cables from a reversed connection, you are lucky if that is the only damage. The electrical systems in modern cars are sensitive, and a reversed jump-start can turn a dead battery into a dead car.
The fix is simple in theory: always double-check the terminal markings before you attach a clamp. The positive terminal is marked with a plus sign and usually has a red cover or red marking. The negative terminal has a minus sign and typically a black cover. On a dead battery, corrosion or poor lighting can make these markings hard to read. If you cannot clearly see which terminal is which, wipe the battery top with a rag and use your phone’s flashlight. A few seconds of extra care can save you hundreds or thousands of dollars in electrical damage.
The Gauge Problem: Why Thin, Cheap Cables Fail Under Load
Not all jumper cables are created equal, and the difference between a quality set and a cheap set is measured in gauge. The gauge number of a wire tells you how thick the copper conductor is. The lower the gauge number, the thicker the wire. A 0-gauge cable is massive, the kind you find on heavy-duty commercial trucks. A 10-gauge cable is thin, more appropriate for a small speaker than for transferring the hundreds of amps a starter motor can draw. Jumper cables sold at convenience stores or in roadside emergency kits often use 10-gauge or even 12-gauge wire to save on manufacturing costs. The price attracts buyers, but the performance falls apart under real-world conditions.
When a six-cylinder or eight-cylinder engine cranks, it can pull 200 to 400 amps from the battery. That current flows through the jumper cables. A thin cable has higher electrical resistance, just like a narrow water pipe restricts flow. When you try to push 300 amps through a thin cable, the wire acts like a heating element. The copper strands heat up rapidly. The insulation, which is usually rated only to a certain temperature, softens and then melts. In the worst case, the copper itself can melt through, breaking the circuit entirely and potentially causing sparks that ignite flammable materials around the engine bay.
Professional mechanics and tow truck operators use jumper cables rated at 2-gauge, 1-gauge, or even 0-gauge. These cables are heavy, thick, and stiff. They can pass massive current without warming up. For a regular driver, 4-gauge cables are a good compromise between performance and manageability. They are thick enough to jump-start most passenger vehicles without overheating, yet flexible enough to coil up and store in a trunk. A set of 6-gauge cables is the minimum I would recommend if you live in a cold climate where engines are harder to crank. Below 6-gauge, you are gambling, especially if you drive a truck, an SUV, or anything with a diesel engine. Those engines have high-compression ratios and draw enormous starting current. A thin cable will melt before the engine even turns over.
Quality jumper cables cost more, but they cost far less than replacing a melted set and repairing the damage a failed jump-start can cause. Expect to spend between $50 and $200 on a good set of copper jumper cables with 4-gauge or 6-gauge wire and sturdy clamps. The extra money buys you thicker copper, better insulation, and clamps with strong springs and sharp teeth that bite into the battery terminals. Cheap cables often use aluminum wire coated in copper, which is a cost-cutting trick that significantly increases resistance. Aluminum has about 60% higher resistance than copper for the same cross-sectional area. Those aluminum-core cables cannot handle high current, and they melt faster. Always look for cables labeled as 100% copper or, at a minimum, copper-clad aluminum with a heavy copper content and a thick gauge to compensate.
Loose and Dirty Connections That Turn a Simple Jump Into a Melting Mess
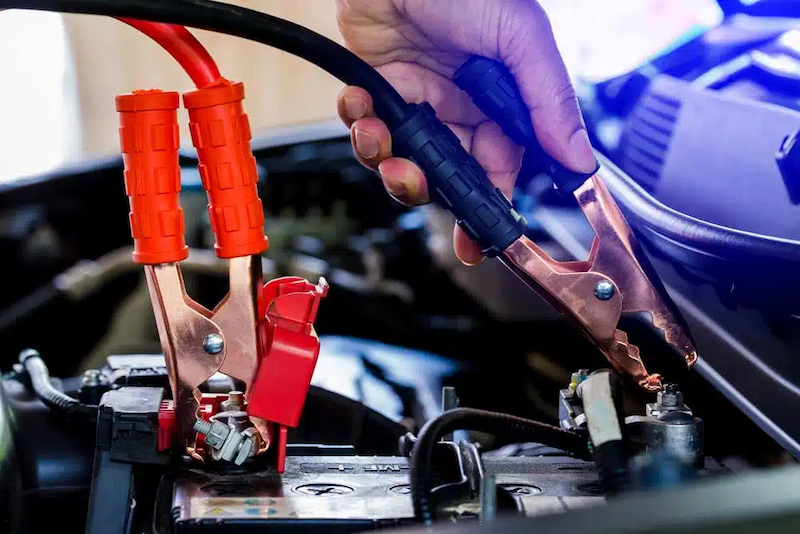
Even if you have the correct cable gauge and the polarity is right, poor connections at the battery terminals can still cause melting. The clamps at the end of jumper cables must make firm, metal-to-metal contact with the battery terminals. If the clamps are loosely attached, if the terminal posts are covered in corrosion, or if the clamp teeth are dull and cannot grip properly, the contact area is reduced. A small contact area increases resistance at that point, and resistance turns electrical energy into heat.
You can feel this happening. After connecting the cables and starting the donor engine, let it run for a minute or two. Then walk over and carefully touch the clamps. If one of them feels hot while the rest of the cable is cool, you have a high-resistance connection at that clamp. The heat is being generated right at the junction between the clamp and the terminal. If you notice this, shut the engines off, disconnect the clamps, clean the terminals and the clamp jaws with a wire brush or even a rag, and reconnect them tightly. Rock the clamp slightly after attaching it to make sure the teeth bite through any remaining oxide layer on the terminal post.
Battery terminals develop a layer of lead sulfate and other corrosion products over time. That layer is an electrical insulator. If you clamp onto a corroded terminal without cleaning it first, the current has to fight through that insulating layer. The result is heat, and if the corrosion is bad enough, the clamp itself can get hot enough to melt the cable insulation at the point where the wire enters the clamp. Cleaning the terminals with a wire brush before attaching jumper cables takes thirty seconds and prevents a world of trouble.
The type of clamp matters too. Cheap jumper cables often have stamped metal clamps with weak springs and smooth jaw surfaces. These clamps make a poor electrical connection even when they feel tight. Better cables have cast or forged clamps with strong springs and aggressive, sharp teeth that dig into the terminal. When you connect a quality clamp, you can feel it grab. There is no wiggle. That solid mechanical connection translates to a solid electrical connection, which keeps the current flowing smoothly without generating heat.
Damaged Cables That Have Already Started to Fail
Jumper cables live a hard life. They get thrown into trunks, stepped on, coiled up tightly, and exposed to temperature extremes. Over time, the insulation can crack, the copper strands inside can break, and the connection between the wire and the clamp can loosen. A cable that looks fine on the outside may have serious internal damage that you cannot see. Broken strands reduce the effective cross-sectional area of the conductor, increasing resistance. A cable with half its strands broken is effectively a much thinner cable, and it will heat up just like a cheap thin cable would.
Storing jumper cables in a hot trunk all summer can also degrade the insulation. PVC insulation becomes brittle when repeatedly heated and cooled. When the insulation cracks, moisture can enter and corrode the copper strands, further increasing resistance. A cable that has been sitting in a puddle of water or exposed to road salt can corrode internally, turning bright copper into green, crumbly oxide. That corroded cable will not carry current efficiently, and it will heat up when asked to pass the high starting current.
Before you use jumper cables, give them a quick visual inspection. Uncoil them and look for cuts, cracks, or melted spots in the insulation. Check where the cable enters the clamps. That junction is a common failure point because the wire flexes there every time you use the cables. If you see exposed copper, or if the insulation is discolored from previous overheating, do not use those cables. Replace them. A damaged cable can fail catastrophically during a jump-start, potentially starting a fire or leaving you stranded with a car that is now even more dead than before.
The Material Trap: Why Aluminum Cables Melt So Quickly
Open a pair of jumper cables at any discount store, and you might find that the wire inside is not copper at all. Instead, it is aluminum, sometimes with a thin copper plating to make it look like the real thing. Copper plating on aluminum wire is a cost-cutting measure that lets manufacturers sell a cheap product that looks acceptable on the shelf. The problem is that aluminum is a significantly worse conductor than copper. For a given thickness, aluminum has roughly 60 percent more resistance. To carry the same current as a copper cable without overheating, an aluminum cable needs to be much thicker.
The aluminum cables sold as jumper cables are rarely thick enough to compensate. They are priced to move, and the buyers who grab them off the hook typically do not know enough about electrical conductivity to recognize the danger. When those aluminum cables are asked to carry the cranking current of a typical engine, they heat up fast. The insulation melts. The aluminum itself can soften and fail, because aluminum melts at a lower temperature than copper. An aluminum cable that gets hot enough can actually melt through its own strands and break the circuit, potentially causing a dangerous arc.
Even cables that are labeled as copper-clad aluminum, or CCA, can be problematic. CCA cable is aluminum wire with a thin copper coating. The copper coating helps with surface conductivity and corrosion resistance, but the core is still aluminum. For low-current applications, CCA can work. For the high current of a jump-start, especially on a cold engine that draws maximum amps, CCA cables often heat up more than pure copper cables of the same gauge. A CCA cable would need to be about two gauge sizes thicker than a pure copper cable to perform equivalently. Few budget CCA cables are built that way.
The safe choice is to buy jumper cables that are labeled as 100% copper, with a generous gauge, from a reputable brand. They cost more, but they will last for years, and they will not melt when you need them most. The extra money is an insurance policy against a melted mess on a cold morning when you are already late for work.
How Much Should You Spend on Jumper Cables That Will Not Melt?
You can find jumper cables for ten dollars at a drugstore. You can also find them for over two hundred dollars at a professional tool supplier. The price difference reflects the quality of materials, the gauge of the wire, and the durability of the clamps. A set of high-quality, 4-gauge pure copper jumper cables with solid clamps will typically cost between $50 and $100. A heavy-duty 2-gauge set might run $100 to $200. For most passenger vehicles, a 4-gauge copper cable is enough to handle any normal jump-start without overheating. If you own a truck, a large SUV, or a diesel vehicle, step up to 2-gauge or even 1-gauge cables.
Spending money on good cables pays off every time you use them. They connect faster because the clamps are better. They transfer power more efficiently, so the dead engine cranks faster and starts sooner. They do not melt, smoke, or scare you while you are working. And they last for decades if stored properly. The cheap cables that melt are not saving you money. They are costing you the price of the cables that are now ruined, and possibly the cost of electrical repairs from a shorted battery or a fried module.
A Step-by-Step Guide to Jump-Starting Without Melting Anything
The best defense against melting jumper cables is a correct jump-start procedure. When you follow the steps in order, the risk of a reversed connection, a loose clamp, or an accidental short drops to nearly zero. Here is the procedure I use every time, and I have jumped hundreds of vehicles over the years without a single melted cable.
- Park the donor vehicle close to the dead vehicle so the cables can reach both batteries comfortably, but make sure the two vehicles are not touching. If they touch, a ground loop can form, which complicates the electrical path.
- Turn off both ignitions, remove the keys, and turn off all accessories. Headlights, radios, phone chargers, and climate control fans should all be off. This reduces the electrical load when the connection is made.
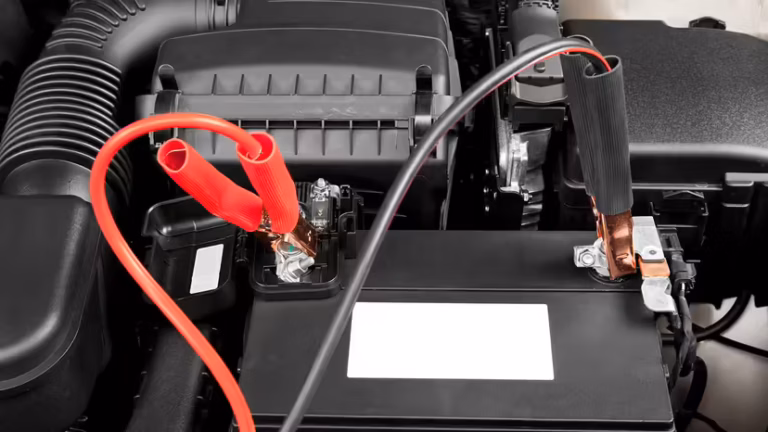
- Identify the positive and negative terminals on both batteries. Look for the plus and minus symbols molded into the battery case near each terminal. On many cars, the positive terminal has a red cover. The negative terminal is bare or has a black cover. Clean any heavy corrosion off the terminals with a wire brush, a rag, or even a pocket knife scraped gently across the surface. You need bright metal for a good connection.
- Connect the red clamp to the positive terminal of the dead battery. Make sure the clamp is firmly attached and is not touching any other metal parts.
- Connect the other red clamp to the positive terminal of the donor battery. Again, firm connection, no contact with other metal.
- Connect the black clamp to the negative terminal of the donor battery. This completes the circuit on the donor side.
- Connect the final black clamp to an unpainted metal surface on the engine block or chassis of the dead vehicle, away from the battery. This is the step most people get wrong. Connecting the last clamp to the dead battery’s negative terminal can create a spark near the battery. Batteries can emit hydrogen gas, and a spark can ignite it. A grounded metal bracket or a clean bolt head away from the battery is the safe choice. The engine will still crank because the chassis is grounded to the battery through the heavy negative cable.
- Start the donor vehicle and let it run for a few minutes. This allows the donor alternator to begin charging the dead battery through the cables. You can raise the donor engine speed slightly by pressing the accelerator, but high RPMs are not necessary. The alternator will put out more current at fast idle, which helps speed up the charging of the dead battery.
- Attempt to start the dead vehicle. If it cranks slowly or fails to start, let the donor charge for another five minutes and try again. Do not crank the starter for more than 10 to 15 seconds at a time, and let the starter motor cool between attempts. Prolonged cranking draws maximum current through the cables, which can overheat them if the engine is not catching.
- Once the dead engine is running, disconnect the cables in the reverse order of attachment. Remove the black clamp from the ground point on the dead vehicle first, then the black clamp from the donor battery, then the red clamp from the donor battery, and finally the red clamp from the formerly dead battery. Do not let the clamps touch each other or any metal while any of them are still connected.
- Let the revived vehicle run for at least 20 minutes, or drive it for a similar duration, to allow the alternator to recharge the battery. A short idle is not enough. If the battery was deeply discharged, it may need a full charge from a battery charger to recover properly.
What to Do If the Cables Start Smoking or Melting Mid-Jump
If you ever see smoke curling up from the jumper cable insulation, or if you smell the unmistakable odor of burning plastic, stop. Do not try to finish the jump. Do not try to wiggle the clamps to get a better connection while the circuit is live. Immediately turn off the donor engine. Then, carefully and quickly disconnect the black clamps first, followed by the red clamps. Be ready for the possibility that the clamps or the cable are hot enough to burn your hands. If you have gloves nearby, put them on. If you do not have gloves, use a rag or a piece of clothing to grip the clamps.
After the cables are disconnected and have cooled down, inspect them. If the insulation is melted, the cables are now garbage. Do not attempt to use them again, even if they look okay on the outside. Melted insulation can hide internal damage like broken strands or fused wires that will create a short circuit the next time you try to jump a car. Throw the ruined cables away and invest in a quality set.
Check the battery terminals on both vehicles. Overheated clamps can leave behind melted plastic or pitted metal. Clean the terminals if they are damaged. Check for any blown fuses in the dead vehicle if the starter will not crank after a failed jump attempt. A melting cable incident sometimes causes a surge that pops the main fuse or a fusible link. The fuse box near the battery or under the hood will usually have a large fuse labeled MAIN or ALT that you can visually inspect.
Common Questions Drivers Ask After a Melting Incident
Can melting jumper cables damage my battery?
Yes. The high current that melts the cables can also internally damage the battery. Excessive heat can warp the lead plates inside the battery, causing a permanent loss of capacity. In severe cases, the battery case can crack or the internal connections can break, ruining the battery entirely. If you have had a melting incident, have both batteries tested by a shop that can perform a load test. A load test will tell you whether the battery still holds capacity and can deliver the rated cold cranking amps.
Can melted cables cause a fire?
Absolutely. The insulation on jumper cables is flammable. If the cable gets hot enough to ignite the insulation, the fire can spread to other under-hood materials like plastic covers, air intake ducts, and even fuel lines if there is a leak. This is why you should never leave a jump-start unattended. Stay with the vehicles the entire time, and be ready to act if you see or smell smoke. Having a small fire extinguisher in your trunk is a wise precaution for any driver, not just for jump-start mishaps but for any unexpected under-hood fire.
Do I need to replace the cables after they cool down if they felt hot but did not smoke?
If the cables only felt warm and the insulation shows no sign of melting, discoloration, or stiffness, they might still be usable. However, heat cycling can degrade the copper strands and insulation over time. A cable that has been hot enough to make you notice it should be inspected carefully. Look for any spots where the insulation has hardened or become brittle. Bend the cable gently along its length. If you feel any crunchy resistance, internal strands may have damaged insulation or started to break. When in doubt, replace the cables. They are far cheaper than a car fire.
A Quick Reference Table: Jumper Cable Gauge and Recommended Use
| Cable Gauge (AWG) | Wire Material | Best For | Approximate Cost (Quality Set) |
|---|---|---|---|
| 0-2 gauge | Copper | Commercial trucks, large diesels, frequent heavy use | $150 – $300+ |
| 4 gauge | Copper | Most passenger cars, SUVs, light trucks | $50 – $100 |
| 6 gauge | Copper | Compact cars, small four-cylinder engines | $30 – $70 |
| 8 gauge and thinner | Copper | Emergency use only on very small engines; risk of overheating | $15 – $30 |
| Any gauge | Aluminum or CCA | Not recommended for jump-starting due to high resistance and melting risk | $10 – $25 |
The Role of the Dead Battery’s Condition in Cable Melting
Sometimes, the battery itself is to blame for overheating cables. A battery that has an internal short circuit will draw current from the donor battery continuously, even after the jump-start is complete. This excessive current draw can overwhelm the jumper cables. An internally shorted battery has damaged cell separators that allow the positive and negative plates to touch. The battery essentially becomes a low-resistance load that pulls current without ever producing useful voltage. The cables get hot because they are feeding this short circuit. If you connect a donor battery to a dead battery and the cables begin to heat up even without attempting to start the dead engine, suspect an internal short in the dead battery. Disconnect immediately and replace that battery before attempting another jump.
A severely sulfated battery, one that has been sitting dead for months, can also exhibit high resistance that causes heat. Sulfate crystals coat the lead plates and prevent the battery from accepting a charge. When you try to push current into a sulfated battery, very little of that current actually stores as chemical energy. Instead, the resistance turns the energy into heat. The battery case may feel hot after a few minutes of charging. A sulfated battery needs a slow, controlled charge from a battery charger over many hours, not a rapid jump-start.
Preventing Jumper Cable Problems Before They Happen
Jumper cable melting is almost entirely preventable with a few habits. Buy the right cables once and store them properly. Inspect them before you need them. Connect them carefully, verifying polarity every time. Keep a pair of work gloves and a small wire brush in your trunk right next to the cables. The gloves protect your hands from hot clamps and dirty terminals. The wire brush lets you clean corrosion on the spot. These two items cost a few dollars together and completely change the jump-start experience from stressful and dangerous to controlled and safe.
Maintain your own battery so you are not the one needing a jump in the first place. Clean your battery terminals once a year. Check that the battery hold-down is tight so the battery cannot vibrate and damage the internal plates. If your battery is more than four years old, have it load tested at the start of winter. A failing battery puts extra strain on your alternator and starter, and it will inevitably leave you stranded at the worst possible time. Replacing an aging battery on your schedule, in a warm garage on a Saturday afternoon, is infinitely better than standing in a frozen parking lot at 7 a.m. trying to flag down a stranger for a jump.
The jumper cables in your trunk are an insurance policy. Like any insurance, you want it to work when you need it, without creating more problems than it solves. Cheap cables, hasty connections, and ignored maintenance turn that insurance policy into a liability. Quality cables, careful technique, and a well-maintained battery keep the drama out of a dead battery situation. The next time you need a jump, you will not be the person watching smoke curl up from melting insulation. You will be the person who connects the cables, starts the engine, says a quick thank you, and drives away.